How to insert glyphs easily at design time
Description
After releasing the Material themes, we introduced a new approach for adding icon-like images. We are now providing font glyphs via custom fonts. The glyphs are vector paths which are easily scalable without loss of quality. Thus, you can very easily assign any icon which will have the same quality no matter of the control's size.
Solution
You can use any custom font that provides individual glyphs. However, it is necessary to install the font first before proceeding with the following steps:
1. Press the Windows button, type Character Map and press Enter.
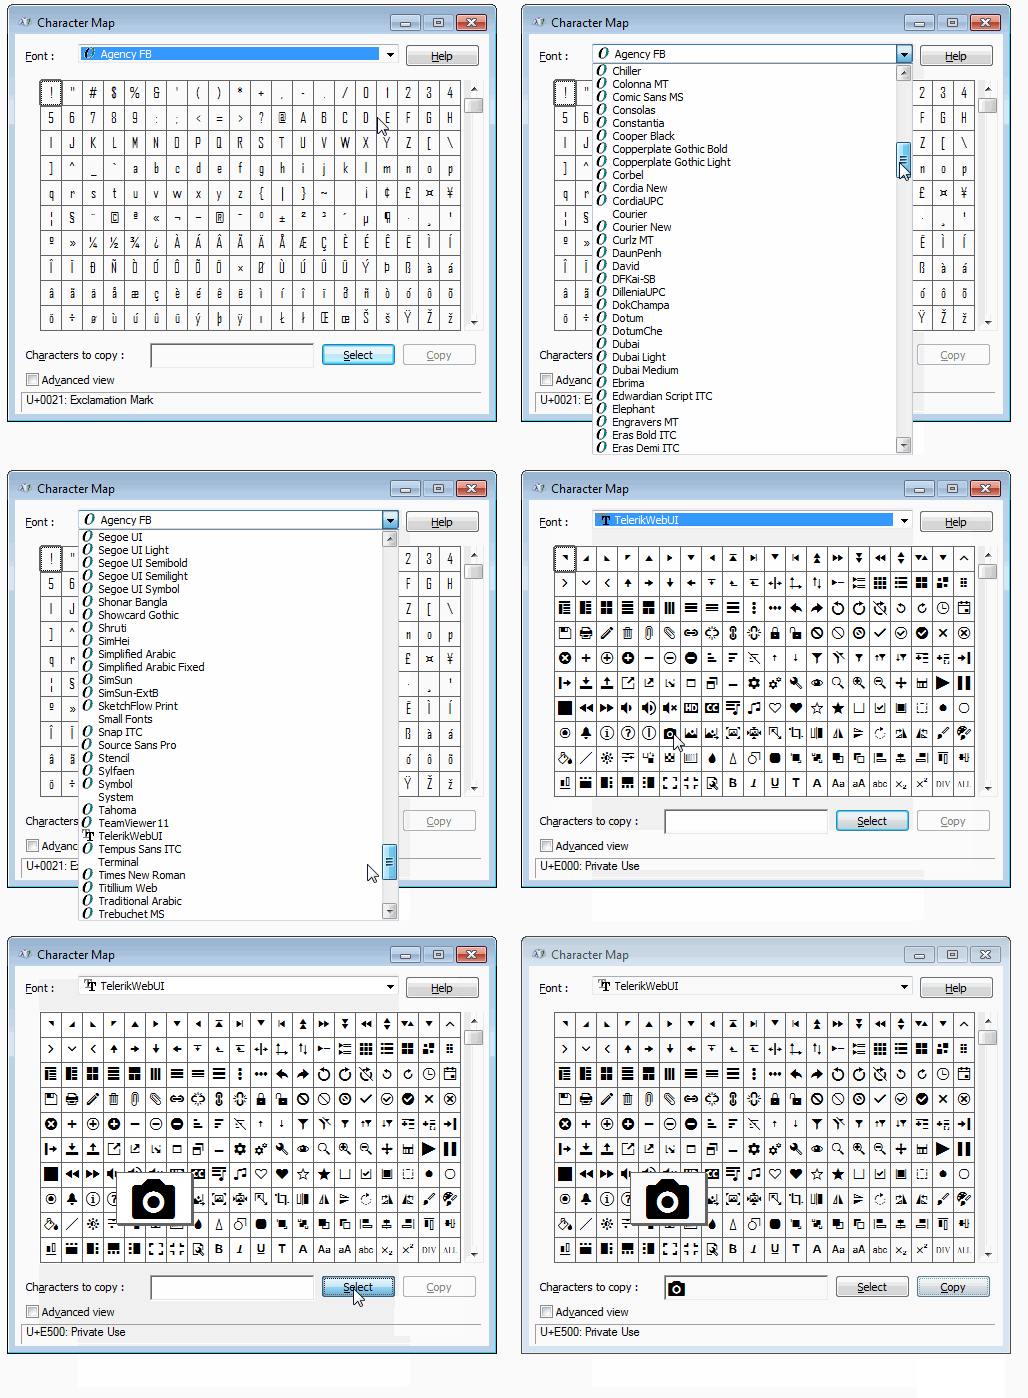
2. The Character Map will be opened. Now, you can select the desired font from the drop down, e.g. TelerikWebUI, select a certain symbol, press the Select button, then the Copy button. The symbol is stored in the clipboard.
Figure 1: Select and copy a symbol

It is necessary to install the font in order to see it in the font drop down.
Next, we will set the copied symbol to a RadButton. Drag a RadButton from the Toolbox and drop it onto the form.
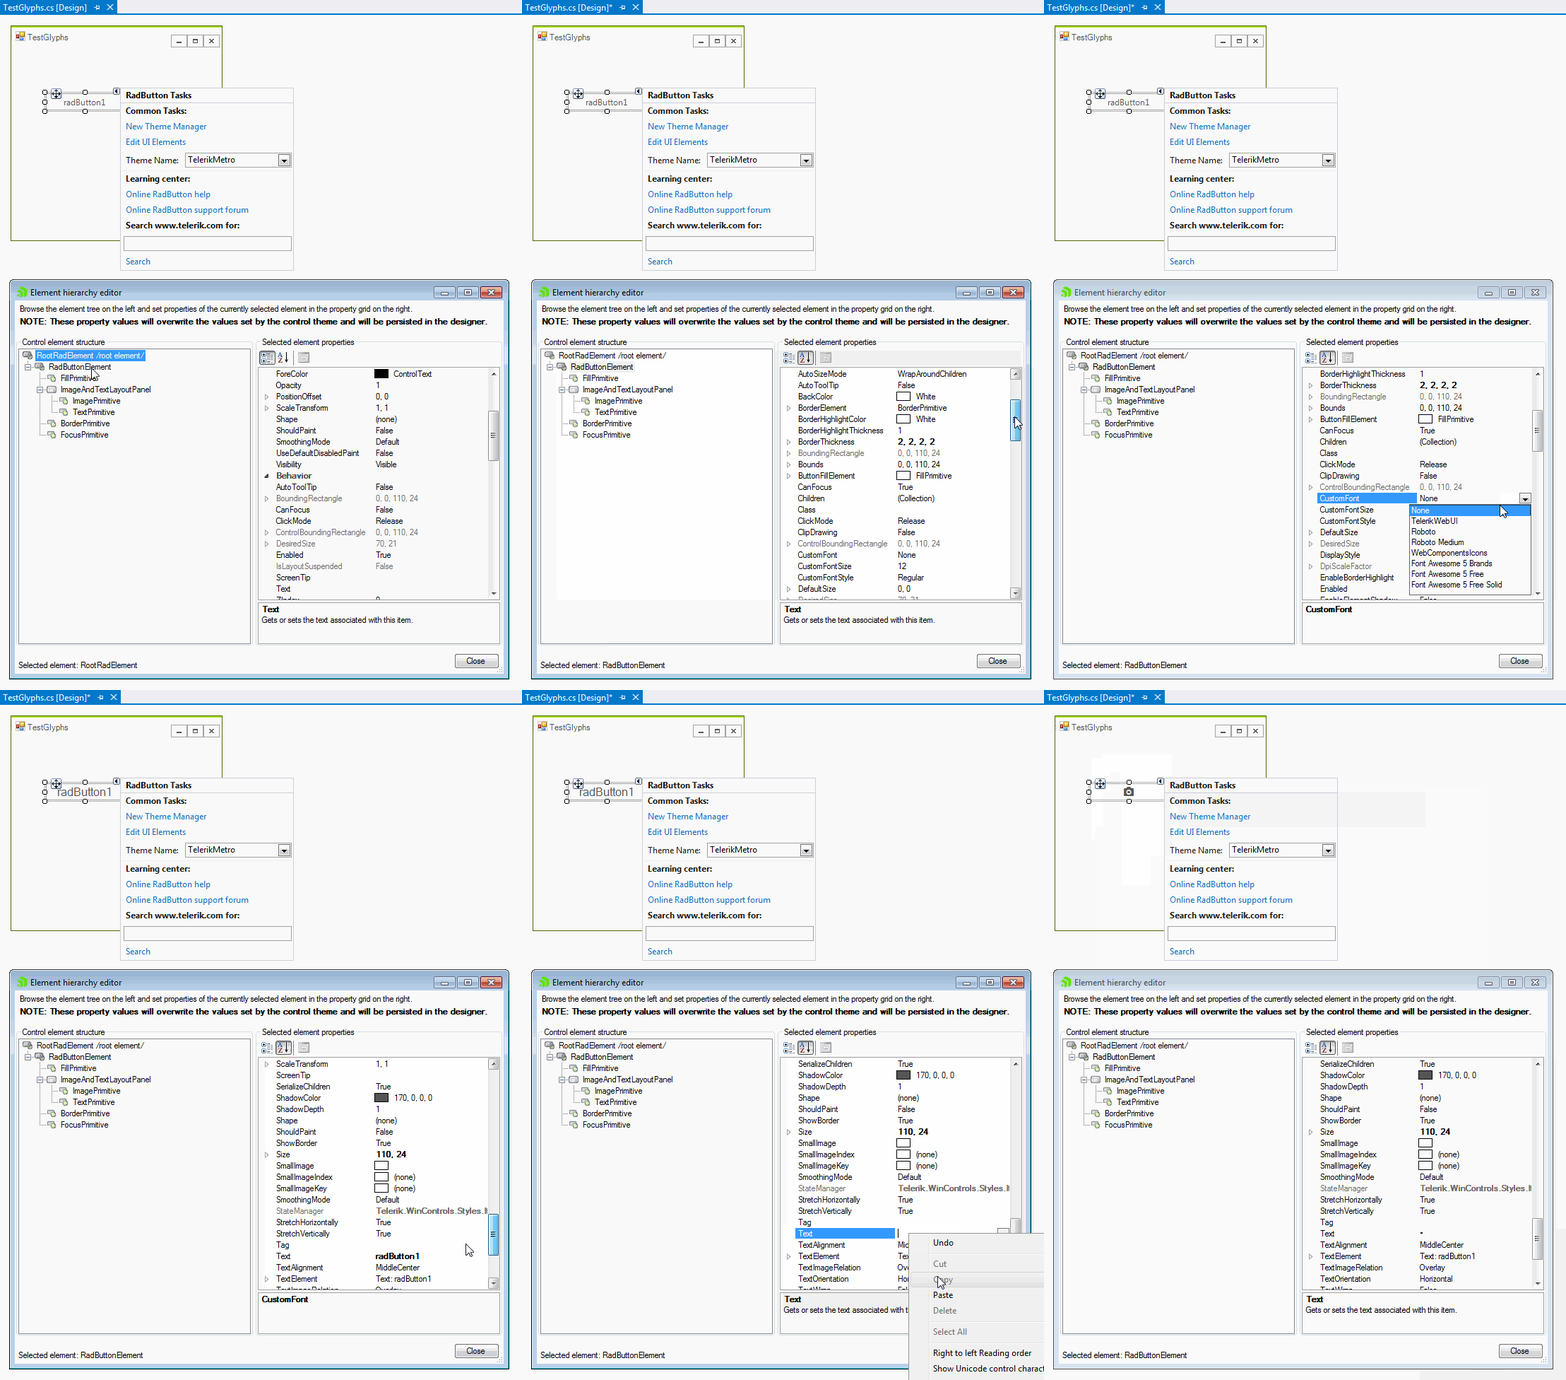
3. Select the button and click the small arrow at the top right position in order to open the Smart Tag. Open the Element hierarchy editor by clicking Edit UI Elements. Now, you can paste the copied symbol to the Text property. Then, change the Custom Font property to the respective font that contains the glyph.
Figure 2: Paste the symbol and change the custom font
