How to create custom FreeFlow shape
Environment
| Product Version | Product | Author |
|---|---|---|
| 2022.2.622 | RadImageEditor for WinForms | Dinko Krastev |
Description
An example demonstrating how to create custom FreeFlow shape using GraphicsPath object.
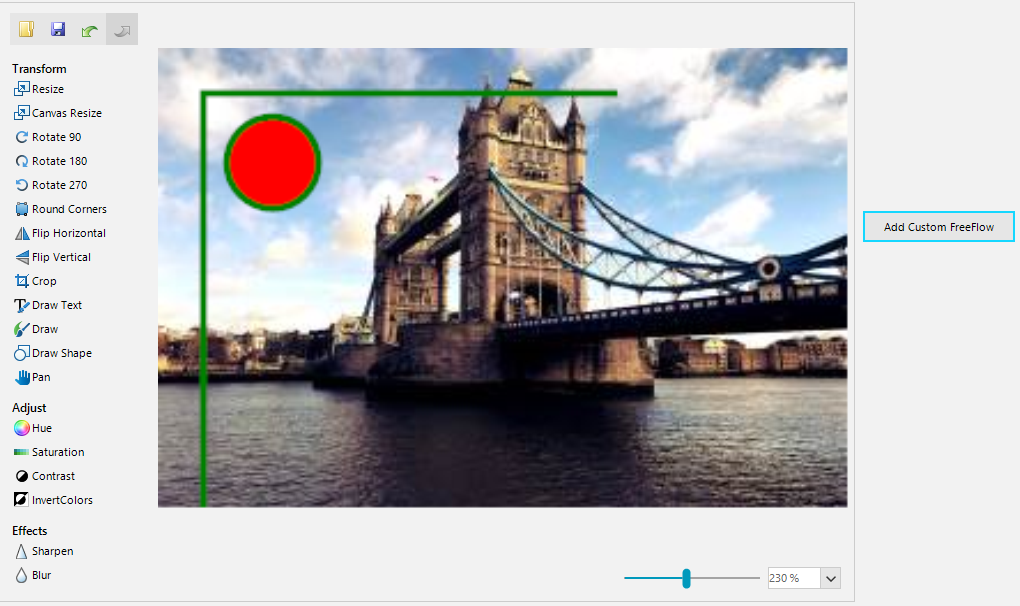
Sample Implementation
    public RadForm1()
    {
        InitializeComponent();
        this.radImageEditor1.LoadAsync("../../London_01.jpg");
        this.radImageEditor1.ImageLoaded += radImageEditor1_ImageLoaded;
    }
    private void radButton1_Click(object sender, EventArgs e)
    {
        GraphicsPath path = new GraphicsPath();
        path.AddLine(20, 20, 200, 20);
        path.AddLine(20, 20, 20, 200);
        path.AddEllipse(new Rectangle(30, 30, 40, 40));
        radImageEditor1.ImageEditorElement.DrawShape(path, Color.Red, Color.Green, 3);
        radImageEditor1.ImageEditorElement.SaveState();
    }
    Class SurroundingClass
    Public Sub New()
        InitializeComponent()
        Me.radImageEditor1.LoadAsync("../../London_01.jpg")
        AddHandler Me.radImageEditor1.ImageLoaded, AddressOf radImageEditor1_ImageLoaded
    End Sub

    Private Sub radButton1_Click(ByVal sender As Object, ByVal e As EventArgs)
        Dim path As GraphicsPath = New GraphicsPath()
        path.AddLine(20, 20, 200, 20)
        path.AddLine(20, 20, 20, 200)
        path.AddEllipse(New Rectangle(30, 30, 40, 40))
        radImageEditor1.ImageEditorElement.DrawShape(path, Color.Red, Color.Green, 3)
        radImageEditor1.ImageEditorElement.SaveState()
    End Sub
End Class