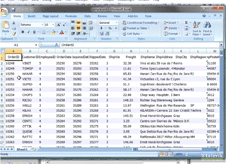
Export to Excel via ExcelML Format
This method offers excellent performance and does not require MS Office installation on user machines. The ExcelML format can be read by MS Excel 2002 (MS Office XP) and above. Direct export to the xlsx format is possible by utilizing our RadSpreadProcessing libraries (see Spread Export and Async Spread Export articles for detailed information and examples).
The export functionality is located in the TelerikData.dll assembly. You need to include the following namespaces in order to access the types contained in TelerikData:
- Telerik.WinControls.Data
- Telerik.WinControls.UI.Export
Exporting Data
Initialize ExportToExcelML object
Before running export to ExcelML, you have to initialize the ExportToExcelML class. The constructor takes one parameter, the RadGridView that will be exported:
ExportToExcelIML initialization
ExportToExcelML exporter = new ExportToExcelML(this.radGridView1);
Dim exporter As ExportToExcelML = New ExportToExcelML(Me.RadGridView1)
Hidden columns and rows option
You can choose one of the three options below which will allow you to have different behavior for the hidden column/rows. You can choose these options by HiddenColumnOption and HiddenRowOption properties:
ExportAlways
DoNotExport
ExportAsHidden (default)
MS Excel does not support other ways of hiding a column different from setting its width to zero. To avoid including hidden columns or rows in the exported excel file you could set HiddenColumnOption or HiddenRowOption property to DoNotExport:
Setting the hidden column option
exporter.HiddenColumnOption = Telerik.WinControls.UI.Export.HiddenOption.DoNotExport;
exporter.HiddenColumnOption = Telerik.WinControls.UI.Export.HiddenOption.DoNotExport
Exporting Visual Settings
Using the ExcelML method allows you to export the visual settings (themes) to the Excel file. ExcelML has also a visual representation of the alternating row color. This feature works only if the EnableAlternatingRow property is set to true. Note that it does not transfer the alternating row settings that come from control theme. RadGridView will also export all conditional formatting to the Excel file. The row height is exported with the default DPI transformation (60pixels = 72points).
You can enable exporting visual settings through the ExportVisualSettings property. By default, the value of this property is false.
Setting ExportVisualSettings
exporter.ExportVisualSettings = true;
exporter.ExportVisualSettings = True
MS Excel Max Rows Settings
RadGridView splits data on separate sheets if the number of rows is greater than Excel maximum. You can control the maximum number of rows through the SheetMaxRows property:
1048576 (Max rows for Excel 2007)
65536 (Max rows for previous versions of Excel) (default)
Setting Maximum Number of Rows
exporter.SheetMaxRows = ExcelMaxRows._1048576;
exporter.SheetMaxRows = ExcelMaxRows._1048576
MS Excel Sheet Name
You can specify the sheet name through SheetName property. If your data is large enough to be split in more than one sheets, then the export method adds index to the names of the next sheets.
Setting the SheetName
exporter.SheetName = "Sheet";
exporter.SheetName = "Sheet"
Summaries export option
You can use the SummariesExportOption property to specify how to export summary items. There are four option to chose:
ExportAll (default)
ExportOnlyTop
ExportOnlyBottom
DoNotExport
Setting SummariesExportOption
exporter.SummariesExportOption = SummariesOption.DoNotExport;
exporter.SummariesExportOption = SummariesOption.DoNotExport
RunExport method
Exporting data to Excel is done through the RunExport method of ExportToExcelML object. The RunExport method accepts the following parameter:
- fileName - the name of the exported file
Consider the code sample below:
Export to Excel in ExcelML format
string fileName = "C:\\ExportedData123.xls";
exporter.RunExport(fileName);
Dim fileName As String = "C:\\ExportedData.xls"
exporter.RunExport(fileName)
Format Codes
There are two properties in GridViewDataColumn object: ExcelExportType and ExcelExportFormatString. You can use them to specify the format of the exported column in the result excel file. To get the desired formatting in Excel, the ExcelExportFormatString should be set to a valid Excel format code. A list of all format codes for Excel is available on the following link – Microsoft Office Excel Format Codes
Here is an example for a date time formatting:
Fomatting dates
this.radGridView1.Columns["Date"].ExcelExportType = DisplayFormatType.Custom;
this.radGridView1.Columns["Date"].ExcelExportFormatString = "yyyy.MMMM.dd hh:mm:ss AM/PM";
Me.RadGridView1.Columns("Date").ExcelExportType = DisplayFormatType.Custom
Me.RadGridView1.Columns("Date").ExcelExportFormatString = " yyyy.MMMM.dd hh:mm:ss AM/PM "
Events
The ExcelCellFormating event:
It gives you access to a single cell’s SingleStyleElement that allows you to make additional formatting (adding border, setting alignment, text font, colors, changing cell value, etc.) for every excel cell related to the exported RadGridView:
Handling the ExcelCellFormatting event
void exporter_ExcelCellFormatting(object sender, Telerik.WinControls.UI.Export.ExcelML.ExcelCellFormattingEventArgs e)
{
    if (e.GridRowInfoType == typeof(GridViewTableHeaderRowInfo))
    {
        BorderStyles border = new BorderStyles();
        border.Color = Color.Black;
        border.Weight = 2;
        border.LineStyle = Telerik.WinControls.UI.Export.ExcelML.LineStyle.Continuous;
        border.PositionType = PositionType.Bottom;
        e.ExcelStyleElement.Borders.Add(border);
    }
    else if (e.GridRowIndex == 2 && e.GridColumnIndex == 1)
    {
        e.ExcelStyleElement.InteriorStyle.Color = Color.Yellow;
        e.ExcelStyleElement.AlignmentElement.WrapText = true;
    }
}
Private Sub exporter_ExcelCellFormatting(ByVal sender As Object, ByVal e As Telerik.WinControls.UI.Export.ExcelML.ExcelCellFormattingEventArgs)
    If e.GridRowInfoType Is GetType(GridViewTableHeaderRowInfo) Then
        Dim border As BorderStyles = New BorderStyles()
        border.Color = Color.Black
        border.Weight = 2
        border.LineStyle = Telerik.WinControls.UI.Export.ExcelML.LineStyle.Continuous
        border.PositionType = PositionType.Bottom
        e.ExcelStyleElement.Borders.Add(border)
    ElseIf e.GridRowIndex = 2 AndAlso e.GridColumnIndex = 1 Then
        e.ExcelStyleElement.InteriorStyle.Color = Color.Yellow
        e.ExcelStyleElement.AlignmentElement.WrapText = True
    End If
End Sub
The ExcelTableCreated event:
It can be used together with the public method AddCustomExcelRow. It allows adding and formatting new custom rows on the top of the every sheet (it could be specified as a header in the excel sheet):
Handling the ExcelTableCreated event
void exporter_ExcelTableCreated(object sender, ExcelTableCreatedEventArgs e)
{
    string headerText = "Custom added header text.";
    SingleStyleElement style = ((ExportToExcelML)sender).AddCustomExcelRow(e.ExcelTableElement, 50, headerText);
    style.FontStyle.Bold = true;
    style.FontStyle.Size = 18;
    style.FontStyle.Color = Color.White;
    style.InteriorStyle.Color = Color.Red;
    style.InteriorStyle.Pattern = InteriorPatternType.Solid;
    style.AlignmentElement.HorizontalAlignment = HorizontalAlignmentType.Center;
    style.AlignmentElement.VerticalAlignment = VerticalAlignmentType.Center;
}
Private Sub exporter_ExcelTableCreated(ByVal sender As Object, ByVal e As Telerik.WinControls.UI.Export.ExcelML.ExcelTableCreatedEventArgs)
    Dim headerText As String = "Custom added header text."
    Dim style As SingleStyleElement = (CType(sender, ExportToExcelML)).AddCustomExcelRow(e.ExcelTableElement, 50, headerText)
    style.FontStyle.Bold = True
    style.FontStyle.Size = 18
    style.FontStyle.Color = Color.White
    style.InteriorStyle.Color = Color.Red
    style.InteriorStyle.Pattern = InteriorPatternType.Solid
    style.AlignmentElement.HorizontalAlignment = HorizontalAlignmentType.Center
    style.AlignmentElement.VerticalAlignment = VerticalAlignmentType.Center
End Sub
| RELATED VIDEOS | |
|---|---|
|
Export to Excel with RadGridView for WinForms In this RadTip, John Kellar demonstrates how you can export data stored in a RadGridView for Windows Forms to Excel using the ExcelML export options. (Runtime: 08:52) |
 |