Unbound Mode
Design Time Adding Items
Unbound data can be populated in the Visual Studio designer by using the Edit Columns and Edit Items groups of the control's Smart Tag. The value of the label is determined by the HeaderText property of the column. Each of the added items exposes a SubItems collection which can be filled with string data corresponding to each of the columns. The short video below sets up the control with one CardViewItem having four columns and four editor values.
Figure 1: Add Items at Design Time

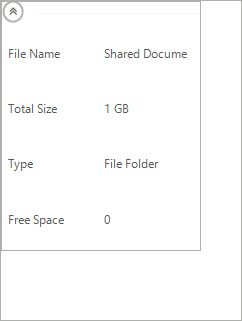
After you run the application, the result should be similar to the following image.
Figure 2: Added Items at Design Time
Populating Data Programatically
RadCardView can also be set up to display data added at run-time. The following example will also demonstrate how custom grouping can be achieved.
Figure 3: Add Grouped Items at Run Time
Adding Columns
The columns of RadCardView are stored in a collection that is accessible through the Columns property. Columns can be added to RadCardView using one of the three overloads of the Add method as it is shown below. Each column must have unique name because columns are distinguished by their Name property.
Adding columns
this.radCardView1.Columns.Add("Id");
this.radCardView1.Columns.Add("Column2", "First Name");
this.radCardView1.Columns.Add(new ListViewDetailColumn("Column3", "Last Name"));
this.radCardView1.Columns.Add("Address");
Me.RadCardView1.Columns.Add("Id")
Me.RadCardView1.Columns.Add("Column2", "First Name")
Me.RadCardView1.Columns.Add(New ListViewDetailColumn("Column3", "Last Name"))
Me.RadCardView1.Columns.Add("Address")
Adding Items and Populating Cells
The items of RadCardView are stored in a collection that is also accessible through its Items property. Items can be added to RadCardView using one of the overloads of the Add method. You can set cell values to the items of RadCardView using their indexers. The keys can be either the index of the column, the name of the column, or the column itself.
Adding items
this.radCardView1.Items.Add(new ListViewDataItem("First CardViewItem"));
this.radCardView1.Items.Add("2", "Nancy", "Davolio", "507 - 20th Ave. E.Apt. 2A");
this.radCardView1.Items.Add("Third CardViewItem");
Me.RadCardView1.Items.Add(New ListViewDataItem("First CardViewItem"))
Me.RadCardView1.Items.Add("2", "Nancy", "Davolio", "507 - 20th Ave. E.Apt. 2A")
Me.RadCardView1.Items.Add("Third CardViewItem")
Populating cells
ListViewDataItem item = this.radCardView1.Items[0];
item[0] = "1";
item["Column2"] = "Andrew";
item[radCardView1.Columns[2]] = "Fuller";
item["Address"] = "908 W. Capital Way";
Dim item As ListViewDataItem = Me.RadCardView1.Items(0)
item(0) = "1"
item("Column2") = "Andrew"
item(RadCardView1.Columns(2)) = "Fuller"
item("Address") = "908 W. Capital Way"
To use these indexers the item must have a valid owner e.g. it first has to be added to the Items collection of the RadCardView.
Adding Groups
Aside from using GroupDescriptors, custom groups can also be added to RadCardView. This is done by using the Add method of the Groups collection of RadListView.
Adding groups
this.radCardView1.EnableGrouping = true;
this.radCardView1.ShowGroups = true;
this.radCardView1.EnableCustomGrouping = true;
this.radCardView1.CardViewElement.ViewElement.Orientation = Orientation.Vertical;
this.radCardView1.Groups.Add(new ListViewDataItemGroup("First Group"));
this.radCardView1.Groups.Add(new ListViewDataItemGroup("Second Group"));
Me.RadCardView1.EnableGrouping = True
Me.RadCardView1.ShowGroups = True
Me.RadCardView1.EnableCustomGrouping = True
Me.RadCardView1.CardViewElement.ViewElement.Orientation = Orientation.Vertical
Me.RadCardView1.Groups.Add(New ListViewDataItemGroup("First Group"))
Me.RadCardView1.Groups.Add(New ListViewDataItemGroup("Second Group"))
In order to assign an item to a group, you should set the item’s Group property:
Assign item to a group
this.radCardView1.Items[0].Group = this.radCardView1.Groups[0];
this.radCardView1.Items[1].Group = this.radCardView1.Groups[1];
this.radCardView1.Items[2].Group = this.radCardView1.Groups[1];
Me.RadCardView1.Items(0).Group = Me.RadCardView1.Groups(0)
Me.RadCardView1.Items(1).Group = Me.RadCardView1.Groups(1)
Me.RadCardView1.Items(2).Group = Me.RadCardView1.Groups(1)
In order to enable this kind of grouping the EnableCustomGrouping property needs to be set to true. In order to display the groups the ShowGroups property needs to be set to true.