RadDataGrid with Azure SQL Database
This article demonstrates how to integrate an Azure's SQL Database and display the data using the RadDataGrid.
Set up the Database
You can set up the sample database by following the Create an Azure SQL database in the Azure portal step-by-step guide.
Create the application
We are going to use a ASP.NET Web API project in combination with our UWP project. In the web application, through EntityFramework's built-in functionalities we are going to connect to the Azure SQL Database and create our models. Eventually, we are going to expose a specific table and consume it by making a REST request within our UWP application.
You can take the following steps to add a web project to your solution:
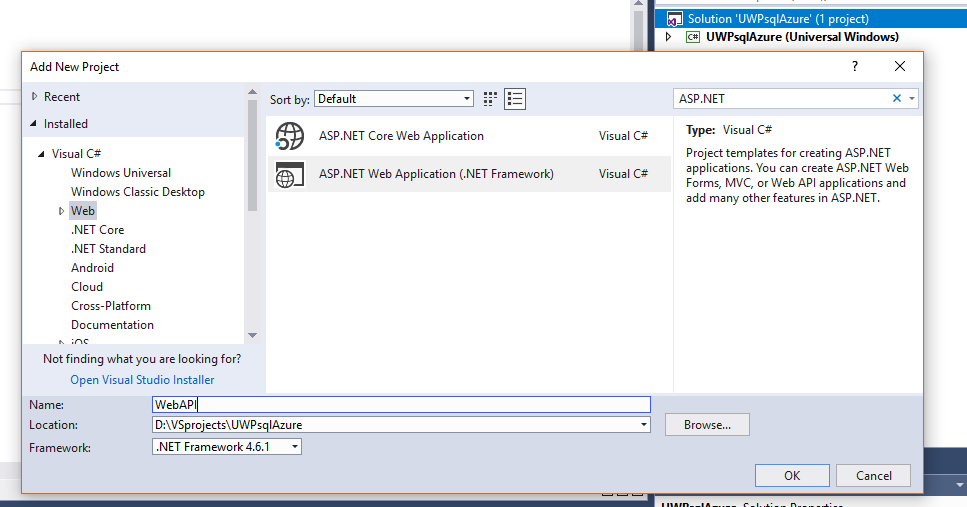
1. Add new project to the solution and choose ASP.NET Web Application:
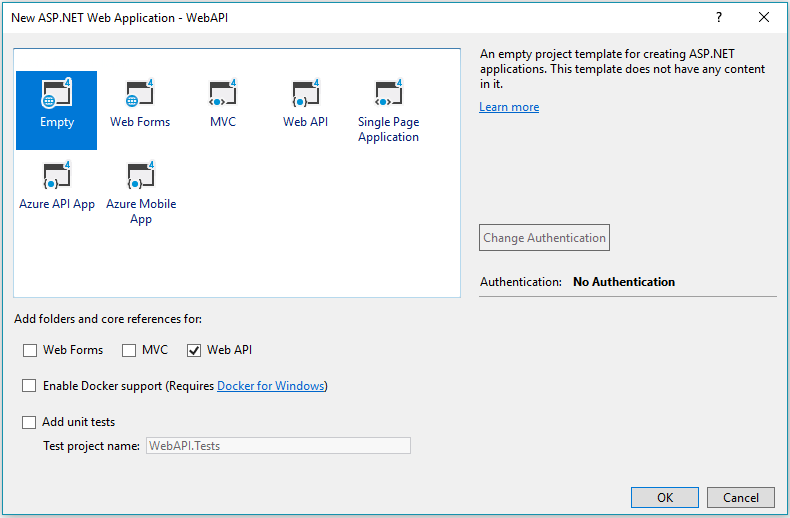
2. Choose Empty project template and the "Web API" option from the references list:
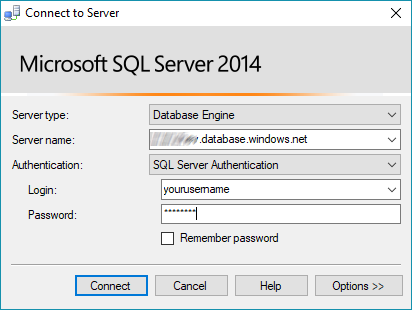
3. If you want, you can set up your SQL Server Management Studio so that it connects to the Azure database as well.
Reverse-engineer the Database Using Entity Framework
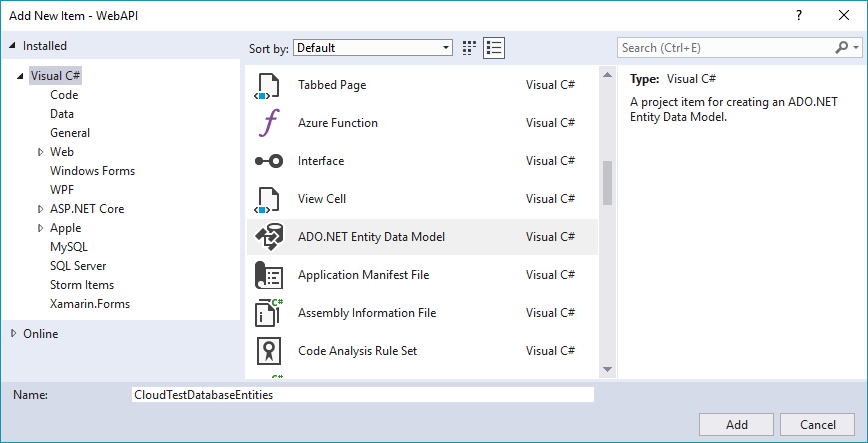
1. Add a new item to your WEB Api project and choose ADO.NET Entity Data Model from the list of available items.
2. Give it a suitable name and click Add. We are going to use CloudTestDatabaseEntities for the test sample.
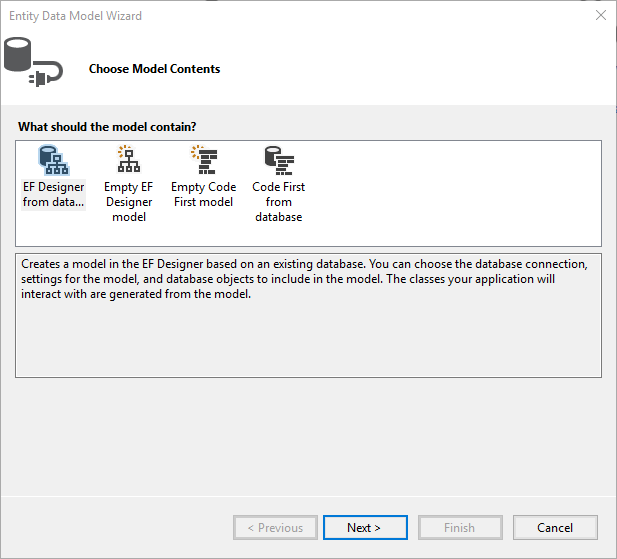
3. Choose EF Designer from database from the Choose Model Contents dialog.
4. Click on New Connection... and input the server name and credentials which you can obtain from the Azure portal. Choose the SQL Server Authentication option to log on to the server.
5. Choose whether or not to include the sensitive data in the connection string, choose a name for it and click Next.
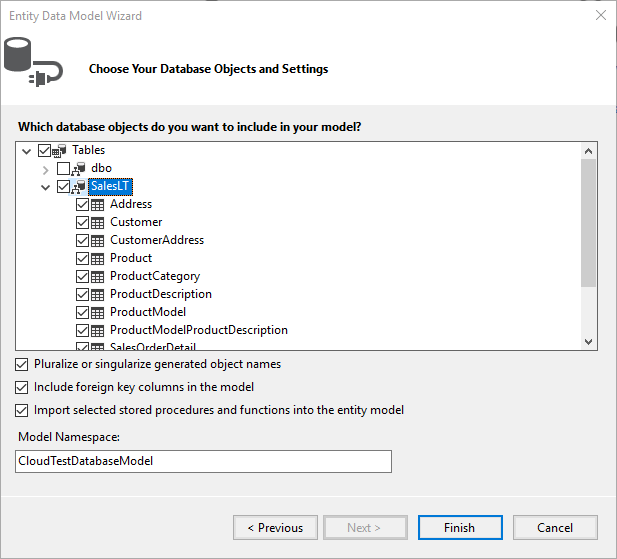
6. Pick the database object you wish to include and click Finish.
You are now able to work with the entities you have chosen through the created DbContext - CloudTestDatabaseEntities in our case.
Expose the Data
In order to expose some of the data from our database, we are going to create a new controller in the web project. Right-click the Controllers folder, and add new empty "Web API 2 Controller". Name your controller and add a method that returns the data you would like to expose. For example:
public class CustomersController : ApiController
{
    public ObservableCollection<Customer> GetCustomers()
    {
        var viewmodel = new CustomersViewModel();
        var customers = viewmodel.Customers;
        return customers;
    }
}
Where the CustomersViewModel is as follows:
public class CustomersViewModel
{
    public ObservableCollection<Customer> Customers { get; set; } = new ObservableCollection<Customer>();
    CloudTestDatabaseEntities dbContext = new CloudTestDatabaseEntities();
    public CustomersViewModel()
    {
        this.Customers = PopulateCustomers();
    }

    private ObservableCollection<Customer> PopulateCustomers()
    {
        ObservableCollection<Customer> customers = new ObservableCollection<Customer>();

        foreach (Customer customer in dbContext.Customers)
        {
            customers.Add(customer);
        }
        return customers;
    }
}
You can now get this information through querying the server on which the web application is deployed. For the purposes of this example, the application is hosted locally.
Consume the Data in the UWP application
We are going to use the HttpClient class from the System.Net.Http namespace in order make our HTTP query and consume the data.
You can create a class that will hold static information such as the server address, username and password if required, etc.
class Constants
{
    public static string RestUrl = "http://localhost:51248/api/";
}
Here is the actual RestService class which is responsible for requesting the information and storing it in the memory of our application:
class RestService : IRestService
{
    HttpClient client;
    public ObservableCollection<Customer> Customers { get; set; }

    public async Task<ObservableCollection<Customer>> GetCustomersAsync()
    {
        Customers = new ObservableCollection<Customer>();
        client = new HttpClient();
        client.BaseAddress = new Uri(Constants.RestUrl);

        try
        {
            var response = await client.GetAsync("Customers");
            if (response.IsSuccessStatusCode)
            {
                var content = await response.Content.ReadAsStringAsync();
                Customers = JsonConvert.DeserializeObject<ObservableCollection<Customer>>(content);
            }
        }
        catch (Exception ex)
        {
            Debug.WriteLine(@"ERROR {0}", ex.Message);
        }

        return Customers;
    }
}
Where the IRestService interface is defined as:
public interface IRestService
{
    Task<ObservableCollection<Customer>> GetCustomersAsync();
}
This RestService is used within a CustomersManager class:
public class CustomersManager
{
    IRestService restService;
    public CustomersManager(IRestService service)
    {
        restService = service;
    }

    public Task<ObservableCollection<Customer>> GetCustomersAsync()
    {
        return restService.GetCustomersAsync();
    }
}
And the Customer class used within the Xamarin.Forms application:
public class Customer
{
    public string FirstName { get; set; }
    public string LastName { get; set; }
    public string EmailAddress { get; set; }
}
So all is left in order to obtain the collection of customers is to instantiate the manager and set the information it provides as the ItemsSource of the RadDataGrid control defined in our application:
public static CustomersManager CustomersManager { get; private set; }
public App()
{
    // The root page of your application
    MainPage = new StartPage();
    CustomersManager = new CustomersManager(new RestService());
}
And in the code-behind of the page that contains the RadListView control:
 public MainPage()
     {
         this.InitializeComponent();
         PopulateListViewAsync();
     }

 private async void PopulateListViewAsync()
    {
        var items = await App.CustomersManager.GetCustomersAsync();
        (this.listView as RadListView).ItemsSource = items;
    }
Here is how the RadListView is defined as well:
<Page
    x:Class="UWPsqlAzure.MainPage"
    xmlns="http://schemas.microsoft.com/winfx/2006/xaml/presentation"
    xmlns:x="http://schemas.microsoft.com/winfx/2006/xaml"
    xmlns:local="using:UWPsqlAzure"
    xmlns:d="http://schemas.microsoft.com/expression/blend/2008"
    xmlns:mc="http://schemas.openxmlformats.org/markup-compatibility/2006"
    xmlns:telerikGrid="using:Telerik.UI.Xaml.Controls.Grid"
    mc:Ignorable="d">

    <Grid Background="{ThemeResource ApplicationPageBackgroundThemeBrush}">
        <telerikGrid:RadDataGrid x:Name="DataGrid"
                                 AutoGenerateColumns="False">
            <telerikGrid:RadDataGrid.Columns>
                <telerikGrid:DataGridTextColumn PropertyName="FirstName" Header="First Name">
                    <telerikGrid:DataGridTextColumn.CellContentStyle>
                        <Style TargetType="TextBlock">
                            <Setter Property="Foreground" Value="Red"/>
                            <Setter Property="FontStyle" Value="Italic"/>
                            <Setter Property="HorizontalAlignment" Value="Center"/>
                            <Setter Property="VerticalAlignment" Value="Center"/>
                        </Style>
                    </telerikGrid:DataGridTextColumn.CellContentStyle>
                </telerikGrid:DataGridTextColumn>
                <telerikGrid:DataGridTextColumn PropertyName="MiddleName" Header="Middle Name"/>
                <telerikGrid:DataGridTextColumn PropertyName="LastName" Header="Last Name"/>
            </telerikGrid:RadDataGrid.Columns>
        </telerikGrid:RadDataGrid>
    </Grid>
</Page>
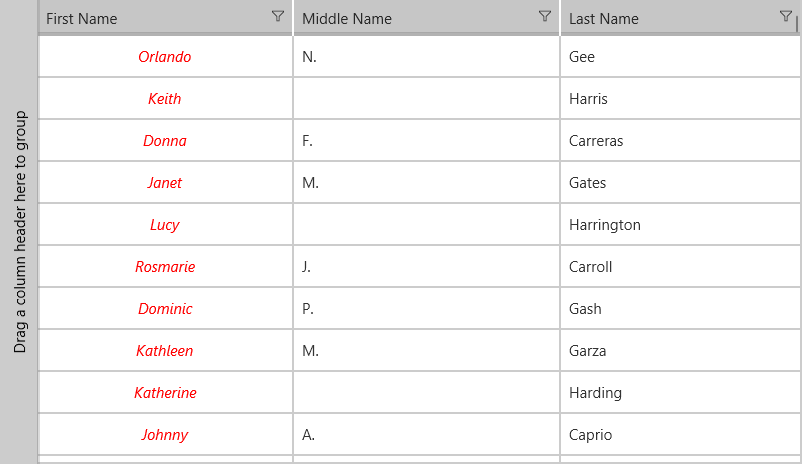
Here is the appearance of the RadDataGrid control when you run the UWP application: