Integration between Cosmos DB and RadListView
Azure Cosmos DB is a globally distributed, multi-model database service which enables you to develop document, key-value, wide-column, and graph databases by using popular APIs and programming models. This article will show you how to integrate the RadGridView control to work with your remote database.
Set Up the Database
Let's start with setting up the Cosmos Db database. Microsoft Azure's documentation is pretty detailed and shows how to achieve this step-by-step. You can review the following guide in order to set up your database - Create a database account
Create the Demo Application
Once you have successfully created the database account, you can proceed with setting up the demo application.
You should also Add a collection which is again explained in details in the step-by-step guide.
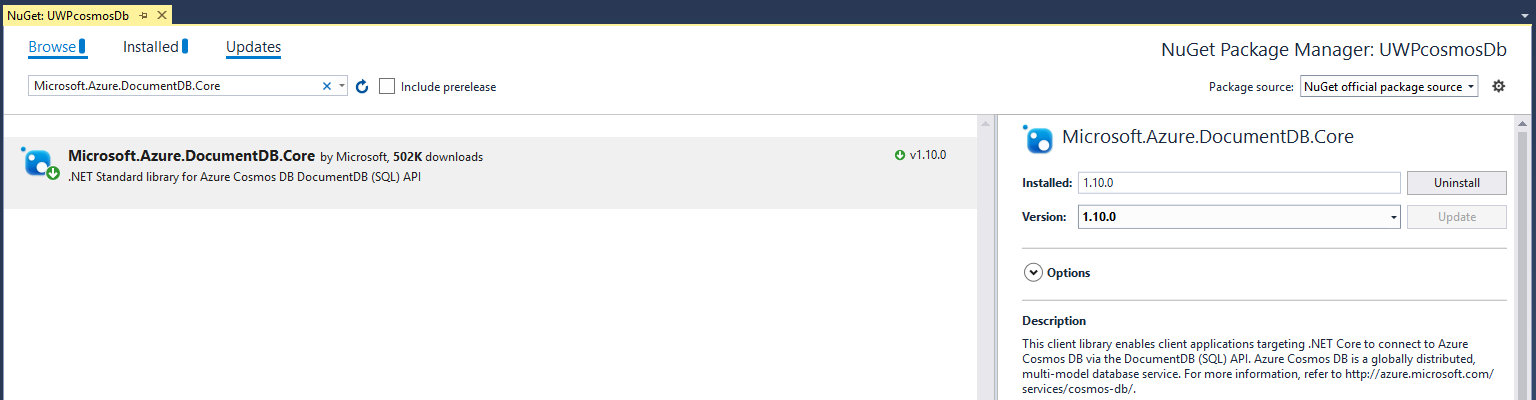
As a first step, install the Microsoft.Azure.DocumentDB.Core NuGet package within the project
We are going to add a collection of Todo items and manage them in our UWP application. Let's first create the TodoItem model:
public class TodoItem
{
    [JsonProperty(PropertyName = "id")]
    public string Id { get; set; }

    [JsonProperty(PropertyName = "text")]
    public string Text { get; set; }

    [JsonProperty(PropertyName = "complete")]
    public bool Complete { get; set; }
}
You should install the NewtonSoft.Json NuGet Package
We are also going to create a TodoItemManager class which will be responsible for communicating with Azure. Here is how it is defined.
public partial class TodoItemManager
{
    static TodoItemManager defaultInstance = new TodoItemManager();

    const string accountURL = @"URI(can be found in the Overview tab in Azure)";
    const string accountKey = @"your account key";
    const string databaseId = @"ToDoList";
    const string collectionId = @"Items";

    private Uri collectionLink = UriFactory.CreateDocumentCollectionUri(databaseId, collectionId);

    private DocumentClient client;

    private TodoItemManager()
    {
        client = new DocumentClient(new System.Uri(accountURL), accountKey);
    }

    public static TodoItemManager DefaultManager
    {
        get
        {
            return defaultInstance;
        }
        private set
        {
            defaultInstance = value;
        }
    }
    public List<TodoItem> Items { get; private set; }

    public async Task<List<TodoItem>> GetTodoItemsAsync()
    {
        try
        {
            // The query excludes completed TodoItems
            var query = client.CreateDocumentQuery<TodoItem>(collectionLink, new FeedOptions { MaxItemCount = -1 })
                  .Where(todoItem => todoItem.Complete == false)
                  .AsDocumentQuery();

            Items = new List<TodoItem>();
            while (query.HasMoreResults)
            {
                Items.AddRange(await query.ExecuteNextAsync<TodoItem>());
            }
        }
        catch (Exception e)
        {
            Console.Error.WriteLine(@"ERROR {0}", e.Message);
            return null;
        }
        return Items;
    }

    public async Task<TodoItem> InsertItemAsync(TodoItem todoItem)
    {
        try
        {
            var result = await client.CreateDocumentAsync(collectionLink, todoItem);
            todoItem.Id = result.Resource.Id;
            Items.Add(todoItem);
        }
        catch (Exception e)
        {
            Console.Error.WriteLine(@"ERROR {0}", e.Message);
        }
        return todoItem;
    }

    public async Task CompleteItemAsync(TodoItem item)
    {
        try
        {
            item.Complete = true;
            await client.ReplaceDocumentAsync(UriFactory.CreateDocumentUri(databaseId, collectionId, item.Id), item);

            Items.Remove(item);

        }
        catch (Exception e)
        {
            Console.Error.WriteLine(@"ERROR {0}", e.Message);
        }
    }
}
Both the TodoItem and TodoManager classes can be found when you download a sample project directly from Azure's CosmosDb QuickStart page.
Here is the XAML definition of the page which we are going to use:
<Page x:Class="UWPcosmosDb.MainPage"
      xmlns="http://schemas.microsoft.com/winfx/2006/xaml/presentation"
      xmlns:x="http://schemas.microsoft.com/winfx/2006/xaml"
      xmlns:local="using:UWPcosmosDb"
      xmlns:d="http://schemas.microsoft.com/expression/blend/2008"
      xmlns:mc="http://schemas.openxmlformats.org/markup-compatibility/2006"
      xmlns:telerikDataControls="using:Telerik.UI.Xaml.Controls.Data"
      mc:Ignorable="d">
<Grid Background="{ThemeResource ApplicationPageBackgroundThemeBrush}">
    <Grid.RowDefinitions>
        <RowDefinition Height="Auto" />
        <RowDefinition Height="*" />
    </Grid.RowDefinitions>
    <StackPanel Grid.Row="0" Background="#5ABAFF" Padding="10,30,10,5">
        <TextBlock Foreground="#555555" Text="Azure DocumentDB" />
        <Grid>
            <Grid.ColumnDefinitions>
                <ColumnDefinition/>
                <ColumnDefinition Width="Auto"/>
            </Grid.ColumnDefinitions>
            <TextBox x:Name="newItemName"/>
            <StackPanel x:Name="buttonsPanel" Grid.Column="1" Orientation="Horizontal">
                <Button Content="+"
                         MinHeight="30"
                         Click="OnAdd" />
            </StackPanel>
        </Grid>
    </StackPanel>
    <telerikDataControls:RadListView x:Name="todoList"
                                     IsActionOnSwipeEnabled="True"
                                     ItemSwipeOffset="120, 0, 0, 0"
                                     ItemSwipeThreshold="120"
                                     SelectionMode="None"
                                     Grid.Row="1">
        <telerikDataControls:RadListView.SwipeActionContent>
            <Grid Margin="0"
                      Padding="0"
                      ColumnSpacing="0"
                      RowSpacing="0">
                <Grid.ColumnDefinitions>
                    <ColumnDefinition Width="120" />
                    <ColumnDefinition Width="*" />
                </Grid.ColumnDefinitions>
                <Button Margin="0"
                        Background="Red"
                        Click="OnComplete"
                        Content="Complete"
                        Width="100"/>
            </Grid>
        </telerikDataControls:RadListView.SwipeActionContent>

        <telerikDataControls:RadListView.ItemTemplate>
            <DataTemplate>
                <Grid Background="Orange">
                    <TextBlock Margin="10" Text="{Binding Text}" Foreground="Gray" />
                </Grid>
            </DataTemplate>
        </telerikDataControls:RadListView.ItemTemplate>
    </telerikDataControls:RadListView>
</Grid>
The newItemName TextBox is used for choosing a name for the item which we are going to add. By clicking the Button we are going to add this item to our database. Here is the code-behind of the page where we are using the methods introduced in the TodoItemManager class:
    TodoItemManager manager;
    public MainPage()
    {
        this.InitializeComponent();
        manager = TodoItemManager.DefaultManager;
        RefreshItems();
    }

    private async Task RefreshItems()
    {
         todoList.ItemsSource = await manager.GetTodoItemsAsync();
    }
    private async void OnAdd(object sender, RoutedEventArgs e)
    {
        var todo = new TodoItem { Text = newItemName.Text };
        await AddItem(todo);
        newItemName.Text = string.Empty;
    }

    async Task AddItem(TodoItem item)
    {
        await manager.InsertItemAsync(item);
        todoList.ItemsSource = await manager.GetTodoItemsAsync();
    }

    private async void OnComplete(object sender, RoutedEventArgs e)
    {
        var btn = ((Button)sender);
        var todo = btn.DataContext as TodoItem;
        await CompleteItem(todo);
    }

    async Task CompleteItem(TodoItem item)
    {
        item.Complete = true;
        await manager.CompleteItemAsync(item);
        todoList.ItemsSource = await manager.GetTodoItemsAsync();
    }
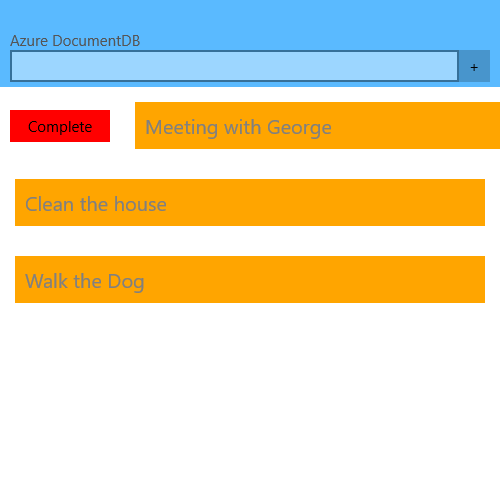
Here is the appearance of the RadListView after we have added several items in our database:
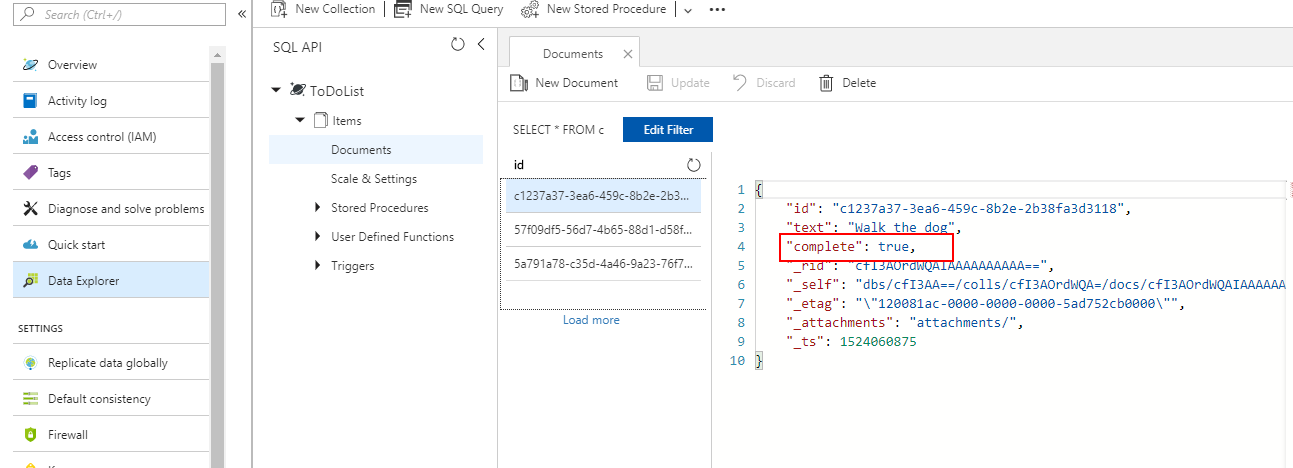
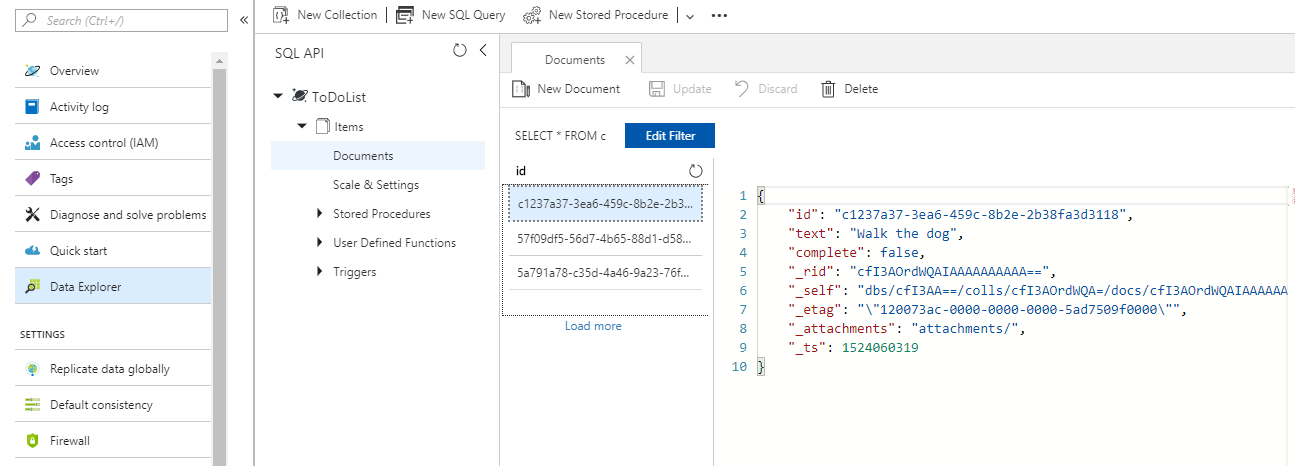
If you have a look at the Data Explorer in Azure's portal, you will notice that the items are correctly added:
We have defined the RadListView so that an item is marked as complete by clicking the button within its custom Swipe ItemTemplate:
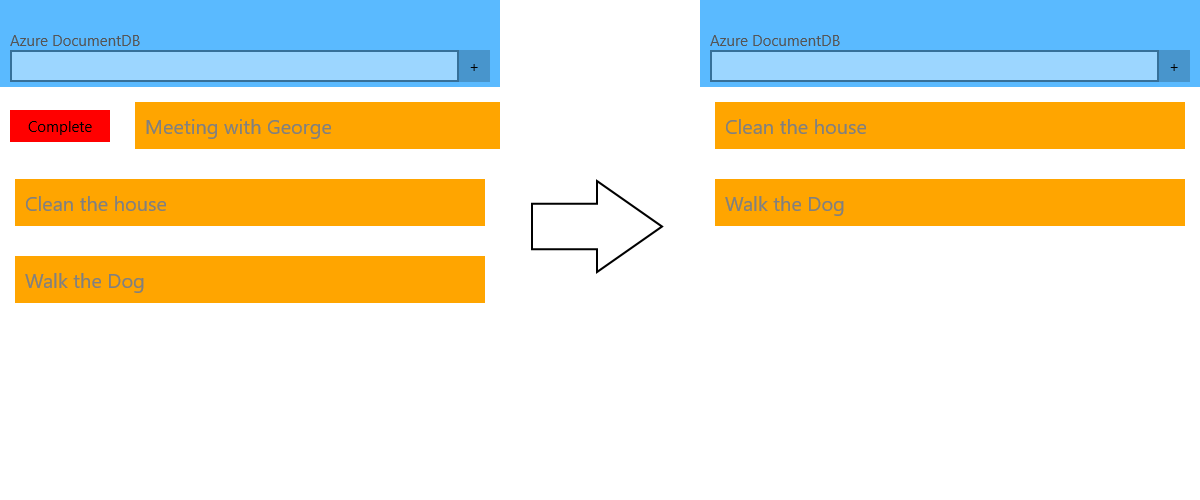
After the updates, you can notice that the individual item marked as complete is updated as well: