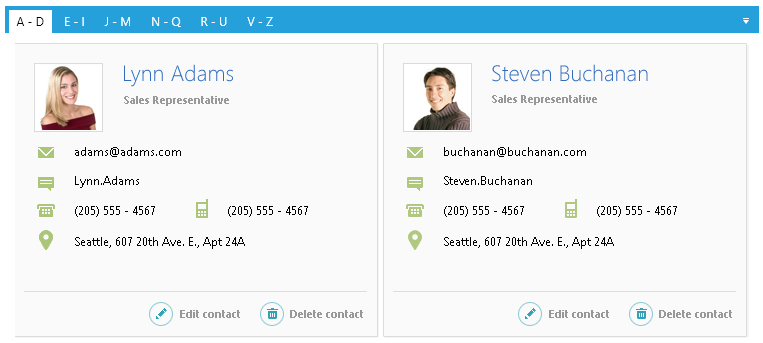
Getting Started with Silverlight TabControl
This tutorial will walk you through the creation of a sample application that contains RadTabControl.
- Assembly references
- Defining a RadTabControl
- Adding tabs
- Adding content in the tabs
- Data binding
- Setting the tabs orientation
Assembly References
In order to use RadTabControl, you will need to add references to the following assemblies:
- Telerik.Windows.Controls
- Telerik.Windows.Controls.Navigation
- Telerik.Windows.Data
You can find the required assemblies for each control from the suite in the Controls Dependencies help article.
Defining a RadTabControl
You can add RadTabControl manually in XAML as demonstrated in Example 1.
Example 1: Adding RadTabControl in XAML
<telerik:RadTabControl />
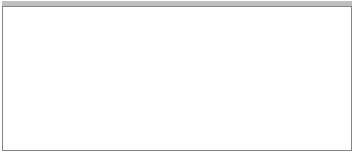
At this point, the control is empty and only its tab items panel and content container are displayed.
Figure 1: An empty RadTabControl
Adding Tabs
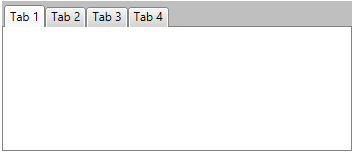
RadTabControl works with RadTabItem elements, which are added in the Items collection of the control. The RadTabItem class exposes a Header property that is used to define the content of its header.
Example 2: Adding RadTabItems in XAML
<telerik:RadTabControl>
    <telerik:RadTabControl.Items>
        <telerik:RadTabItem Header="Tab 1" />
        <telerik:RadTabItem Header="Tab 2" />
        <telerik:RadTabItem Header="Tab 3" />
        <telerik:RadTabItem Header="Tab 4" />
    </telerik:RadTabControl.Items>
</telerik:RadTabControl>
Example 3: Adding RadTabItems in code
RadTabControl tabControl = new RadTabControl();
tabControl.Items.Add(new RadTabItem() { Header = "Tab 1" });
tabControl.Items.Add(new RadTabItem() { Header = "Tab 2" });
tabControl.Items.Add(new RadTabItem() { Header = "Tab 3" });
tabControl.Items.Add(new RadTabItem() { Header = "Tab 4" });
Dim tabControl As New RadTabControl()
tabControl.Items.Add(New RadTabItem() With { _
    .Header = "Tab 1" _
})
tabControl.Items.Add(New RadTabItem() With { _
    .Header = "Tab 2" _
})
tabControl.Items.Add(New RadTabItem() With { _
    .Header = "Tab 3" _
})
tabControl.Items.Add(New RadTabItem() With { _
    .Header = "Tab 4" _
})
Figure 2: RadTabControl with several RadTabItems defined in its Items collection
The Items collection of RadTabControl can contain any UIElement. However, if you do not wrap it manually into a RadTabItem control, the tab control will do it automatically. In this case, the UIElement will be set as a content of the tab item and its header will be empty.
You can read more about adding and removing tabs in the Add and Remove Tabs help article.
Adding Content in the Tabs
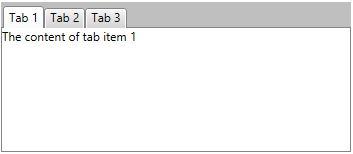
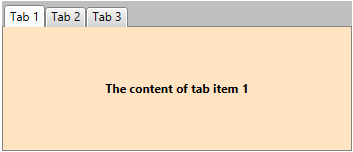
RadTabItem is a HeaderedContentControl, which means that it can have a header and content. You can use the Header and Content properties to define what to display in the tab. The Content property of RadTabItem is of type object and it can contain UIElements, strings, business objects or any other element that inherits the System.Object class.
Example 4: Setting a string as the value of the RadTabItem's Content property
<telerik:RadTabControl>
    <telerik:RadTabControl.Items>
        <telerik:RadTabItem Header="Tab 1" Content="The content of tab item 1"/>
        <telerik:RadTabItem Header="Tab 2" />
        <telerik:RadTabItem Header="Tab 3" />
    </telerik:RadTabControl.Items>
</telerik:RadTabControl>
Figure 3: RadTabItem with a string set as its content
Example 5: Setting a UIElement as the value of the RadTabItem's Content property
<telerik:RadTabControl>
    <telerik:RadTabItem Header="Tab 1">
        <telerik:RadTabItem.Content>
            <Border Background="Bisque">
                <TextBlock Text="The content of tab item 1"
                           FontWeight="Bold"
                           VerticalAlignment="Center"
                           TextAlignment="Center" />
            </Border>
        </telerik:RadTabItem.Content>
    </telerik:RadTabItem>
    <telerik:RadTabItem Header="Tab 2" />
    <telerik:RadTabItem Header="Tab 3" />
</telerik:RadTabControl>
Figure 4: RadTabItem with a UIElement set as its content
Data Binding
The RadTabControl component allows you to data bind it to a collection of business objects and define their visual appearance. You can do that through the ItemsSource property of the control.
You can learn more about data binding from the Binding to Collection article.
The model from Example 6 will be used to demonstrate a simple data binding scenario.
Example 6: Defining a model for the RadTabItems
public class TabItemModel
{
    public string Header { get; set; }
    public string Content { get; set; }
}
Public Class TabItemModel
    Public Property Header() As String
        Get
            Return m_Header
        End Get
        Set
            m_Header = Value
        End Set
    End Property
    Private m_Header As String
    Public Property Content() As String
        Get
            Return m_Content
        End Get
        Set
            m_Content = Value
        End Set
    End Property
    Private m_Content As String
End Class
Example 7 and Example 8 show how you can populate a collection of business objects and bind it to the ItemsSource of the tab control.
Example 7: Populating a collection of business objects and pass it as the DataContext of a RadTabControl
var source = new ObservableCollection<TabItemModel>()
{
    new TabItemModel()
    {
        Header = "Tab 1",
        Content = "The content of tab 1",
    },
    new TabItemModel()
    {
        Header = "Tab 2",
        Content = "The content of tab 2",
    },
    new TabItemModel()
    {
        Header = "Tab 3",
        Content = "The content of tab 4",
    },
};
this.tabControl.DataContext = source;
Dim source = New ObservableCollection(Of TabItemModel)() From { _
    New TabItemModel() With { _
        .Header = "Tab 1", _
        .Content = "The content of tab 1" _
    }, _
    New TabItemModel() With { _
        .Header = "Tab 2", _
        .Content = "The content of tab 2" _
    }, _
    New TabItemModel() With { _
        .Header = "Tab 3", _
        .Content = "The content of tab 4" _
    } _
}
Me.tabControl.DataContext = source
Example 8: Binding the ItemsSource of a RadTabControl and defining the RadTabItems appearance
<telerik:RadTabControl x:Name="tabControl" ItemsSource="{Binding}">
    <telerik:RadTabControl.ItemTemplate>
        <DataTemplate>
            <TextBlock Text="{Binding Header}" />
        </DataTemplate>
    </telerik:RadTabControl.ItemTemplate>
    <telerik:RadTabControl.ContentTemplate>
        <DataTemplate>
            <Border Background="Bisque">
                <TextBlock Text="{Binding Content}"
                           FontWeight="Bold"
                           VerticalAlignment="Center"
                           TextAlignment="Center" />
            </Border>
        </DataTemplate>
    </telerik:RadTabControl.ContentTemplate>
</telerik:RadTabControl>
Figure 5: Data binding a RadTabControl

Setting the Tabs Orientation
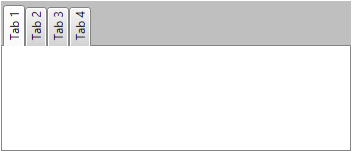
RadTabControl allows you to control whether to display the tabs horizontally or vertically. You can do that through the Orientation property of the tab control. Its default value is Horizontal and therefore the items are positioned horizontally. Setting the property to Vertical will rotate the headers of the tab items at 90 degrees.
Example 9: Setting a UIElement as the value of the RadTabItem's Content property
<telerik:RadTabControl TabOrientation="Vertical">
    <telerik:RadTabItem Header="Tab 1" />
    <telerik:RadTabItem Header="Tab 2" />
    <telerik:RadTabItem Header="Tab 3" />
    <telerik:RadTabItem Header="Tab 4" />
</telerik:RadTabControl>
Figure 6: RadTabItem with a UIElement set as its content
Setting a Theme
The controls from our suite support different themes. You can see how to apply a theme different than the default one in the Setting a Theme help article.
Changing the theme using implicit styles will affect all controls that have styles defined in the merged resource dictionaries. This is applicable only for the controls in the scope in which the resources are merged.
To change the theme, you can follow the steps below:
Choose between the themes and add reference to the corresponding theme assembly (ex: Telerik.Windows.Themes.Windows8.dll). You can see the different themes applied in the Theming examples from our Silverlight Controls Examples application.
-
Merge the ResourceDictionaries with the namespace required for the controls that you are using from the theme assembly. For the RadTabControl, you will need to merge the following resources:
- Telerik.Windows.Controls
- Telerik.Windows.Controls.Navigation
- Telerik.Windows.Data
Example 10 demonstrates how to merge the ResourceDictionaries so that they are applied globally for the entire application.
Example 10: Merge the ResourceDictionaries
<Application.Resources>
    <ResourceDictionary>
        <ResourceDictionary.MergedDictionaries>
            <ResourceDictionary Source="/Telerik.Windows.Themes.Windows8;component/Themes/System.Windows.xaml"/>
            <ResourceDictionary Source="/Telerik.Windows.Themes.Windows8;component/Themes/Telerik.Windows.Controls.xaml"/>
            <ResourceDictionary Source="/Telerik.Windows.Themes.Windows8;component/Themes/Telerik.Windows.Controls.Navigation.xaml"/>
        </ResourceDictionary.MergedDictionaries>
    </ResourceDictionary>
</Application.Resources>
Alternatively, you can use the theme of the control via the StyleManager.
Figure 7 shows a RadTabControl with the Windows8 theme applied.
Figure 7: RadTabControl with the Windows8 theme
