Install using NuGet Packages
This article describes how you can install the Document Processing Libraries using a NuGet package. There are two ways for getting the NuGet packages:
Manually Download NuGet Packages
This approach allows you to setup a local NuGet package source, so you can install the Telerik products without an active Internet connection and without setting up our private feed.
1. Copy all the .nupkg files we provide to your preferred local feed location. First you need to log in using your Telerik licensed account. Telerik Document Processing is a part of several Telerik bundles and is available in the Downloads section of the suite with which you've obtained the product, e.g. UI for Blazor. This way you will be able to download the packages:
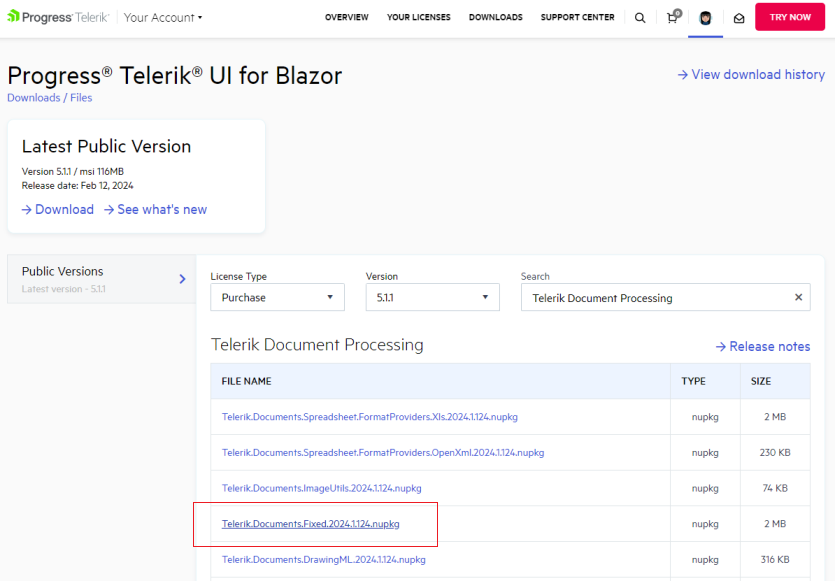
Telerik Document Processing is also available as a separate distibution in your account: Download Product Files
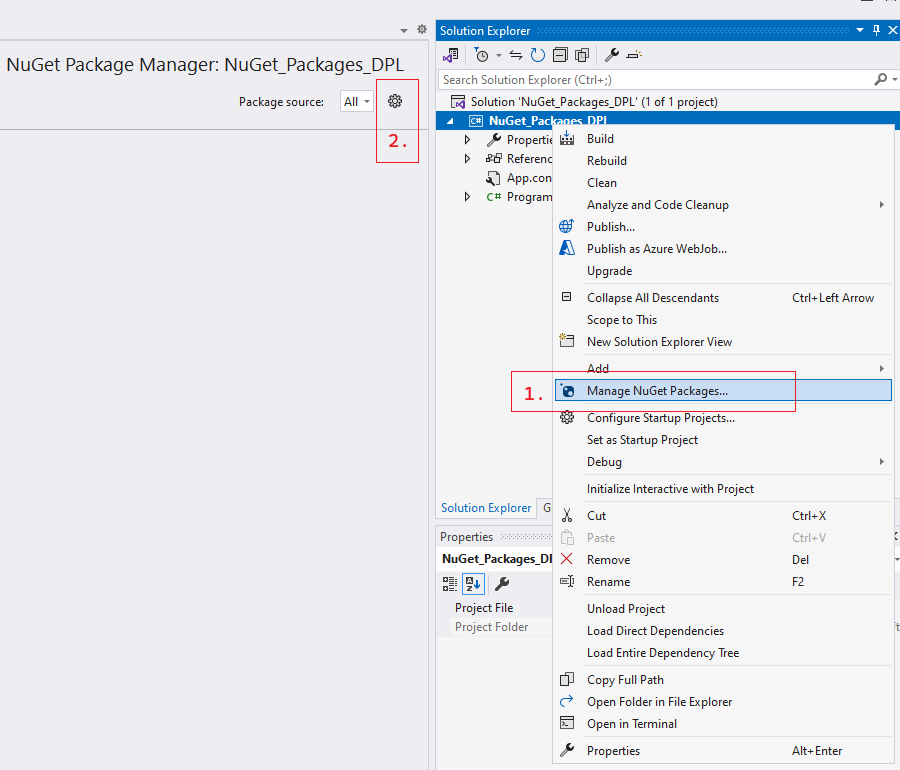
2. Then, you need to add packages to Visual Studio. Open the NuGet manager and then click the Options button:
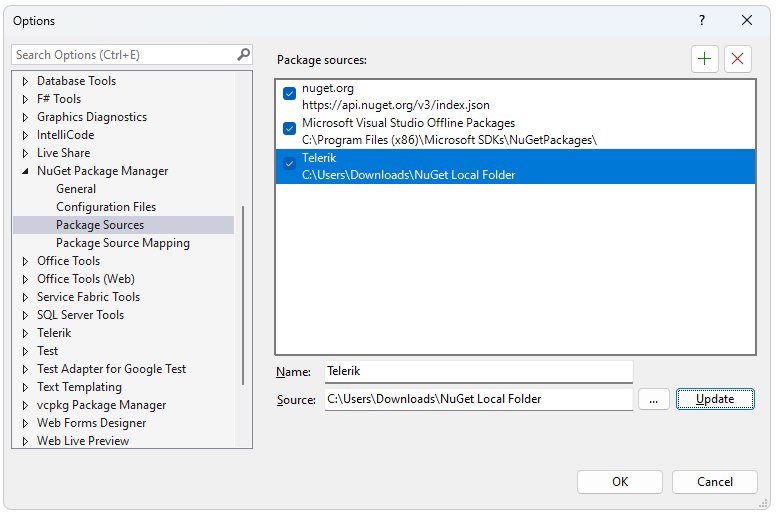
3. Add new package source. The Source should point to the local folder with the NuGets:
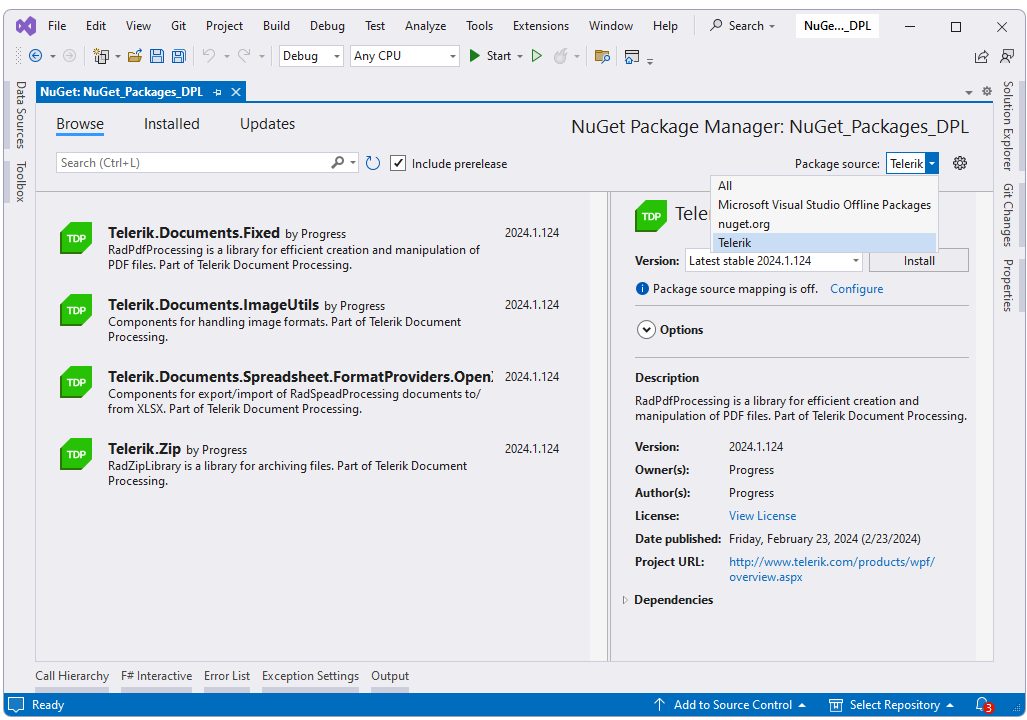
4. The final step is to select and install the desired packages.
The Telerik Document Processing libraries are available in two versions:
A version for .Net Framework 4.0 or later
A version for .Net Standard 2.0
Both versions are available as NuGet packages but with different names. The packages for .NET Standard do not contain the word Windows in their name.
Download from the NuGet server
To install the Telerik Document Processing Libraries, you can use the NuGet packages hosted on the public Telerik NuGet server. This online source lets you download and install various versions of the Document Processing libraries and enables quick updates with minimal manual intervention.
Before adding the Telerik NuGet server to Visual Studio, make sure you have:
A commercial or trial license that includes Document Processing. Note that the Telerik NuGet server requires authentication and checks if you have a valid license.
Generate an API key - As the Telerik NuGet server requires authentication, the first step is to obtain an API key.
Generate an API Key
It is necessary to obtain an API key that you will use instead of a password. Using an API key instead of a password is a more secure approach, especially when working with .NET CLI or the NuGet.Config file.
Add the Telerik NuGet Package Source to Visual Studio
Before you can install Telerik NuGet packages, you must configure the Telerik NuGet server as a package source in Visual Studio:
https://nuget.telerik.com/v3/index.json
1. In the Visual Studio Solution Explorer, right-click a Project, select Manage NuGet Packages..., and then select the Settings icon:

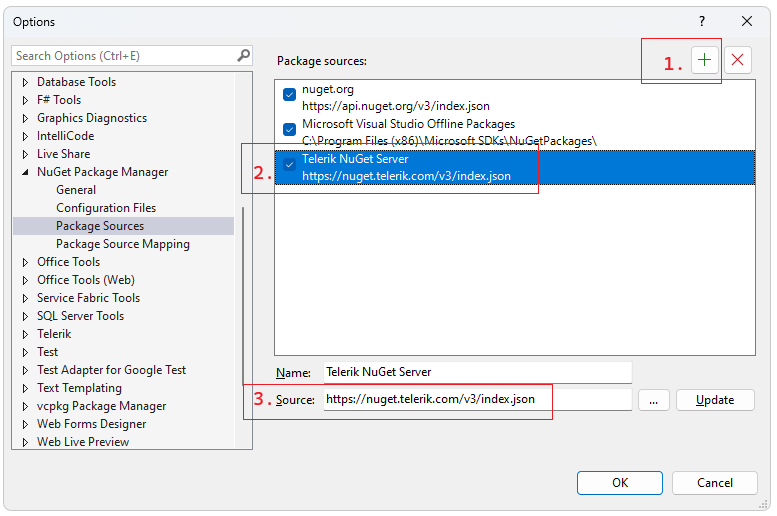
2. Select + to add a new package source and enter https://nuget.telerik.com/v3/index.json in the Source field. Add a name for the new package source, for example, Telerik NuGet Server:
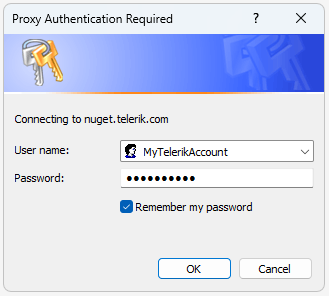
3. Select Telerik NuGet Server from the Package Source dropdown, and you will be prompted for a user name and a password. Use the credentials for your Telerik Account.
4. Select and install the desired NuGet packages.
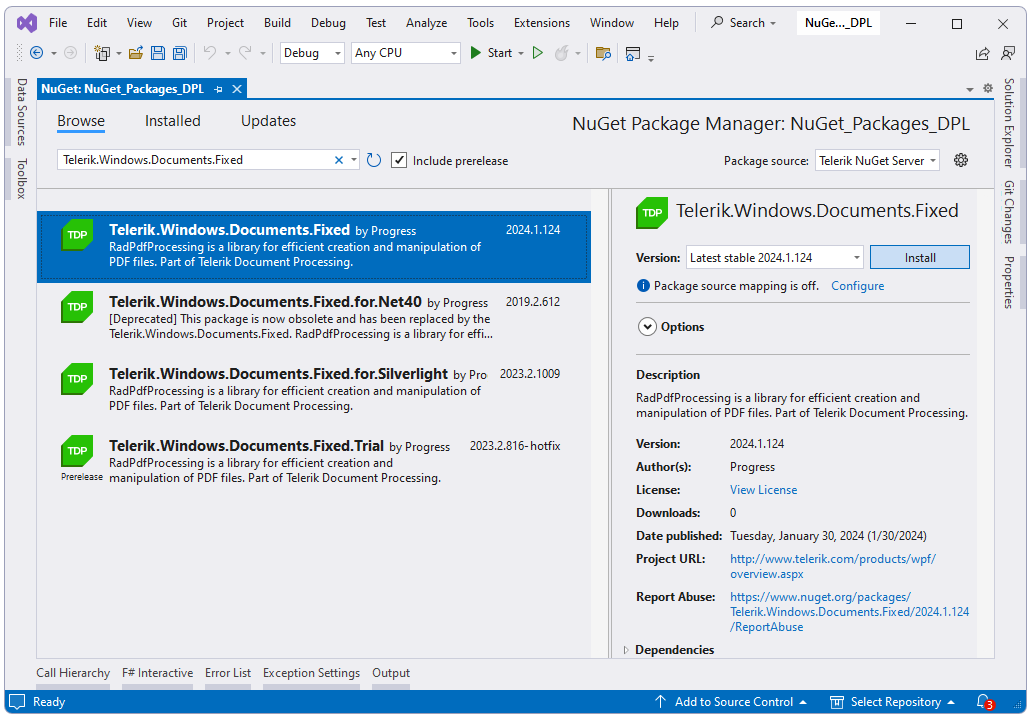
You have successfully added the Telerik NuGet feed as a Package source.
Reset Store Credentials
If you previously stored credentials for the Telerik NuGet server, you need to reset them to be able to authenticate with your new API key. Here are the steps you need to follow:
- Remove the saved credentials in the Windows Credential Manager. These credentials will appear as
nuget.telerik.comorVSCredentials_nuget.telerik.comentries. - Remove the Telerik NuGet package source from Visual Studio.
- If you have added the Telerik package source by using the .NET CLI, try to remove it by running the following commands:
- Check if you have any credentials stored in
%AppData%\NuGet\Nuget.Config. If so, remove them. - Try to reset the Visual Studio user data by forcing NuGet to ask for authentication.
- Restart Visual Studio.
- Add the Telerik NuGet package source again through Visual Studio or .NET CLI. If you are using the Telerik NuGet feed in a .NET Core application, use a NuGet API key in the NuGet.Config file.