Getting Started with the Telerik WebForms Upload
RadUpload has been replaced by RadAsyncUpload, Telerik’s next-generation ASP.NET upload component. If you are considering Telerik’s Upload control for new development, check out the documentation of RadAsyncUpload or the control’s product page. If you are already using RadUpload in your projects, you may be interested in reading how easy the transition to RadAsyncUpload is and how you can benefit from it in this blog post. The official support for RadUpload has been discontinued in June 2013 (Q2’13), although it is still be available in the suite. We deeply believe that RadAsyncUpload can better serve your upload needs and we kindly ask you to transition to it to make sure you take advantage of its support and the new features we constantly add to it.
This tutorial will walk you through creating a Web page that uses RadUpload controls. It shows how to:
Use RadUpload to validate and upload files.
Use RadProgressArea to display a progress dialog.
Use skins to provide a consistent look & feel.
Enabling RadProgressManager
Before you can use any of the RadUpload progress-monitoring controls, you must add RadProgressManager.
You can omit the below seven steps if you simply use the SmartTag of RadProgressManager
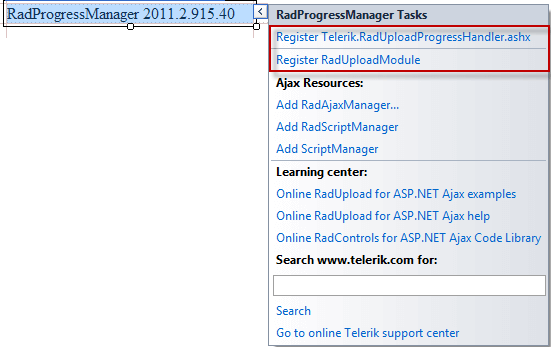
-
In the Solution explorer, double-click the Web.config file to open it for editing:
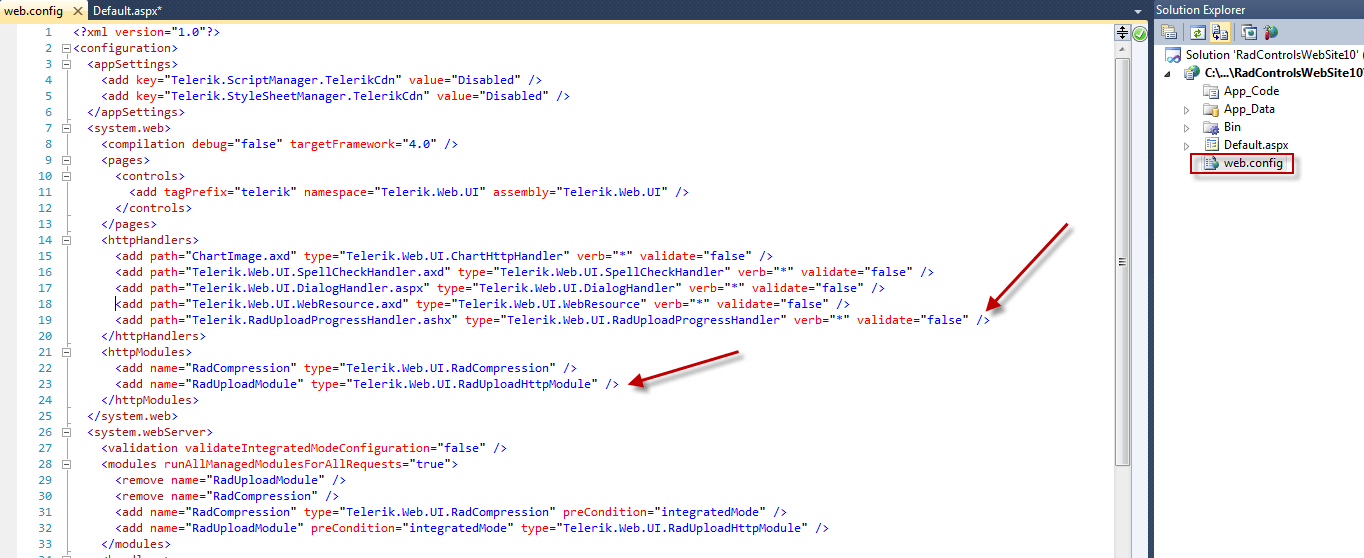
Under the
<configuration>element locate the<system.web>element. Add it if it does not exist.Under the
<system.web>element locate the<httpModules>element. Add it if it does not exist.-
In the
<httpModules>element add the following tag:<add name="RadUploadModule" type="Telerik.Web.UI.RadUploadHttpModule" /> ````This registers the RadUploadHttpModule type, which enables RadProgressManager to manage the upload progress.
If the controls assembly is added in GAC you must specify the full assembly qualified path of the RadUploadHttpModule type. See the Configuration article for details.
Under the
<system.web>element, locate the<httpHandlers>element. Add it if it does not exist.In the
<httpHandlers>element, add the following tag:
    <add verb="*" path="Telerik.RadUploadProgressHandler.ashx" type="Telerik.Web.UI.RadUploadProgressHandler"
    validate="false" />
````
This registers the RadUploadProgressHandler, which is required by the RadProgressManager control.
If you are hosting your application in IIS 7 with integrated mode, you should additionally register RadUpload in the modules and handlers sections like this:
    <system.webserver>
    <modules>
     . . .
        <add name="RadUploadModule" type="Telerik.Web.UI.RadUploadHttpModule" preCondition="integratedMode"/>
    </modules>
    <handlers>
     . . .
        <add name="Telerik_RadUploadProgressHandler_ashx" path="Telerik.RadUploadProgressHandler.ashx" verb="*" type="Telerik.Web.UI.Upload.RadUploadProgressHandler" preCondition="integratedMode"/>
    </handlers>
</system.webserver>
````
If the controls assembly is added in GAC you must specify the full assembly qualified path of the RadUploadProgressHandler type. See RadUploadProgressHandler for details.
- At this point, your Web.config should look as follows:
<configuration>
...
<system.web>
    <httpHandlers>
          <add verb="*" path="Telerik.RadUploadProgressHandler.ashx" type="Telerik.Web.UI.RadUploadProgressHandler" />
          ...
    </httpHandlers>
    <httpModules>
         <add name="RadUploadModule" type="Telerik.Web.UI.RadUploadHttpModule" />
         ...
    </httpModules>
         ...
</system.web>

</configuration>
Adding a RadUpload control
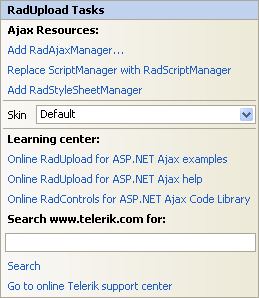
- In the designer, drag a RadUpload control from the toolbox onto your page. The RadUpload Smart Tag should appear automatically:
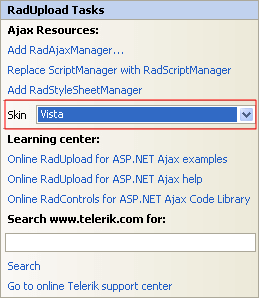
- In the Skin drop-down control, select the "Vista" skin, to provide the basic look & feel of your upload control.
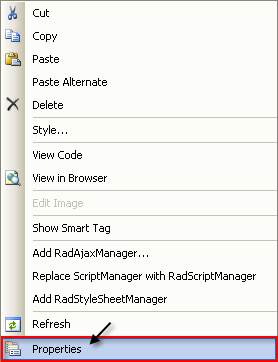
- Right click on the RadUpload control, and choose Properties from its context menu:
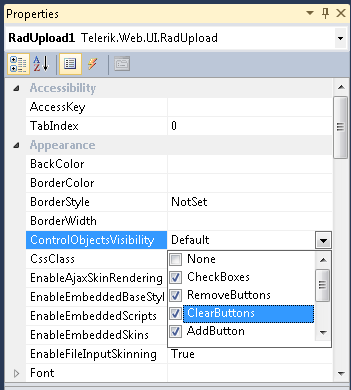
- In the Appearance section of the properties pane, locate the ControlObjectsVisibility property. This lets you configure what controls are associated with each input area of the RadUpload control. Drop down the list and check the ClearButtons item, so that all the possible controls are checked:
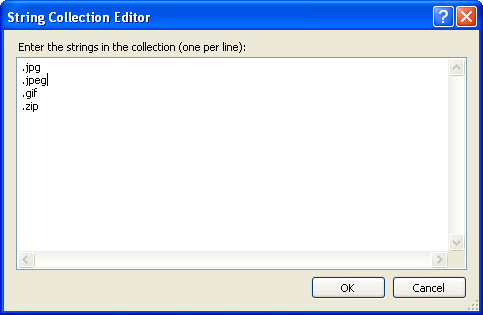
- In the Behavior section of the properties pane, click the ellipsis button next to the AllowedFileExtensions property. This displays the string collection editor. Add the file extensions for the file types you want to allow:
Set the following additional properties in the Behavior section:
Set InitialFileInputsCount to 2. This configures the RadUpload control to start by showing 2 input areas.
Set the MaxFileInputsCount to 5. This configures the RadUpload control so that it never shows more than 5 input areas.
Set the MaxFileSize to 1000000. This specifies that the RadUpload should not upload a file of more than 1,000,000 bytes.
By default, your application can upload at most 4 megabytes of data over all the files uploaded in a single postback.
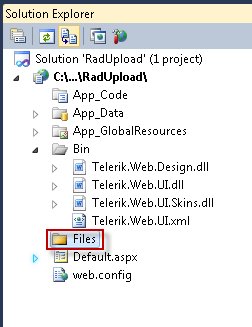
- In the Solution Explorer, add a new folder called "Files" where the uploaded files will be placed:
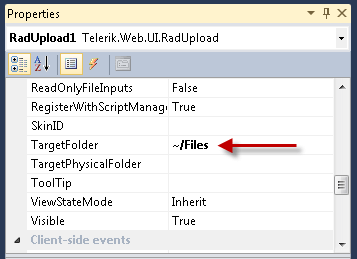
- In the properties pane for the RadUpload control set the TargetFolder property to "~/Files". This tells the RadUpload control to automatically save uploaded files into the "Files" folder you created.
Adding a RadProgressArea control
If the user tries to upload a lot of large files, the process can take a while. Adding a RadProgressArea control automatically causes your Web page to display a progress dialog while files are uploaded.
Drag a RadProgressManager control from the toolbox onto your Web page. The RadProgressManager is required for progress monitoring.
Drag a RadProgressArea control from the toolbox onto your Web page. The RadProgressArea control is responsible for displaying the progress dialog while files are uploaded. It operates automatically, whenever an update control on the page starts to upload files.
In the RadProgressArea Smart Tag that appears automatically, choose "Vista" from the drop-down list for the Skin property, so that the dialog matches the skin for the RadUpload control.
In the properties pane for the RadProgressArea control, locate the DisplayCancelButton property. Set it to True, so that the user can cancel an upload that is taking a long time.
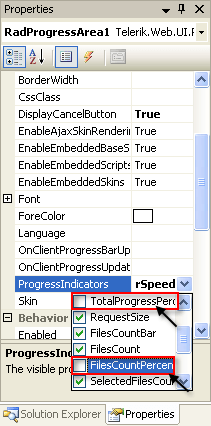
Locate the ProgressIndicators property, drop down its list, and uncheck "TotalProgressPercent" and "FilesCountPercent". This removes the percentage values from the figures that the progress dialog reports.
File Submission
Drag a Horizontal Rule from the HTML section of the toolbox onto your Web page below the RadUpload control.
Drag a Button from the Standard section of the toolbox below the horizontal rule. Set its Text property to "Submit".
Since on localhost the upload speed is pretty fast (like 5mb/s) one needs to upload file larger than 15-20mb in order to trigger the progress area. If you do not see the progress this usually means that the file is too small and it is uploaded before there is enough time for the area to show up.
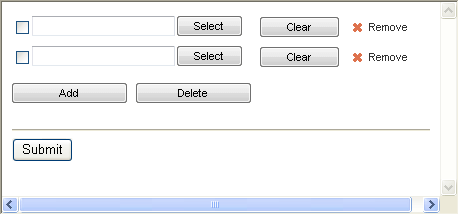
Run the application. The RadUpload control appears, showing two file input areas:
Experiment with the input areas:
Use the Select buttons to locate files.
Use the Clear buttons to clear the selected files.
Use the Remove link to remove an entire file input area.
Use the Add button to add new file input areas.
Click the check box next to an item and click the Delete button to remove the selected input area.
- When you have selected a number of files, including some with invalid extensions, click the Submit button to upload the files. The progress dialog appears:
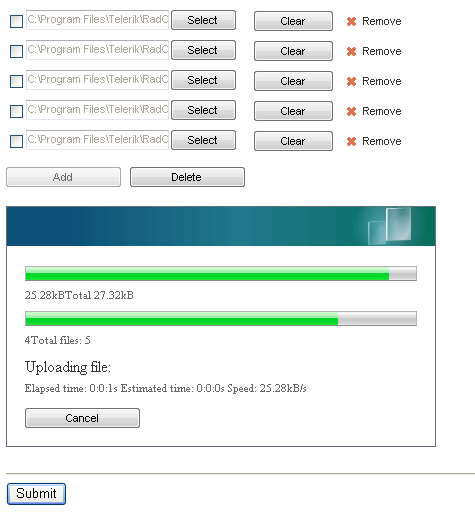
When the page reloads after the postback, it is reset to the initial starting configuration.
Use the Windows explorer to look in the Files directory. Note that the uploaded files have been copied to that directory, except for the ones with invalid extensions.