Getting Started with the Telerik WebForms Timeline
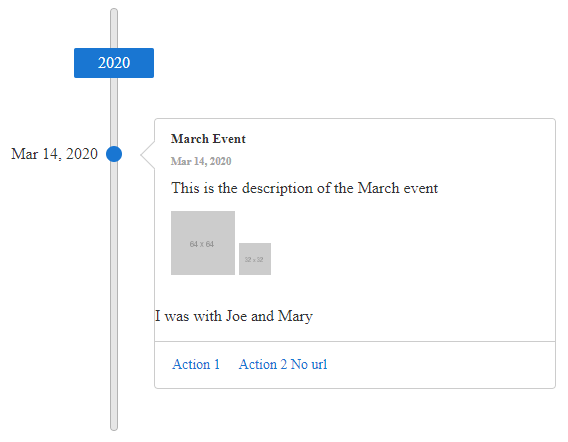
The following tutorial demonstrates how you can add a RadTimeline control populated with declarative items. The end result will be similar to Figure 1:
Figure 1: Basic RadTimeline configuration with static items

Add a ScriptManager control on a Web Form.
-
Add a RadTimeline control to the page, and set its properties:
EventTemplate- define your own template for rendering the events data by utilizing the Kendo UI Templates functionality. You can also use the values of custom defined properties in the template.-
Populate the
Itemscollection withTimelineIteminstances and set their properties:-
Actions- the actions of the item, each ot them could have its own navigationUrl -
Images- the images of the item
-
Set other properties like
AlternatingMode,CollapsibleEvents,HeightandWidthto control its layout and behavior as desired.
The end result can be similar to the following:
ASPX
<telerik:RadTimeline runat="server" ID="RadTimeline1" AlternatingMode="false" CollapsibleEvents="false" Width="600px" Height="420px">
    <EventTemplate>
             <div class="k-card-header">
                    <h5 class="k-card-title">#= data.title #</h5>
                    <h6 class="k-card-subtitle"><strong>#= kendo.toString(data.date, "MMM d, yyyy")#</strong></h6>
                </div>
                <div class="k-card-body">
                    <div class="k-card-description">
                        <p>#= data.description #</p>
                        <div class="imageContainer">
                            # var imagesCount = data.images? data.images.length:0;
                             for (var i = 0; i < imagesCount; i++) { #
                            <img src="#= data.images[i].src #" class="k-card-image">
                            # } #
                        </div>
                    </div>
                </div>

            #if(data.attributes && data.attributes.Friends){#
                <p>I was with #=data.attributes.Friends#</p>
            #}#

             # var actionsCount = data.actions? data.actions.length:0;
             if (actionsCount>0){#
                <div class="k-card-actions">
                    # for (var i = 0; i < actionsCount; i++) { #
                            <a class="k-button k-flat k-primary" href="#= data.actions[i].url #" target="_blank">#= data.actions[i].text #</a>
                            # } #
                </div>
             #}#
    </EventTemplate>
    <Items>
        <telerik:TimelineItem Date="2020/3/14" Title="March Event" Subtitle="14 March 2020" Description="This is the description of the March event" Friends="Joe and Mary">
            <Actions>
                <telerik:TimelineItemAction Text="Action 1" Url="https://google.com/search?q=action1" />
                <telerik:TimelineItemAction Text="Action 2 No url" />
            </Actions>
            <Images>
                <telerik:TimelineItemImage Src="https://via.placeholder.com/64" />
                <telerik:TimelineItemImage Src="https://via.placeholder.com/32" />
            </Images>
        </telerik:TimelineItem>
    </Items>
</telerik:RadTimeline>