Custom Resources and Attributes
For each appointment, RadScheduler requires the data to include an ID, subject, start time, and end time. In addition, RadScheduler includes support for recurring appointments. If your data permits, you can expand on these attributes of an appointment by adding your own, custom resources and attributes. Custom resources and attributes can include details such as location, users, materials needed, and so on.
Custom Resources
Custom resources let you associate additional information with your appointments, where the information for each field can be selected from a limited number of possibilities. That is, a custom resource acts like an enumerated type. To add a custom resource in design time:
Add a DataSource component to your page that can supply the list of possible values for the custom resource.
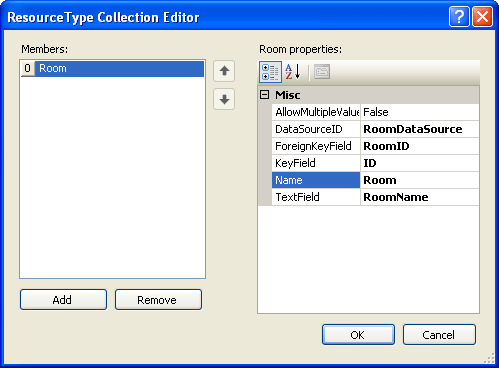
In the RadScheduler's properties pane of the designer, click the ellipsis button on the ResourceTypes property. This displays the Resource Type Collection Editor.
In the Resource Type Collection Editor, define your custom resource by supplying the information RadScheduler needs to bind to the list of resource type values.

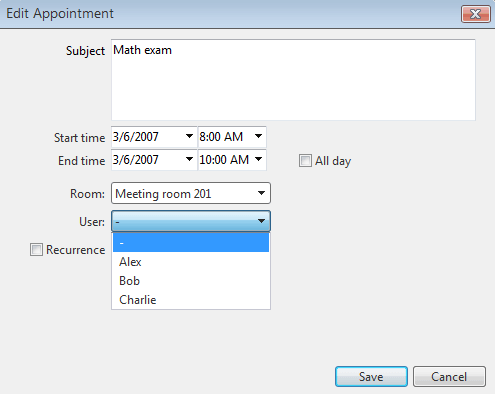
You can customize the appearance of the resource in the edit form by EnableResourceEditing property of the RadScheduler. By default it is "True".

Be sure that your insert and update statements accept a parameter with the name of the custom resource.
The resources you define in the Resource Type Collection Editor are not used if the RadScheduler gets its data from a data provider. When using a data provider, RadScheduler gets information about the available data from the provider instead.
Because custom resources have a limited number of values, RadScheduler can group appointments based on the resources associated with them. To group appointments by a custom resource, set the GroupBy property to the name of the custom resource that you specified in the Resource Type Collection Editor.
Custom Attributes
Custom attributes are simple text values that your data source stores with the appointment. The user can enter any string of text as the value of a custom attribute. To define custom attributes
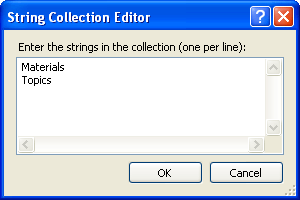
In the RadScheduler's properties pane of the designer, click the ellipsis button on the CustomAttributeNames property. This displays the string collection editor.
In the string collection editor, specify the names of the custom attributes you want to add. These are the names of the fields for the custom attributes in the data supplied by the Select statement of your data source. They are also the names of the parameters for the values that the scheduler passes to the Insert and Update statements of your data source.

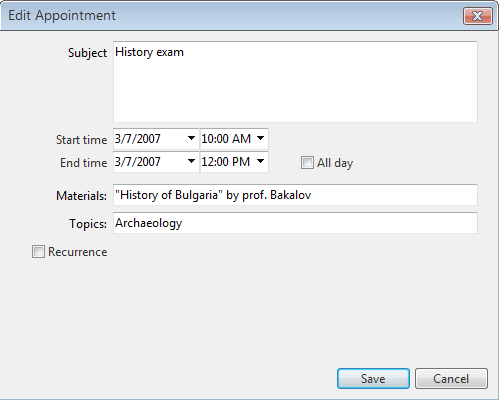
Set the AdvancedForm-EnableCustomAttributeEditing property to True. This causes controls for the custom attributes to appear in the advanced edit form of the scheduler:

If you enable custom attribute editing, be sure that your insert and update statements accept a parameter with the name of the custom attribute.
Unlike Custom Resources, Custom Attributes must still be defined declaratively, even when using a data provider instead of a DataSource.