Creating RadChart Declaratively
RadChart has been replaced by RadHtmlChart, Telerik's client-side charting component. If you are considering RadChart for new development, examine the RadHtmlChart documentation and online demos first to see if it will fit your development needs. If you are already using RadChart in your projects, you can migrate to RadHtmlChart by following these articles: Migrating Series, Migrating Axes, Migrating Date Axes, Migrating Databinding, Features parity. Support for RadChart is discontinued as of Q3 2014, but the control will remain in the assembly so it can still be used. We encourage you to use RadHtmlChart for new development.
RadChart properties that are set in the designer can also be written declaratively in the ASP.NET HTML code.
-
To use the RadChart control on the page you need to declare the namespace and associate a tag prefix. Add the following code just under the "<%@ Page>" tag at the top of the HTML.
ASP.NET
<%@ register assembly="Telerik.Web.UI" namespace="Telerik.Web.UI" tagprefix="telerik" %> <%@ register assembly="Telerik.Web.UI" namespace="Telerik.Charting" tagprefix="telerik" %> -
Within the main div tag for the page add a RadChart tag.
ASP.NET
<div> <telerik:RadChart runat="Server" id="myRadChart"> </telerik:RadChart> </div> -
Within the RadChart tag add a ChartTitle tag and set its TextBlock-Text attribute to "My First Chart".
ASP.NET
<ChartTitle> <TextBlock Text="My First Chart"> </TextBlock> </ChartTitle> -
Add a ChartSeries tag. Set the Name attribute to "Sales".
ASP.NET
<Series> <telerik:ChartSeries Name="Sales"> </telerik:ChartSeries> </Series> -
Add three ChartSeriesItem tags inside the ChartSeries tag as shown in the example below.Set the YValue attribute for each item.Add a TextBlock tag within each ChartSeriesItem tag and set the Text attribute to the values shown in the example.
ASP.NET
<items>
<telerik:ChartSeriesItem YValue="34">
<Label><TextBlock Text="Internet"></TextBlock></Label>
</telerik:ChartSeriesItem>
<telerik:ChartSeriesItem YValue="66">
<Label><TextBlock Text="Wholesale"></TextBlock></Label>
</telerik:ChartSeriesItem>
<telerik:ChartSeriesItem YValue="27">
<Label><TextBlock Text="Retail"></TextBlock></Label>
</telerik:ChartSeriesItem>
</items>
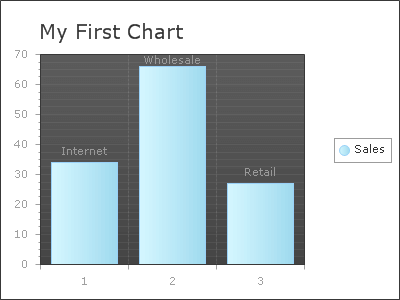
The chart should now look like the figure below. The chart will display as three bars (Bar is the default type).

-
Add an Appearance tag to the RadChart Series tag. Within Appearance add a FillStyle tag, set the MainColor attribute to "Red" and the SecondColor attribute to Maroon. Add a Border tag and set the color to DarkRed.Then add PlotArea tag and Appearance tag within it
ASP.NET
<Appearance>
<FillStyle MainColor="Red" SecondColor="Maroon"></FillStyle>
<Border Color="DarkRed" />
</Appearance>
ASP.NET
<PlotArea>
<Appearance>
<FillStyle FillType="Solid" MainColor="White"></FillStyle>
</Appearance>
</PlotArea>
When complete the chart should look like this example:
