How to: Create Domain Classes
This article is relevant to entity models that utilize the deprecated Visual Studio integration of Telerik Data Access. The current documentation of the Data Access framework is available here.
Entities/persistent types/domain types/domain classes are the fundamental building block for describing the structure of data with the Telerik Data Access Domain Model. In a domain model, entities are constructed from properties and describe the structure of top-level concepts, such as products and categories in a business application. An entity represents a specific object, such as a specific product or category.
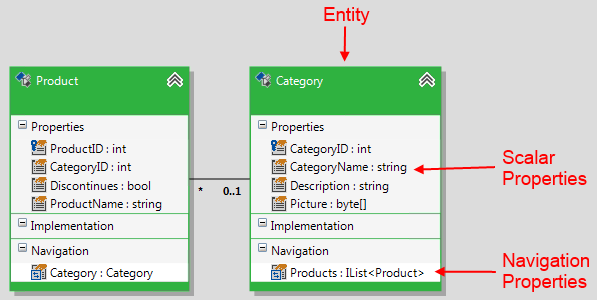
This topic demonstrates how to create and rename entities in your domain model.
How to Create New Entities
Basically, there are three ways for creating new entities:
Using the Toolbox
The designer, when empty, contains a simple message, which states that to create new entities you need to drag them from the Toolbox.
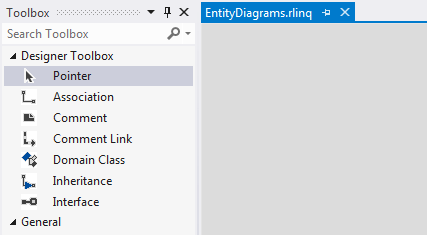
Just like a normal Visual Studio development, the items you want to place on your designer are found in the Toolbox. The Toolbox contains, besides the Pointer, several controls, or items, from which to design your domain model. One of these items is the Domain Class item. To create a new Entity in the domain model, simply drag the Domain Class item from the Toolbox to the design surface.
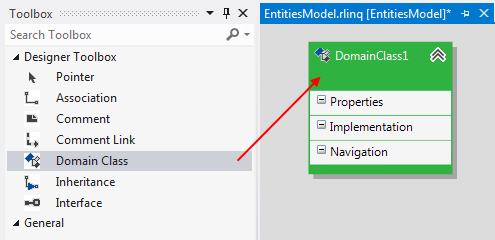
What Just Happened?
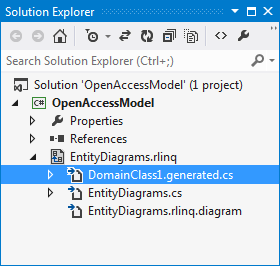
When you drag the Domain Class item from the Toolbox, a new entity is created in the domain model. By default the entity is named DomainClassX. The domain class name must be unique for the domain model. Telerik Data Access checks if the domain model has an entity with the same name and makes the name unique by adding a "0", "1", and so on, to the entity name. When you save the domain model, a new class with the same name will be created.
Using the Visual Designer Context Menu
The second way to create entities in the domain model is to use the context menu in the Visual Designer. Right-click on an empty area in the Visual Designer, point Add and then Add New Domain Class.
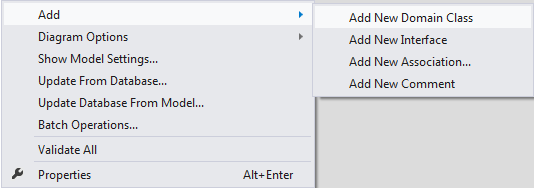
This will add a new entity in the Visual Designer.
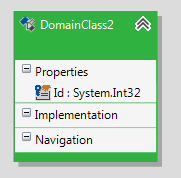
The only difference in this case is that the newly added entity will contain an Int32 property named Id, which will be used as a primary key. The How to: Create Properties topic demonstrates how to add new properties manually. More information about the different identity mechanism could be found in the Defining Identity Mechanisms section.
Using the Model Object Explorer and Model Schema Explorer
The Telerik Data Access Visual Designer also provides other views of the metadata with the Model Object Explorer and Model Schema Explorer. Both views let you see an overview of the relational and conceptual items. For example, the Model Schema Explorer displays all relational items (tables, views, stored procedures and constraints) included in the model. The Model Object Explorer provides a tree view of the conceptual model, i.e. it provides information about all types and methods exposed by the domain model. From here you can access the Property Window of various classes and properties. You can also navigate to a particular domain class, by expanding the Types node, right-clicking the target entity and selecting Locate in Diagram. As you domain model gets more complex, the Model Object Explorer and Model Schema Explorer are a convenient way to see an organized view of all items in your domain model.
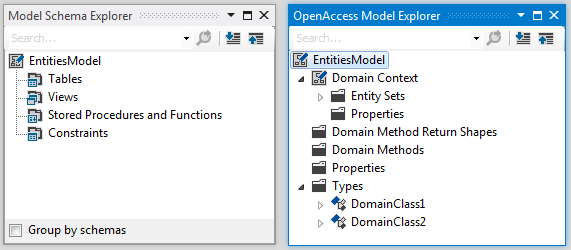
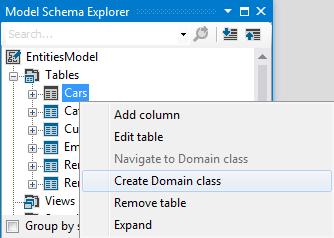
The Model Schema Explorer also allows you to create new domain classes. However, it could be used in slightly different scenarios. For example, all commands and approaches discussed so far create new domain classes, which are not mapped to anything. In other words, the created domain classes are not mapped to tables. The Model Schema Explorer could be used to create a new domain class that will be mapped to an existing table from the relational part of the model. For example, take a look at the image below. The icon left to the Cars table is grey. That means that the Cars table is not mapped to a domain class. You could create a new domain class for the Cars table by right-clicking it and selecting the Create Domain Class command.
How to Rename Entities
When you drag the Domain Class item from the Toolbox, a new entity is created in the domain model. By default the entity is named DomainClassX. The domain class name must be unique for the domain model. Telerik Data Access checks if the domain model has an entity with the same name and makes the name unique by adding a "0", "1", and so on, to the entity name.
In order to rename an entity:
- Select the target entity in the Visual Designer.
-
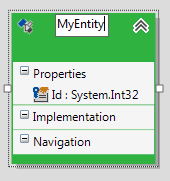
Press the F2 key. The entity goes in edit mode. Now, you could change the entity name.
An alternative approach is to use the Property Window:
- Again, select the target entity in the Visual Designer.
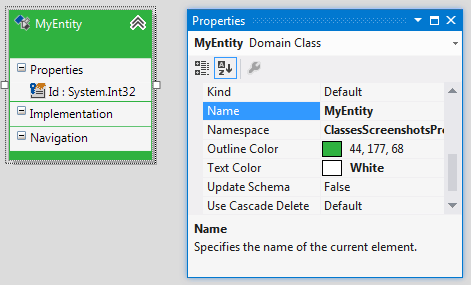
- Press the F4 key to open the Properties pane.
-
Modify the Name property in the Properties pane.
Next Steps
Creating a new entity in the Visual Designer is only the first step. In a domain model, entities are constructed from properties that describe it. The second step is to create properties. Once you create several entities, you may want to define associations between them. To see how to do this, check out How to: Create Associations.
When you add a new entity in the domain model, save it and take a look at the Error List pane, you should be presented with the following warning.

This warning is completely valid, and the information is absolutely correct. The warning is letting you know that the DomainClass1 item in the Visual Designer is not mapped to anything. The project will save and compile as-is, since this is a warning, but beyond having your conceptual model you really don't have anything substantial. In other words, this warning means that you have to map your entity to a table. To see how to do this, check out the Domain Class Mapping section.
