Schedule Test List Execution
Once you have configured your Scheduling setup with at least one execution machine connected and your current project is connected to the Scheduling service, you can proceed with scheduling test lists remotely.
This article guides you trough the below topics:
Scheduling Test List Steps
Once you have created a test list, you can schedule it for execution at any time in the future. Initiate the Scheduling wizard from the Schedule TestList button in the Test List tab.
Go through the steps to setup the scheduled job:
- Step 1 - Define start time and (optionally) job recurrence
- Step 2 - Select execution machine(s) and (aoptionally) type of run
- (Optional) Step 3 - Enable automatic email report for current scheduled job
Step 1
Select the desired time and recurrence settings for this test run. In product version R3 2015 we've introduced the ability to schedule test lists Minutely and Hourly.
Step 2
Select Machine(s) step lets you pick the Execution Server on which to run the test list. If the list is empty, add at least one Execution Server. Picking multiple servers will result in the Test List executing simultaneously on all selected machines.
Options available:
Distribute tests among these machines - Test Studio will split up the test list and assign each test to a different machine automatically. Note: If this setting is not selected, each test will run once on each machine you select, which may result in multiple test results for each test in the list.
Get latest version of tests automatically from TFS - available only if the project is connected to a TFS. If checked - Test Studio will perform a "check out" operation on the project latest version at each execution machine before running the test list.
Important
Test Studio ignores time zone differences and completely disregards the date and time on the Execution Server(s). The only date and time taken into account is on the machine where the Scheduling Server is located. This can lead to problems when the Scheduling Server is not located on the machine you're scheduling from and there are time zone differences between the two machines.
Step 3
Note
This step is optional. To enable the option for sending automatic email for a scheduled job, you need to define the SMTP server and credentials in the Scheduling Server Configuration wizardWithout these SMTP settings, Step 3 screen is not present.
Choose whether an automatic email is sent after test list completion and on what condition. Read here additional details for email customization options.
Scheduled Job Information
Once you close the Scheduling Wizard, the scheduled run appears in the Results tab. It is yellow, indicating it's waiting to be executed.
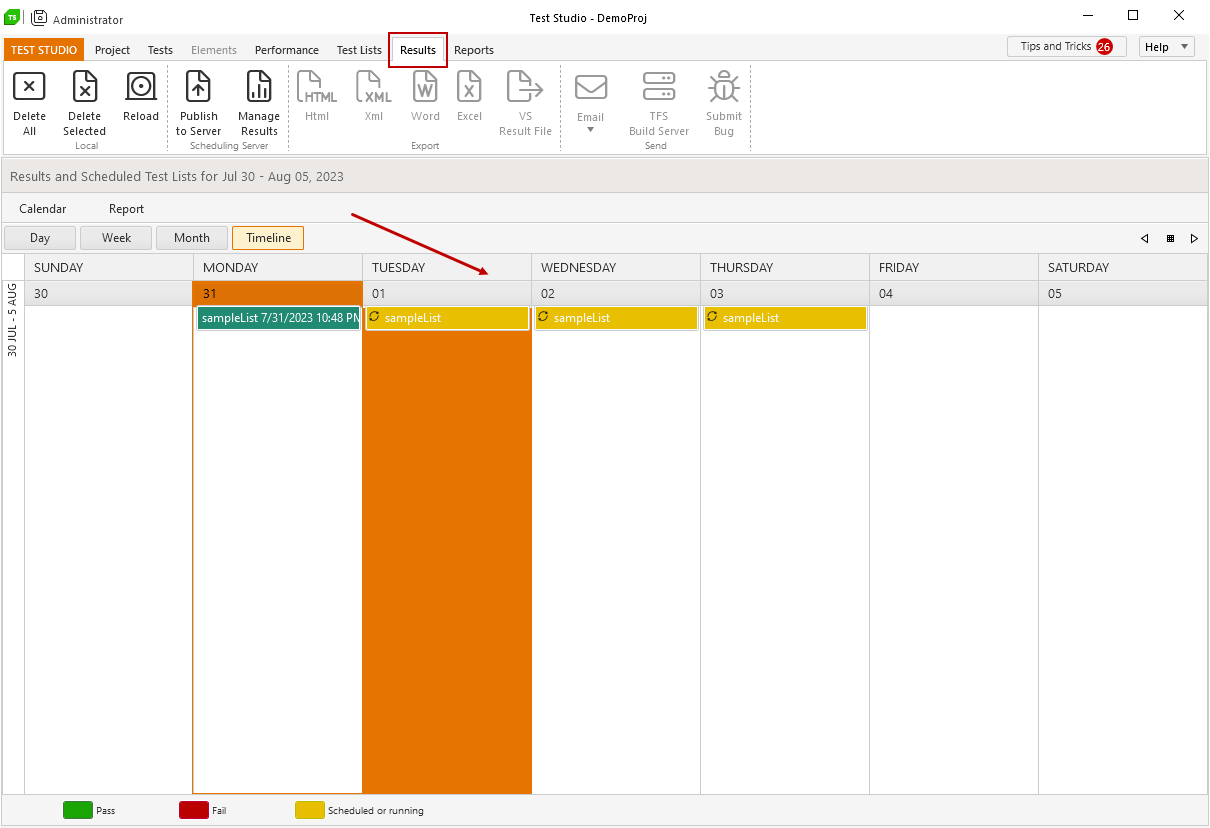
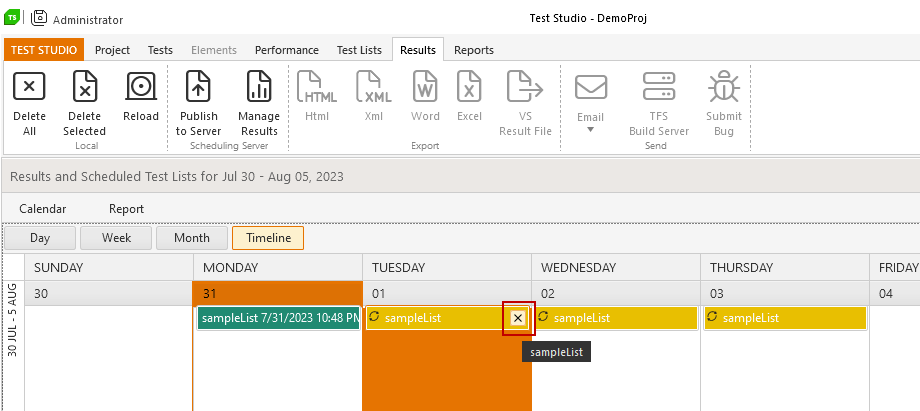
To remove a scheduled test execution:
- In the Results tab, hover over the scheduled test execution. Click the close button that appears.
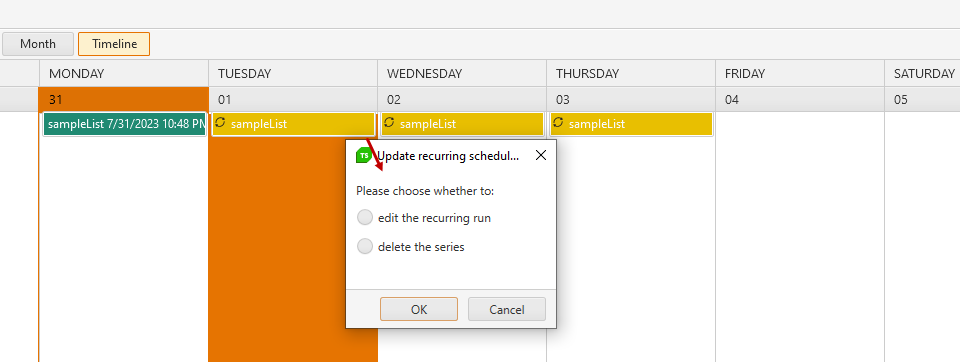
- If the scheduled test run is recurring, select whether to delete all instances or edit the scheduled run to remove specific test runs.
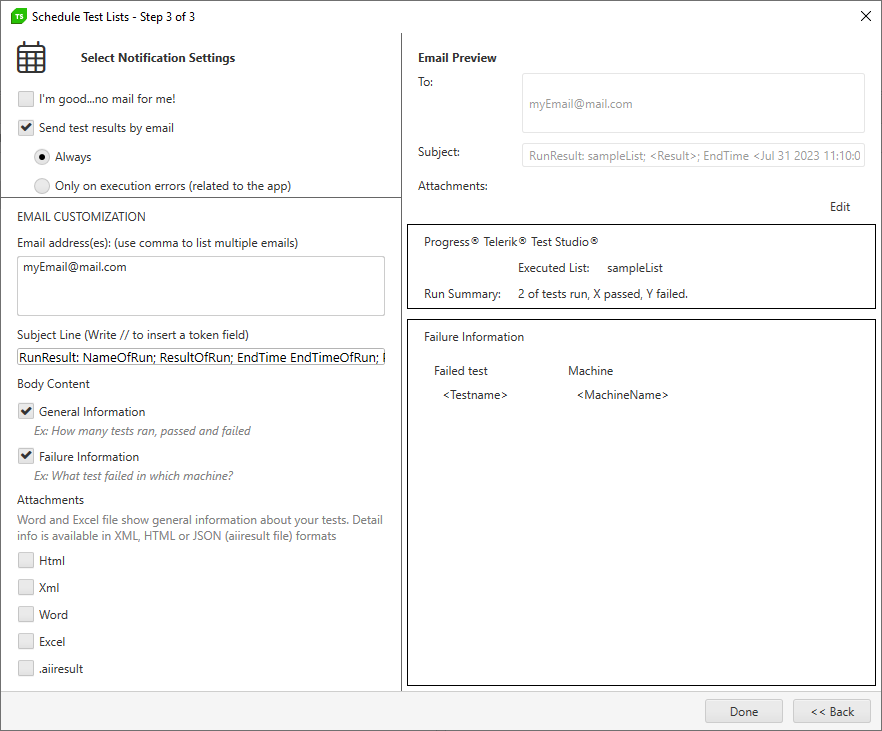
Email Notification Customization
These steps lets you configure the e-mail notification sent upon test list completion.
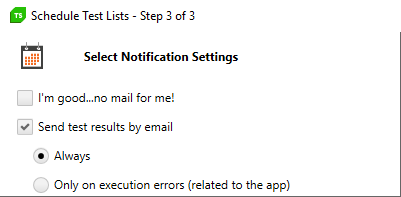
To disable mail notification, check "I'm good...no mail for me!".
If you check "Send test results by email" select one of these three options:
Always - receive a notification no matter what the result, pass or fail.
Only on execution errors (related to the app) - sends an email only if a "normal" error is encountered. (For example, an error that's related to the application under test such as missing controls, wrong text values, etc.)
Under Email Customization customize the recipients, subject line, content, and attachments. Select the body content and attachments by checking the appropriate checkboxes.
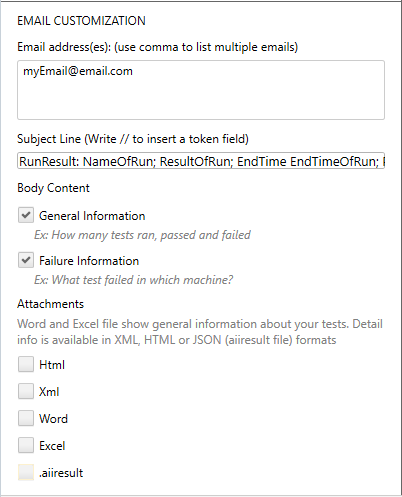
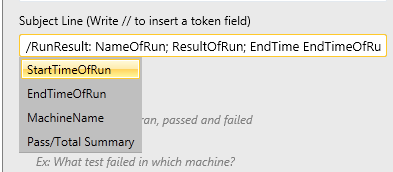
Under Subject Line, type "//" to invoke the token field menu and include data from the test results in the subject line.
Note! Once you define a scheduled test list and enable the email message, all selected settings persist in that dialog next time you schedule a job within the same project.
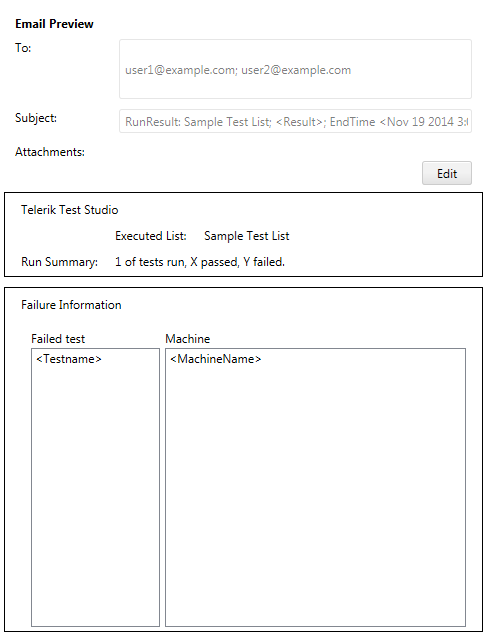
To view the resulting email format, see the email preview on the right.
To further customize the email notification, click the Edit button and input custom text into the email template.