Connect a Project to the Scheduling Server
Once you've configured your Scheduling setup and you've successfully registered at least one Execution Server to it, you are ready to configure a test project for remote execution.
This article guides you how to connect:
Connect the Project to Schedule Test Lists on Remote Execution Machines
Open the Test Studio project and click the Connect button from the Scheduling ribbon in the Project tab.

In the Scheduling Server Settings dialog, choose Remote radio button to connect the project to the configured Scheduling server.
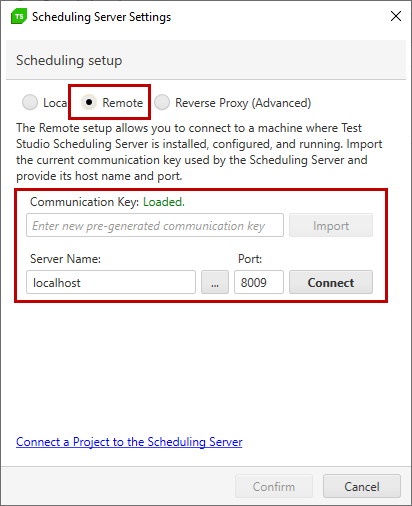
Communication Key
The Communication Key lets you import the key generated in the Scheduling Config wizard. The text field remains empty to keep safe the value of the key in use. To indicate a key is in use ensure the Loaded. status is present.
Tip
In case the communication key is not matching, you need to import the current key in use. Check here how to generate a new key and import it for all Scheduling components.
Server Name
Enter the machine name for the machine which hosts the Scheduling service, then click Connect.
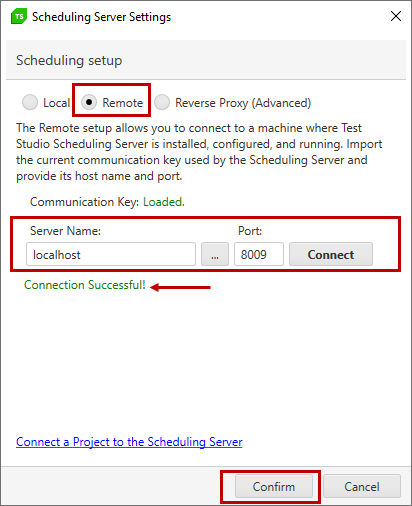
A confirmation message appears when the connection is successful.
Confirm Connection
Once the connection is successfully established, click the Confirm button to apply the changes in the project.
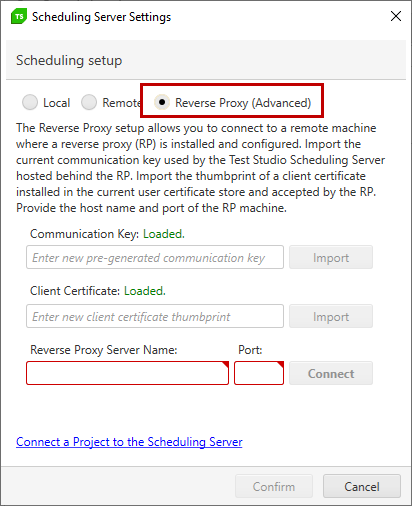
Connect via Reverse Proxy (Advanced)
Test Studio allows you to connect a project to a Scheduling server hosted in a network behind a Reverse Proxy server. See the detailed instructions on the required configuration to setup this connection.