Web Report Designer Table Context Menu
The table context menu may be opened in two ways:
- Hover over the corresponding table, table column, or table row. Click on the ellipses
...when they appear. - Open the Explorer tab in the Components/Explorer area of the Web Designer and find the corresponding table. Expand the groups. Click on the ellipses
...beside the item.
The exact options in the menu depend on the selected table part - see Crosstab Areas. The static and dynamic groups the column/row falls in, the availability of merged cells, etc. may also impact the content of the context menu.
Context Menu for the entire Table item
Hover over the top left table corner known as the Corner area to open the Context Menu for the entire table
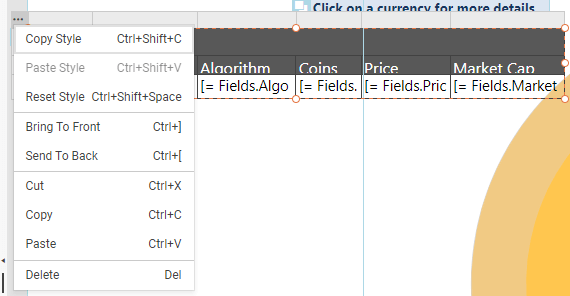
The context menu items are:
- Copy, Paste, Reset Style: Use to copy the style from one table to another, or reset to the default style.
- Bring To Front/Send To Back: Allows you to change the order of the items in the items collection of a section. Use when the table overlaps with another item to determine which one should stay on the top.
- Cut, Copy, Paste: Use to copy the entire table.
- Delete: Delete the corresponding table.
Context Menu for a Table Column
Hover over the top right corner of the specific table column in the Column Groups area to open its Context Menu.
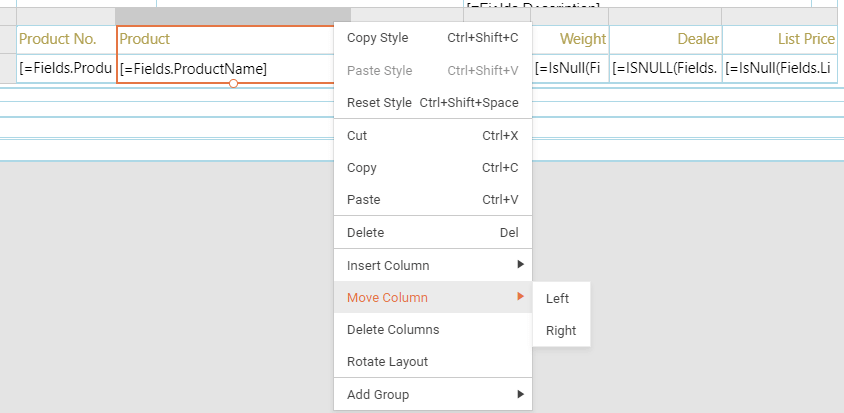
The context menu items are as follows. Some of the options may be hidden or disabled, depending on the context, for example, the static and dynamic groups the column falls in:
- Copy, Paste, Reset Style: Use to copy the style from one table column to another, or reset the default style.
- Cut, Copy, Paste: Use to copy the content from one table column to another.
- Delete: Delete the content of the table column.
-
Insert Column: Let you insert a new column. Available options:
LeftorRightof the current one. -
Insert Row: Let you insert a new row. Available options:
AboveorBelowthe current one. - Delete Columns: Use to delete the corresponding columns.
- Delete Rows: Use to delete the corresponding rows.
- Rotate Layout: Rotate the table so that its columns become rows and vice-versa.
-
Add Group: Use to add Row/Column group. Available options for
Row Group/Column Group:Parent,Child,Adjacent Above/Left, orAdjacent Below/Right. -
Move Column: Use to move a column or selection of columns. Only columns from static groups may be moved. If there are merged cells in the column, all the columns within the merged cells will be automatically selected and moved. Works only in tables and not in crosstabs. The designer automatically detects the possible moving directions. Available options:
Move LeftandMove Right.
Context Menu for a Table Row
Hover over the left top corner of the specific table row in the Row Groups area to open its Context Menu.
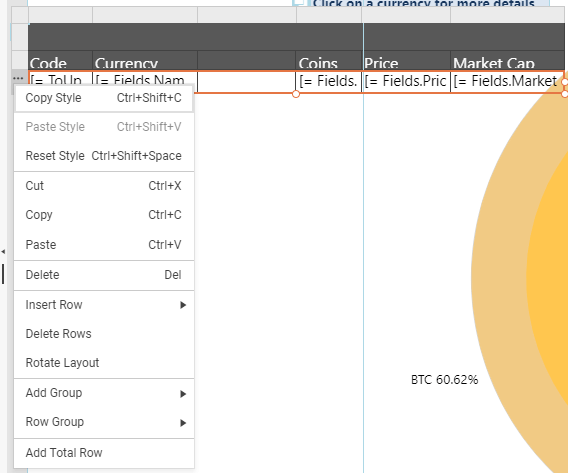
The context menu items are as follows. Some of the options may be hidden or disabled, depending on the context, for example, the static and dynamic groups the row falls in, if there are merged cells, etc.:
- Copy, Paste, Reset Style: Use to copy the style from one table row to another, or reset the default style.
- Cut, Copy, Paste: Use to copy the content from one table row to another.
- Delete: Delete the content of the table row.
-
Insert Row: Let you insert a new row. Available options:
- For static groups:
AboveorBelow. - When the table has dynamic groups, you may add the new row as part of the current table group:
Inside Group - Above,Inside Group - Below, or outside it:Outside Group - Above,Outside Group - Below.
- For static groups:
- Delete Rows: Use to delete the corresponding row.
- Rotate Layout: Rotate the table so that its rows become columns and vice-versa.
- Split Cells: Use to split the merged cells on the row.
-
Add Group: Use to add Row/Column group. Available options for
Row Group/Column Group:Parent,Child,Adjacent Above/Left, orAdjacent Below/Right. -
Row Group: Use to delete the group. You may choose whether to delete only the group or the related items as well. Available options:
Delete Group OnlyandDelete Group and Related Rows. - Add Total Row: Add a row with totals. The row will contain the Sum of the cell contents in the corresponding column when applicable.