How to Create a Non-Privileged IIS User for Report Server and Service Agent
Environment
| Product | Progress® Telerik® Report Server |
| Version | 10.1.24.514+ |
Description
This tutorial will show you how to change the Report Server's IIS application pool and service agent to use an identity with limited permissions.
Solution
-
Create a new Windows user with limited permissions, for example,
RSUser.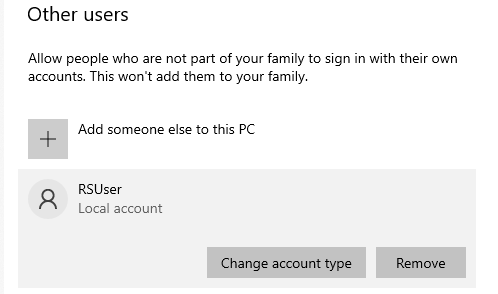
For more help, see Microsoft Docs - Manage User Accounts in Windows.
-
Go to Telerik Report Server's installation directory (
C:\Program Files (x86)\Progress\Telerik Report Server) and giveRSUserfull access permissions to theTelerik.ReportServer.WebandServicessub-folders.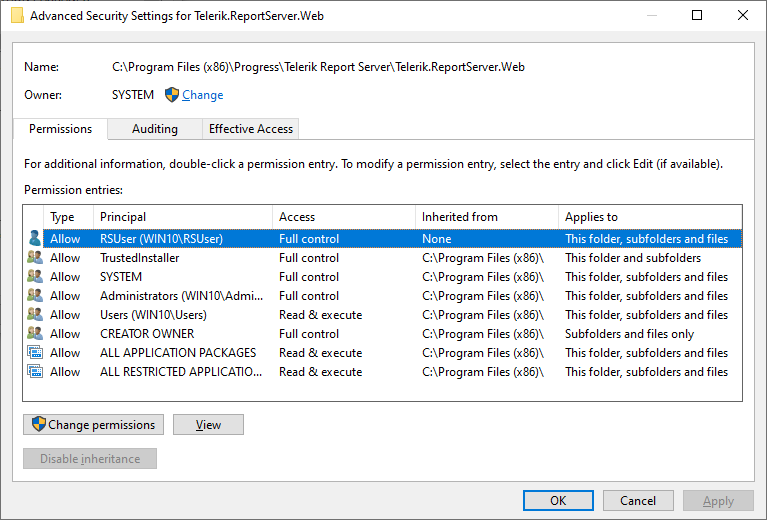
- Ensure the user does not have read or write permissions to any other folders.
- You can use any username you prefer, the
RSUserrecommended here applies the semantic naming practices. - For more help, see Microsoft Q&A - How do I set up user account and manage permissions.
Open Internet Information Services (IIS) Manager by selecting
Windows Key+Rto open the Run window, and then enterinetmgr.-
In the left column, expand the machine's node and select Application Pools. Right-click on the
TelerikReportServerapplication pool and select Advanced Settings from the context menu.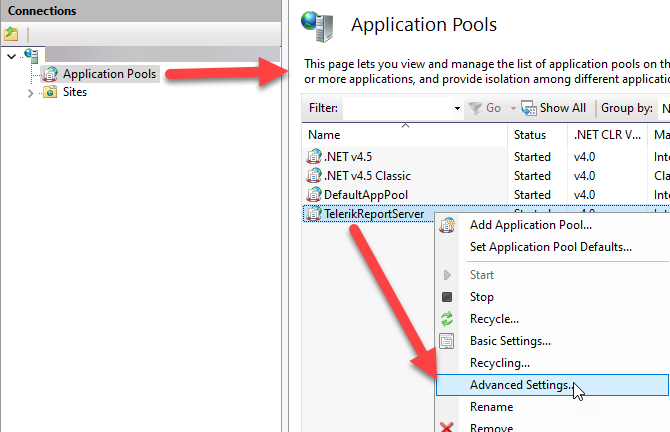
-
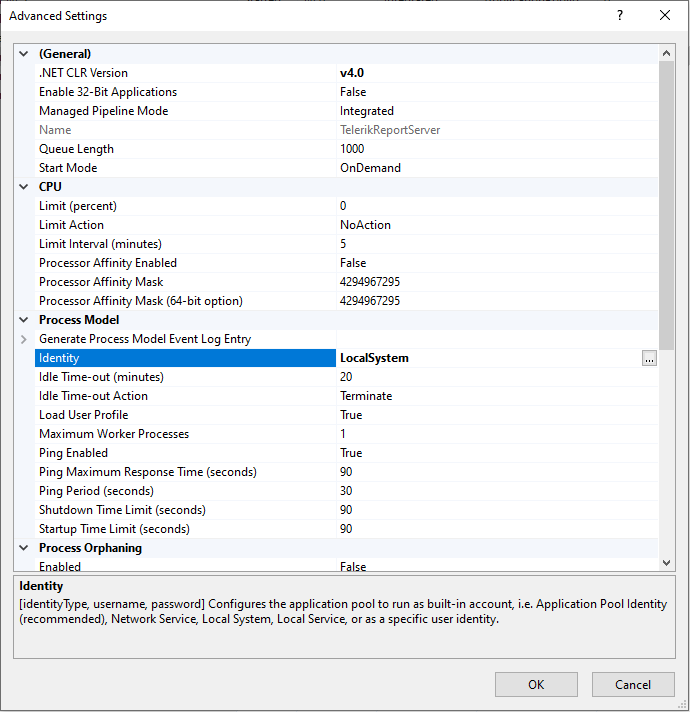
Select the Identity item and click the ellipsis button.
-
Select Custom account, click Set…, and enter the name of the newly created user (for example,
RSUser) and its password: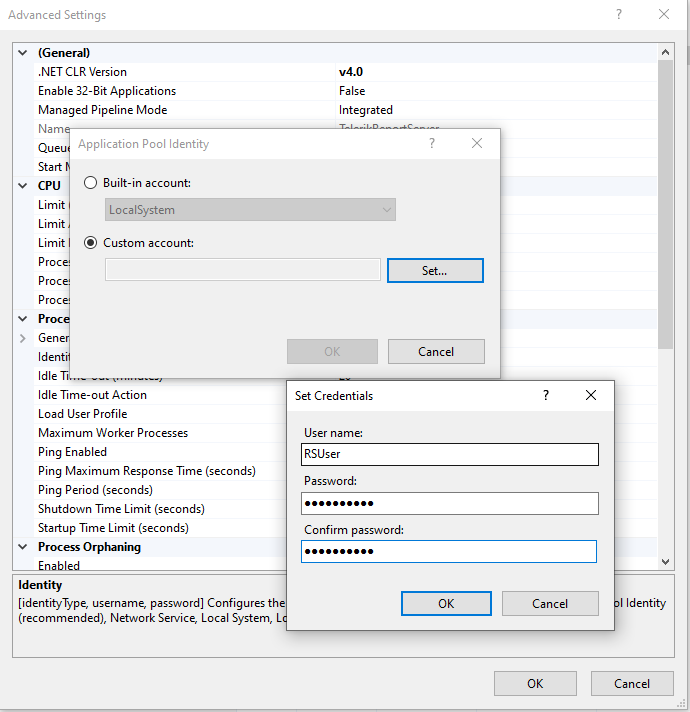
Right-click the
TelerikReportServerapplication pool and select Recycle... from the context menu.- Open the Report Server Manager application in the web browser to confirm it is working with the new user identity.
- Open Windows's Services app by selecting
Windows Key+Rto open the Run window, and then enterservices.msc. -
Scroll to the
Telerik.ReportServer.ServiceAgentservice instance: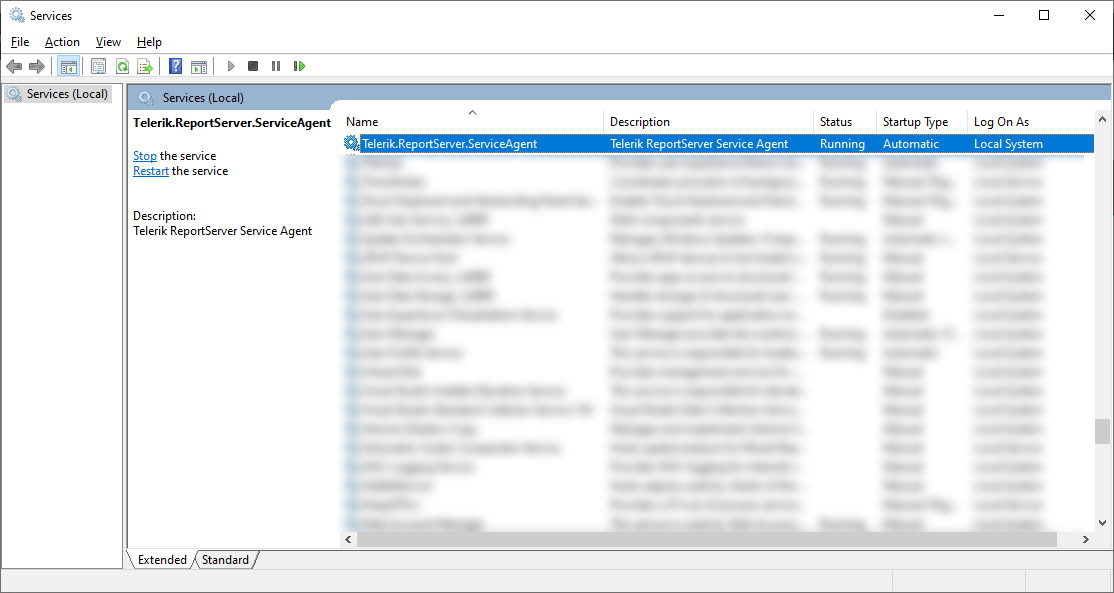
Double-click to show the service's Properties panel. Select the Log On tab.
-
Click This account and enter the new user name (for example,
.\RSUser) and its password: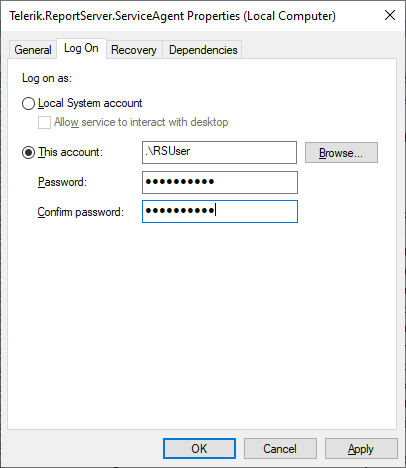
Right-click
Telerik.ReportServer.ServiceAgentand select Restart to restart the service with the new user.-
Ensure it is working by running a scheduled task or a data alert from the Report Server Manager web UI, or on the URL
http://{MachineNameHere}:82/ReportServer/ServiceAgent?wsdl:If the Report Server Manager cannot connect to the Telerik.ReportServer.ServiceAgent, most probably the WCF service doesn't have a reservation for the corresponding port (the default one is
82). Ensure reserving the port by running the proper Netsh command as an Administrator in the command prompt or terminal. Here is a sample command that reserves port82forReportServer/ServiceAgent/running under userRSUser:netsh http add urlacl url=http://+:82/ReportServer/ServiceAgent/ user=RSUserIf the default port
82is already reserved by another application, you may change the port and reserve the new port as above, or release port82with thedelete urlaclcommand and then reserve it with the above command. Here is a sample code releasing port82from the Telerik.ReportServer.ServiceAgent:netsh http delete urlacl url=http://+:82/ReportServer/ServiceAgent/ -
Ensure that the newly created Windows user has all of the required permissions for running the Report Server and its Service Agent:
-
Modify access for the Report Server installation directory(
C:\Program Files (x86)\Progress\Telerik Report Server), and all subdirectories -
Modify access for the
%ProgramData%\Telerik\Reportingdirectory - This is the place where the cache of the Map report item is stored. - Log on as a service must be enabled for the user, or one of the user groups where it is included.
-
Modify access for the Report Server installation directory(
Additional Actions: Consider adding the local user to databases used by Report Server data connections that utilize Windows Credentials login permissions.