Installing from Progress Control Panel
The Telerik UI for WPF controls can also be installed via the Progress Control Panel.
Note that the recommended installation approach is to use the Telerik NuGet packages
Downloading and Log-in
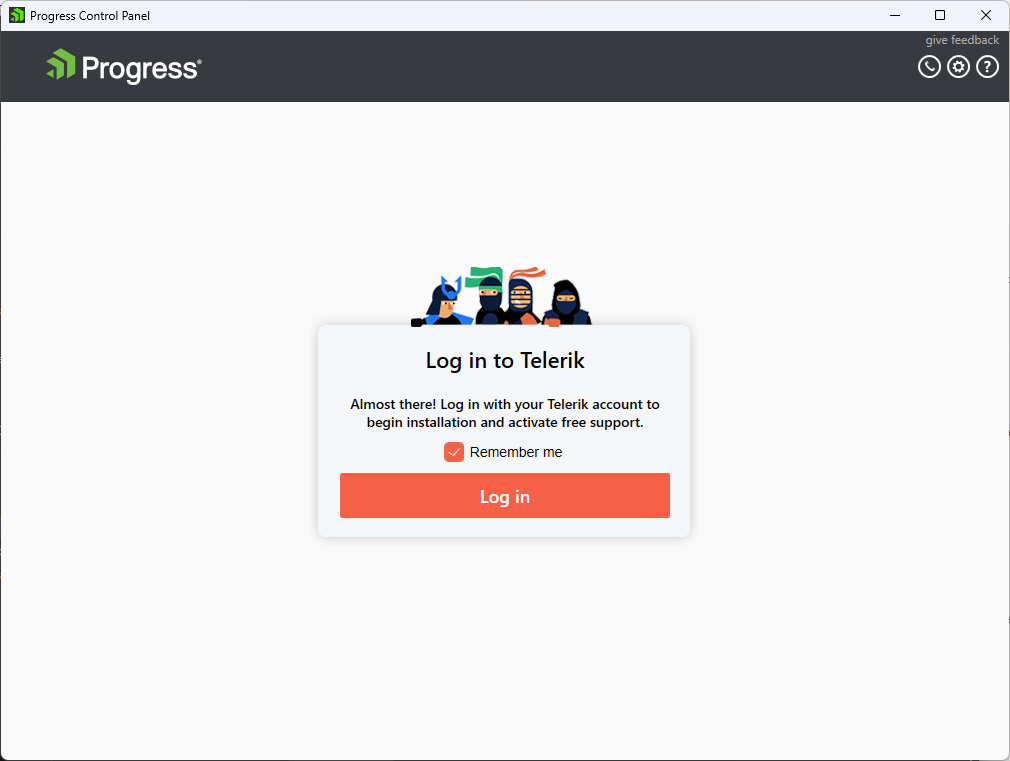
To start, download the Progress Control Panel from the following page and run the downloaded .exe file. You will soon be presented with the login screen where you need to provide your Telerik account credentials to sign in.
The Progress Control Panel Login Screen
Selecting Products to Install
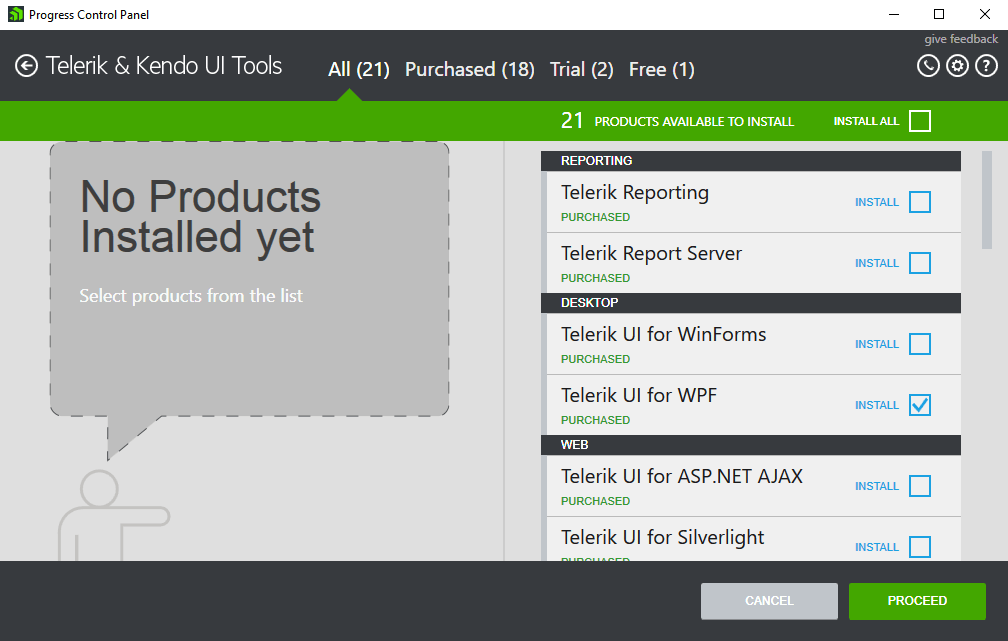
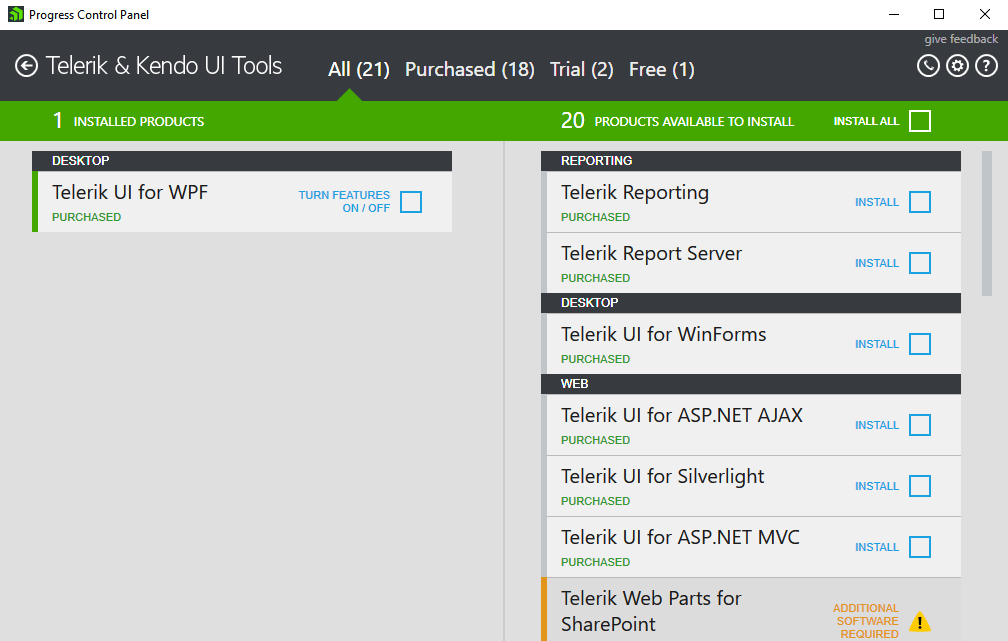
Afterwards, you will be presented with a screen containing sections for All products, Purchased products, Trial products, and Free products. These sections each have a split screen view - the left contains installed products that can be updated and the right contains products that can be installed.
You can continue by selecting the Telerik UI for WPF suite. Once you click the checkbox, the option to proceed or cancel will be displayed.
The Progress Control Panel List of Available Products
Configurating Installation
Once you click Proceed, you will then be given the opportunity to review your choice and make changes to the installation folder. When you're ready to proceed, accept the license agreements and click Proceed once more. If you forgot something or checked the wrong box, click Back and correct your selection.
The Progress Control Panel Installation Configuration Page
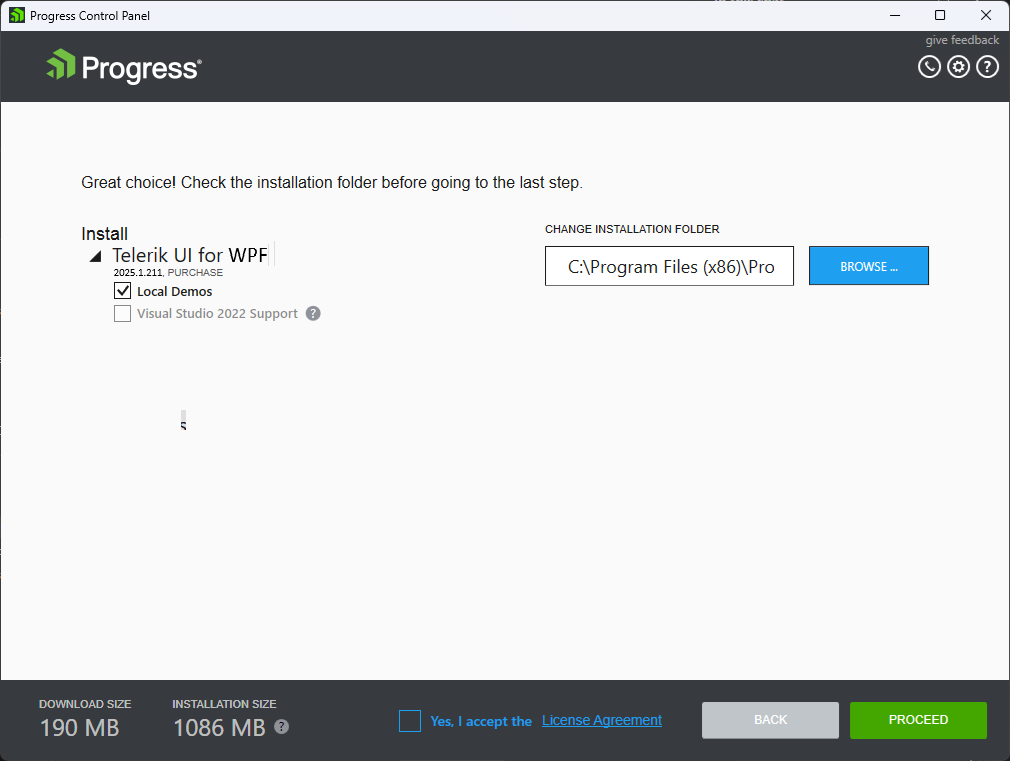
When you click Proceed, the Progress Control Panel will download the necessary files for installation and then install them to the location you selected.
Next Steps
After the installation is complete, you will be returned to the main screen to install or update more products.
The Progress Control Panel with Telerik UI for WPF Installed
You can now start creating your first Telerik UI for WPF project.