Edit Appointment
This topic describes the work flow for editing an appointment in RadScheduleView control.
Using UI
RadScheduleView uses one and the same dialog to create and edit appointments. This topic describes the end-user's work flow for editing an existing appointment.
In order to edit an appointment just double click it in the RadScheduleView.
If the appointment is not a recurrent one, the edit appointment dialog appears immediately.
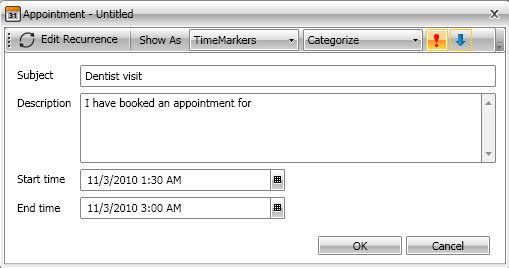
After the edit appointment dialog is opened, you can change the Subject, Description, Start and End time of the appointment.
You can also change or assign category, time marker or importance by using the tool bar controls.
You can also change the appointment recurrent.
If you have completed the appointment edit, click the 'Save & Close' button or press the Enter key.
If you want to cancel the appointment creation, click the X button or press the Esc key.
Using code
You can edit an appointment using the code. Here are the steps to accomplish this:
Call BeginEdit() method of the RadScheduleView control. It returns whether or not the appointment or the occurrence can be edited. This method has 3 overloads:
If BeginEdit() returns True - edit the appointment or the occurrence.
Call Commit() method to commit the changes and to update the UI.
if (this.radScheduleView.BeginEdit(appointment))
{
    appointment.Subject = "New Subject";
    this.radScheduleView.Commit();
}
If Me.radScheduleView.BeginEdit(appointment) Then
 appointment.Subject = "New Subject"
 Me.radScheduleView.Commit()
End If