Custom Gridline
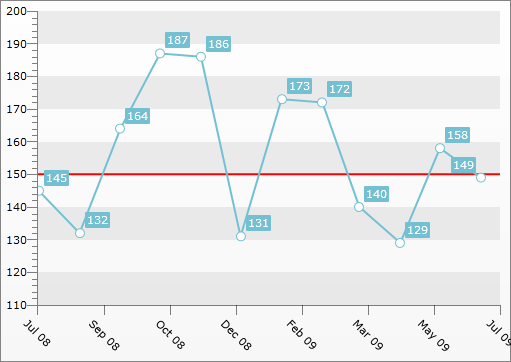
The Custom Gridline allows you to place a vertical or horizontal gridline at a specific place in your ChartArea. This allows you to mark a specific value on the Y-Axis and/or the X-Axis, which can, for example, serve as a border value. In order to place the Custom GridLine you have to add a CustomGridLine object to the Annotations collection of the ChartArea. You also have to set either its XIntercept or YIntercept properties. These properties allow you to specify the value of the X- and Y-Axis, for which the gridline should be placed.
You can place more than one CustomGridLine in your ChartArea.
The XIntercept and the YIntercept are of type double. Therefore, if the respective axis displays DateTime values, you have to pass converted to OLE Automation dates to them. For more information see DateTime.ToOADate().
In order to customize the appearance of the CustomGridLine you can simply set its Stroke (will change its color) and its StrokeThickness (will change the thickness of the line).
If you have multiple y-axes, you can specify to which the CustomGridLine should be applied by setting the x:Name value of the appropriate Y-Axis to the YAxisName property of the CustomGridLine.
Here is an example:
<telerik:RadChart x:Name="radChart">
    <telerik:RadChart.DefaultView>
        <telerik:ChartDefaultView>
            <telerik:ChartDefaultView.ChartArea>
                <telerik:ChartArea>
                    <telerik:ChartArea.Annotations>
                        <telerik:CustomGridLine YIntercept="150"
                                                Stroke="Red"
                                                StrokeThickness="2" />
                    </telerik:ChartArea.Annotations>
                </telerik:ChartArea>
            </telerik:ChartDefaultView.ChartArea>
        </telerik:ChartDefaultView>
    </telerik:RadChart.DefaultView>

</telerik:RadChart>
CustomGridLine gridline = new CustomGridLine();
gridline.YIntercept = 150;
gridline.Stroke = new SolidColorBrush(Colors.Red);
gridline.StrokeThickness = 2;
this.radChart.DefaultView.ChartArea.Annotations.Add(gridline);
Dim gridline As New CustomGridLine()
gridline.YIntercept = 150
gridline.Stroke = New SolidColorBrush(Colors.Red)
gridline.StrokeThickness = 2
Me.radChart.DefaultView.ChartArea.Annotations.Add(gridline)

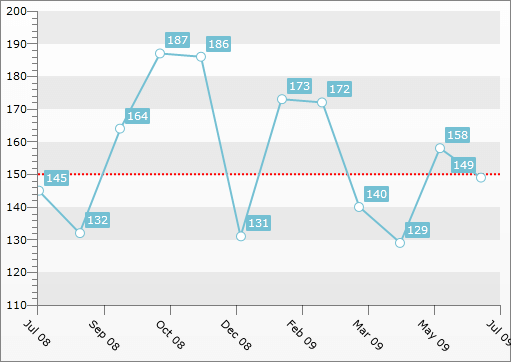
Additional customizations can be done via the ElementStyle property. It gets applied to the Line element that visually represents the CustomGridLine. Via this style you can set the StrokeDashArray property for example.
<FrameworkElement.Resources>
    <Style x:Key="CustomGridLineStyle"
    TargetType="Line">
        <Setter Property="StrokeDashArray"
        Value="1,1" />
    </Style>
</FrameworkElement.Resources>
<!--...-->
<telerik:RadChart>
    <telerik:RadChart.DefaultView>
        <telerik:ChartDefaultView>
            <telerik:ChartDefaultView.ChartArea>
                <telerik:ChartArea>
                    <telerik:ChartArea.Annotations>
                        <telerik:CustomGridLine YIntercept="150"
                                        Stroke="Red"
                                        StrokeThickness="2"
                                        ElementStyle="{StaticResource CustomGridLineStyle}" />
                    </telerik:ChartArea.Annotations>
                </telerik:ChartArea>
            </telerik:ChartDefaultView.ChartArea>
        </telerik:ChartDefaultView>
    </telerik:RadChart.DefaultView>
    <!--...-->
</telerik:RadChart>
This can be done in code behind too.
