Telerik UI for WinForms Controls in WPF Application
This article demonstrates how the Telerik UI for WinForms controls can be integrated in a WPF application.
Creating the WinForms Project
Let's start by creating the Windows Forms Class Library.
1. Launch Visual Studio, and open the New Project dialog box.
2. In Visual C# and the Windows category, select the Windows Forms Control Library template.
3. Name the new project TelerikWinFormsControls.
4. For the location, specify a conveniently named top-level folder, such as WpfHostingWinFormsControl. Later, you will put the host application in this folder.
5. Click OK to create the project. The default project contains a single control named UserControl1.
Your project should have references to the following system assemblies. If any of these dlls are not included by default, add them to your project.
- System
- System.Data
- System.Drawing
- System.Windows.Forms
- System.Xml
In addition, add a reference to the Telerik.WinControls, Telerik.WinControls.UI and Telerik.Common assemblies from your Telerik UI for WinForms installation or use the respective NuGet package.
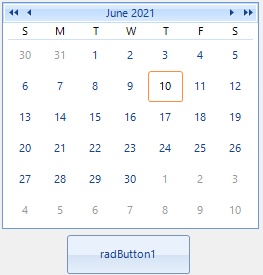
Drag a RadCalendar and a RadButton to the designer from the Toolbox.
Figure 1: The Telerik WinForms controls in the designer
Create the WPF Application
To create the hosting WPF application:
1. Launch Visual Studio, and open the New Project dialog box.
2. In Visual C# and the Windows category, select the WPF Application template.
3. Name the new project WPFHost.
4. For the location, specify the same top-level folder that contains the TelerikWinFormsControls project.
5. Click OK to create the project.
You also need to add references to the DLL that contains UserControl1 and other assemblies.
1. Right-click the project name in Solution Explorer, and select Add Reference.
2. Add a project reference to the TelerikWinFormsControls project.
3. Add a reference to the WindowsFormsIntegration assembly, which is named WindowsFormsIntegration.dll.
Include the WinForms Controls in the WPF Application
Define the following XAML in the MainWindow.xaml file:
Example 1: The XAML layout in UserControl1.xaml
<WindowsFormsHost>
    <wfcontrols:UserControl1 />
</WindowsFormsHost>
Example 2: The wfcontrols namespace
xmlns:wfcontrols="clr-namespace:TelerikWinFormsControls;assembly=TelerikWinFormsControls"
As a result, the Telerik Windows Forms controls are rendered as part of the WPF window, and you can communicate with them from the application.
Figure 2: The Telerik WinForms controls in the WPF application