Getting Started
This help article shows how to create a DataGrid from scratch using the DataGrid related classes in the Telerik UI for Universal Windows Platform.
Since version Q1 2015 the RadDataGrid needs references to the following assemblies:
- Telerik.Core.dll
- Telerik.Data.dll
- Telerik.UI.Xaml.Primitives.dll
- Telerik.UI.Xaml.Input.dll
- Telerik.UI.Xaml.Grid.dll
If you use a version prior to Q1 2015, you will have to add referencse to the following assemblies:
- Telerik.Core.dll
- Telerik.UI.Xaml.Primitives.dll
- Telerik.UI.Xaml.Input.dll
- Telerik.UI.Xaml.Grid.dll
Alternatively, you can add a reference to Telerik UI for Universal Windows Platform SDK.
Next, add the Telerik.UI.Xaml.Controls.Grid namespace:
xmlns:telerikGrid="using:Telerik.UI.Xaml.Controls.Grid"
Now declare the DataGrid which is in the Telerik.UI.Xaml.Controls.Grid namespace. Here is the XAML declaration:
<telerikGrid:RadDataGrid x:Name="DataGrid"/>
Next, load it with data. This is, pass Business objects to the DataGrid.ItemsSource property.
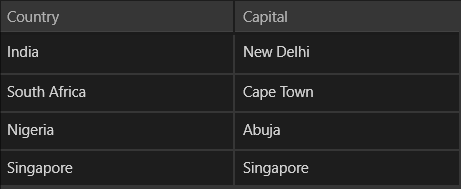
By default, the DataGrid control will auto generate rows depending on the number of objects and columns depending on the object's properties.
Here's how we can achieve this:
this.DataGrid.ItemsSource = new List<Data>
 {
     new Data { Country = "India", Capital = "New Delhi"},
     new Data { Country = "South Africa", Capital = "Cape Town"},
     new Data { Country = "Nigeria", Capital = "Abuja" },
     new Data { Country = "Singapore", Capital = "Singapore" }
 };
Where Data is a custom business object:
public class Data
{
    public string Country { get; set; }

    public string Capital { get; set; }
}
And the result is:
