MySQL Database
Cloud SQL is a fully-managed database service that makes it easy to set up, maintain, manage, and administer your relational PostgreSQL BETA and MySQL databases in the cloud. Cloud SQL offers high performance, scalability, and convenience. Hosted on Google Cloud Platform, Cloud SQL provides a database infrastructure for applications running anywhere.
Using database on the cloud provides you with lots of advantages such as better focus on your application, no need of installations and backups, high performance and scalability.
Google Cloud SQL supports PostgreSQL (in Beta at the time of writing this article) and MySQL databases. For the purpose of this article we are going to show you a simple example on how to visualize data from MySQL database within a RadGridView control.
Prerequisites
1. In order to create a database, you need to first enable the Cloud SQL Administration API and set up the billing for your account through the GCP console.
2. As a next step, you should create a MySQL instance which can hold different MySQL databases.
3. Finally, you can create the database instance as shown in the official Quickstart for Cloud SQL for MySQL. We are going to use this exact database in this example as well. Make sure that you have added several entities so that you are not working with an empty database.
Integration with RadDataGrid
Once you have created the database and added different entities within it, you can use some of Telerik UI for UWP's data controls to visualize the data in your .NET application. We are going to use a RadDataGrid.
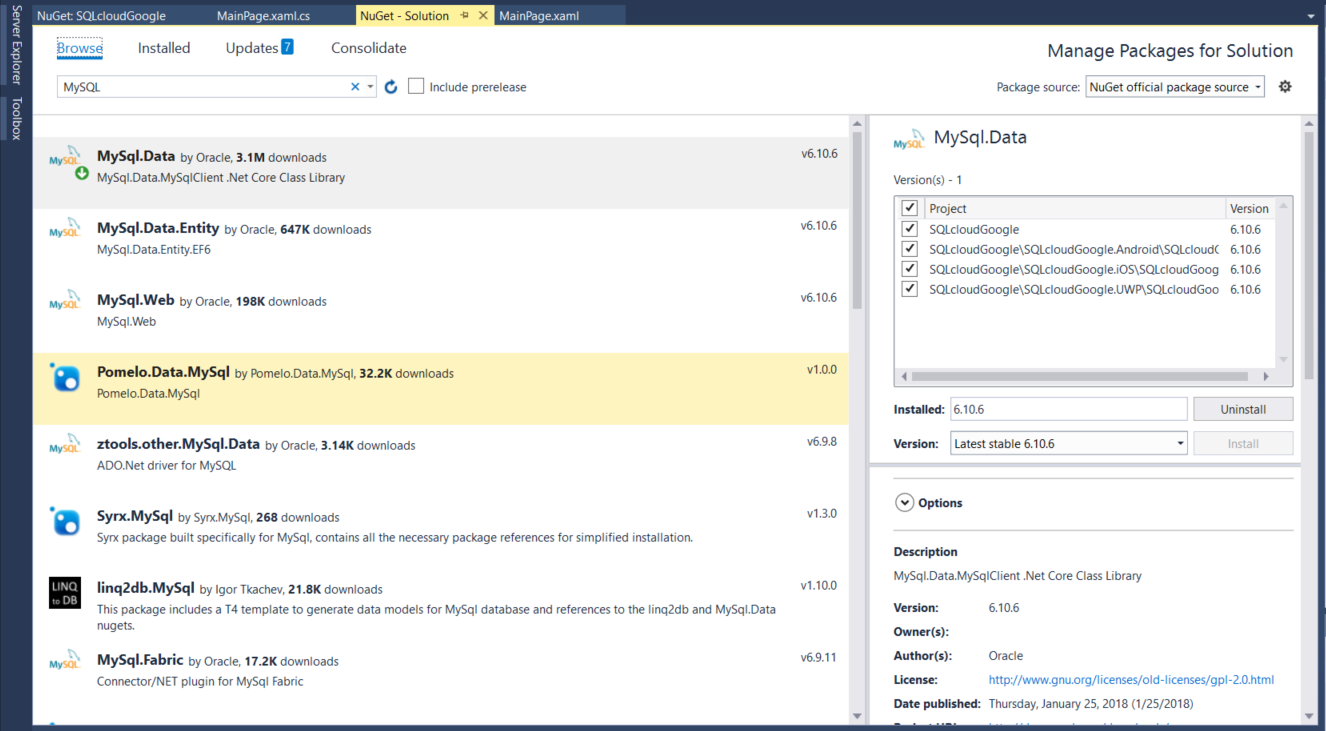
As we are going to work with a MySQL database, you need to install some MySQL .NET Connector - the connector that enabled .NET applications to communicate with MySQL servers. More information can be found on the following link - MySQL Connector/NET Developer Guide
You can install the MySQL.Data NuGet package as shown in the image below:
Next, you need to initialize a connection to your database. You can directly add the database server IP. For the purpose of the demo, we have added a test user in your MySQL instance through the GCP console:

The IP address of your SQL instance can be found in the Overview tab of the instance in the GCP console. The following method can be used to initialize the connection:
private MySqlConnection connection;
private string server;
private string database;
private string uid;
private string password;

private void Initialize()
{
    server = "123.123.123.123"; //enter the address of your SQL instance
    database = "guestbook";
    uid = "netuser";
    password = "admin";
    string connectionString;
    connectionString = "SERVER=" + server + ";" + "DATABASE=" +
    database + ";" + "UID=" + uid + ";" + "PASSWORD=" + password + ";";

    connection = new MySqlConnection(connectionString);
}
As a Next step, you need to open the connection as in the method below:
    private bool OpenConnection()
    {
        try
        {
            connection.Open();
            return true;
        }
        catch (MySqlException ex)
        {
            switch (ex.Number)
            {
                case 0:
                    Debug.WriteLine("Cannot connect to server.  Contact administrator");
                    break;

                case 1045:
                    Debug.WriteLine("Invalid username/password, please try again");
                    break;
            }
            return false;
        }
    }
You can create a similar method for closing the connection when needed.
Finally, we have to select the data from the database and assign it as an ItemsSource of the RadDataGrid control.
 public List<Guest> Select()
    {
        string query = "SELECT * FROM entries";

        //Create a list to store the result
        List<Guest> list = new List<Guest>();

        //Open connection
        if (this.OpenConnection() == true)
        {
            //Create Command
            MySqlCommand cmd = new MySqlCommand(query, connection);
            MySqlDataReader dataReader = cmd.ExecuteReader();

            //Read the data and store them in the list
            while (dataReader.Read())
            {
                Guest guest = new Guest();
                guest.GuestName = dataReader["guestName"].ToString();
                guest.Content = dataReader["content"].ToString();
                guest.EntryId = Int32.Parse(dataReader["entryID"].ToString());
                list.Add(guest);
            }

            //close Data Reader
            dataReader.Close();

            //close Connection
            this.CloseConnection();

            //return list to be displayed
            return list;
        }
        else
        {
            return list;
        }
    }
Where you have created a custom Guest class:
public class Guest
{
    public string GuestName { get; set; }
    public string Content { get; set; }
    public int EntryId { get; set; }

}
Setting this List of guests as an ItemsSource of the RadDataGrid:
this.dataGrid.ItemsSource = Select();
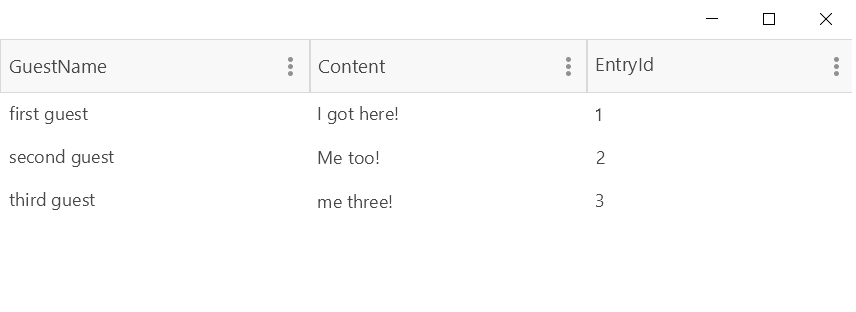
Here is the RadDataGrid after it is populated: