RadDocument
RadDocument is the root element for RadRichTextBox's content. It holds the collection of Sections defined for the RadRichTextBox content. It also enables you to configure the appearance of its child elements.
Work with the Contents of RadDocument Through its API
The RadDocument class exposes numerous properties and methods enabling you to control settings and apply modifications related to the document. The next list shows several of the most used properties:
LayoutMode: Specifies whether the page should be in Paged, Flow or FlowNoWrap layout mode. To learn more about layout modes, read here.
-
SectionDefaultPageSize: This property is of type Size and represents the default page size of the document. Example 1 shows how to use it.
Example 1: Setting SectionDefaultPageSize
    <telerik:RadRichTextBox x:Name="radRichTextBox" LayoutMode="Paged">
        <telerik:RadDocument SectionDefaultPageSize="500,1000" />
    </telerik:RadRichTextBox>
The SectionDefault~ settings get applied only when Paged layout mode is used.
SectionDefaultPageMargin: Defines the default margin for each of the sections in the RadDocument. To assign different margins for each of the sections, use the respective property of the Section class.
SectionDefaultPageOrientation: Defines the default section page orientation. This property is of type PageOrientation and could be set to Portrait or Landscape.
ParagraphDefaultSpacingAfter: Defines the default spacing after for each of the paragraphs in the RadDocument. To assign different spacing after each of the paragraphs, use the respective property of the Paragraph class.
ParagraphDefaultSpacingBefore: Defines the default spacing before for each of the paragraphs in the RadDocument. To assign different spacing before each of the paragraphs, use the respective property of the Paragraph class.
LineSpacing: Specifies the value for the space between the lines.
-
LineSpacingType: Specifies the type of spacing:
- AtLeast: The space between the lines should be equal to or greater than the value of the LineSpacing property.
- Auto: The space between the lines is determined automatically.
- Exact: The space between the lines should equal the value of the LineSpacing property.
ShowFormattingSymbols: Indicates whether the formatting symbols should be displayed or not.
DefaultTabWidth: Specifies the default tab width of the document.
IsEmpty: Allows you to determine whether the document instance has any content.
There are also members allowing you to control different features and functionalities, like:
- Bibliographics
- Document variables and fields
- Captions
- Caret position
- Comments
- Endnotes and footnotes
- Revisions
- Layout and styling settings
- Line breaking rules
- Mail merge
- Protection
- Selection
For the full list of the members refer to the RadDocument API Reference page.
Specifics
The first time a RadDocument is shown inside a RadRichTextBox in the Visual Tree, it is measured by the framework and arranges its children. This is the moment when the layout cycle is completed; each of the document elements calculates its size and arranges its children.
As the two states of the document - measured and not measured are too different, distinct methods for manipulating the content of the document should be used before the document is measured and after the first time that it is shown in the editor.
Adding Sections to RadDocument
As explained in the previous section, the state of the document is essential for the methods that can be used on it.
For example, you can build a RadDocument from scratch and add Sections to it as demonstrated in Example 2.
You can also merge RadDocument instances. For more information, see the Merge Documents section.
Example 2: Add a section to a not measured document
Section section = new Section();
this.radRichTextBox.Document.Sections.Add(section);
Dim section As New Section()
Me.radRichTextBox.Document.Sections.Add(section)
Splitting an already measured document into two sections at the current caret position, on the other hand, can be done by inserting a section break.
Example 3: Insert a Section break in a measured document
this.radRichTextBox.InsertSectionBreak(SectionBreakType.NextPage);
Me.radRichTextBox.InsertSectionBreak(SectionBreakType.NextPage)
More details about the Section element and the section break types is available here.
The distribution of the document content in sections is only visible when the document is in Paged layout mode. Furthermore, the sections and section breaks can be persisted in XAML, Docx and Rtf. If you export the document to HTML or plain text, the section breaks will be lost.
Creating a Document at Run Time
One of the common uses of RadRichTextBox is to create a document programmatically and show it in the editor. RadDocument can contain several other elements:
The whole hierarchy of the document elements can be found here.
Example 4 shows a sample code that creates a new RadDocument instance and assigns it to RadRichTextBox.
Example 4: Create a document in code-behind
RadDocument document = new RadDocument();
Section section = new Section();

Paragraph paragraph1 = new Paragraph();
Stream stream = Application.GetResourceStream(new Uri(@"/RadRichTextBox-Getting-Started;component/Images/RadRichTextBox.png", UriKind.RelativeOrAbsolute)).Stream;
Size size = new Size(236, 50);
ImageInline imageInline = new ImageInline(stream, size, "png");
paragraph1.Inlines.Add(imageInline);
section.Blocks.Add(paragraph1);

Paragraph paragraph2 = new Paragraph();
paragraph2.TextAlignment = Telerik.Windows.Documents.Layout.RadTextAlignment.Center;
Span span1 = new Span("Thank you for choosing Telerik");
paragraph2.Inlines.Add(span1);

Span span2 = new Span();
span2.Text = " RadRichTextBox!";
span2.FontWeight = FontWeights.Bold;
paragraph2.Inlines.Add(span2);
section.Blocks.Add(paragraph2);

Paragraph paragraph3 = new Paragraph();
Span span3 = new Span("RadRichTextBox");
span3.FontWeight = FontWeights.Bold;
paragraph3.Inlines.Add(span3);

Span span4 = new Span(" is a control that is able to display and edit rich-text content including formatted text arranged in pages, paragraphs, spans (runs) etc.");
paragraph3.Inlines.Add(span4);
section.Blocks.Add(paragraph3);

document.Sections.Add(section);

this.radRichTextBox.Document = document;
Dim document As New RadDocument()
Dim section As New Section()

Dim paragraph1 As New Paragraph()
Dim stream As Stream = Application.GetResourceStream(New Uri("/RadRichTextBox-Getting-Started;component/Images/RadRichTextBox.png", UriKind.RelativeOrAbsolute)).Stream
Dim size As New Size(236, 50)
Dim imageInline As New ImageInline(stream, size, "png")
paragraph1.Inlines.Add(imageInline)
section.Blocks.Add(paragraph1)

Dim paragraph2 As New Paragraph()
paragraph2.TextAlignment = Telerik.Windows.Documents.Layout.RadTextAlignment.Center
Dim span1 As New Span("Thank you for choosing Telerik")
paragraph2.Inlines.Add(span1)

Dim span2 As New Span()
span2.Text = " RadRichTextBox!"
span2.FontWeight = FontWeights.Bold
paragraph2.Inlines.Add(span2)
section.Blocks.Add(paragraph2)

Dim paragraph3 As New Paragraph()
Dim span3 As New Span("RadRichTextBox")
span3.FontWeight = FontWeights.Bold
paragraph3.Inlines.Add(span3)

Dim span4 As New Span(" is a control that is able to display and edit rich-text content including formatted text arranged in pages, paragraphs, spans (runs) etc.")
paragraph3.Inlines.Add(span4)
section.Blocks.Add(paragraph3)

document.Sections.Add(section)

Me.radRichTextBox.Document = document
Figure 1: The document created at run time
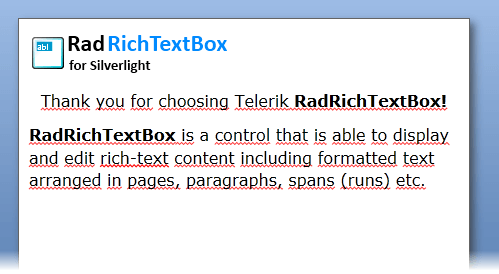
This document is editable. To make it read only you have to set the IsReadOnly property of the RadRichTextBox to True.
To learn more about the read-only feature, read this topic.