Drag and Drop from RadGridView to RadDiagram
This tutorial describes how to implement a drag/drop operation from a data-bound RadGridView to a RadDiagram control using DragDropManager.
Please note that the examples in this tutorial are showcasing the Telerik Windows8 theme. In the Setting a Theme article you can find more information on how to set an application-wide theme.
First we will specify the following ViewModels which are going to be used to populate the RadGridView and RadDiagram controls.
- Employee: A class that will be the DataContext of the RadGridView rows.
- EmployeeGraphSource: A class deriving from the ObservableGraphSourceBase ViewModel that represents the RadDiagram GraphSource.
- MainViewModel: The main ViewModel class of the application.
Example 1: Creating ViewModels
    public class Employee
    {
        public Employee(string firstName, string lastName)
        {
            this.FirstName = firstName;
            this.LastName = lastName;
        }
        public string FirstName { get; set; }
        public string LastName { get; set; }
    }
    public class EmployeeGraphSource : ObservableGraphSourceBase<NodeViewModelBase, LinkViewModelBase<NodeViewModelBase>>
    {
    }
    public class MainViewModel
    {
        public EmployeeGraphSource EmployeeGraphSource { get; set; }
        public ObservableCollection<Employee> EmployeeData { get; set; }

        public MainViewModel()
        {
            EmployeeData = GetEmployee();
            EmployeeGraphSource = new EmployeeGraphSource();
        }

        private ObservableCollection<Employee> GetEmployee()
        {
            var data = new ObservableCollection<Employee>();
            data.Add(new Employee("Nancy", "Davolio"));
            data.Add(new Employee("Andrew", "Fuller"));
            data.Add(new Employee("Janet", "Leverling"));
            data.Add(new Employee("Margaret", "Peacock"));
            data.Add(new Employee("Steven", "Buchanan"));
            data.Add(new Employee("Michael", "Suyama"));
            data.Add(new Employee("Robert", "King"));
            data.Add(new Employee("Laura", "Callahan"));
            data.Add(new Employee("Anne", "Dodsworth"));
            return data;
        }
    }
Example 2: Defining RadDiagram and RadGridView in XAML
<Grid>
    <Grid.ColumnDefinitions>
        <ColumnDefinition Width="Auto"/>
        <ColumnDefinition Width="*"/>
    </Grid.ColumnDefinitions>

    <telerik:RadGridView x:Name="gridView" Margin="5" Grid.Column="0"
                         CanUserReorderColumns="False"
                         ItemsSource="{Binding EmployeeData}"
                         VerticalAlignment="Top">
    </telerik:RadGridView>

    <telerik:RadDiagram Grid.Column="1" GraphSource="{Binding EmployeeGraphSource}"
                        x:Name="xDiagram">
        <telerik:RadDiagram.ShapeStyle>
            <Style TargetType="telerik:RadDiagramShape" BasedOn="{StaticResource RadDiagramShapeStyle}">
                <Setter Property="Width" Value="120"/>
                <Setter Property="Height" Value="30"/>
                <Setter Property="ContentTemplate">
                    <Setter.Value>
                        <DataTemplate>
                            <TextBlock Text="{Binding Content}"/>
                        </DataTemplate>
                    </Setter.Value>
                </Setter>
                <Setter Property="Position" Value="{Binding Position,Mode=TwoWay}"/>
            </Style>
        </telerik:RadDiagram.ShapeStyle>
        <telerik:RadDiagram.ContainerShapeStyle>
            <Style TargetType="telerik:RadDiagramContainerShape" BasedOn="{StaticResource RadDiagramContainerShapeStyle}">
                <Setter Property="ContentTemplate">
                    <Setter.Value>
                        <DataTemplate>
                            <TextBlock Text="{Binding Content}"/>
                        </DataTemplate>
                    </Setter.Value>
                </Setter>
                <Setter Property="Position" Value="{Binding Position}"/>
            </Style>
        </telerik:RadDiagram.ContainerShapeStyle>
    </telerik:RadDiagram>
</Grid>
Example 3: Setting DataContext
    public MainWindow()
    {
        InitializeComponent();
        this.DataContext = new MainViewModel();
    }
If you run the application now, you should get a structure like in Figure 1:
Figure 1: RadGridView and RadDiagram
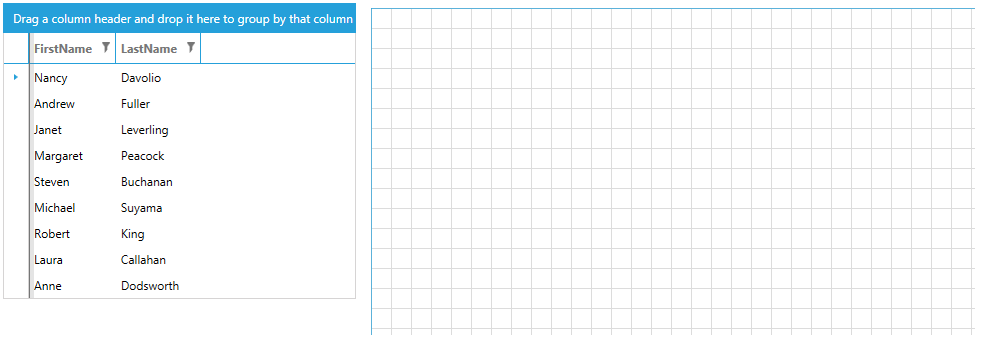
You can observe that you still can't drag-drop a row from the RadGridView to the RadDiagram. This is expected as the drag-drop functionality is still not implemented.
The next step is to make sure that the GridViewRows are draggable. We can do so by applying an implicit style that sets the DragDropManager.AllowDrag attached property to True on every GridViewRow.
Example 4: Setting AllowDrag attached property
<telerik:RadGridView.RowStyle>
    <Style TargetType="telerik:GridViewRow" BasedOn="{StaticResource GridViewRowStyle}">
        <Setter Property="telerik:DragDropManager.AllowDrag" Value="True" />
    </Style>
</telerik:RadGridView.RowStyle>
To create a visual clue that the user has started dragging a row, we can create a custom attached property. In the property changed callback we can subscribe to the DragInitialize event of the RadGridView using DragDropManager. In the event handler we can set the DragVisual property from the event arguments.
Example 5: Creating custom attached property
public class DragDropBehavior
{
    public static readonly DependencyProperty IsEnabledProperty =
        DependencyProperty.RegisterAttached(
            "IsEnabled",
            typeof(bool),
            typeof(DragDropBehavior),
            new PropertyMetadata(new PropertyChangedCallback(OnIsEnabledPropertyChanged)));

    public static bool GetIsEnabled(DependencyObject obj)
    {
        return (bool)obj.GetValue(IsEnabledProperty);
    }

    public static void SetIsEnabled(DependencyObject obj, bool value)
    {
        obj.SetValue(IsEnabledProperty, value);
    }

    private static void OnIsEnabledPropertyChanged(DependencyObject dependencyObject, DependencyPropertyChangedEventArgs e)
    {
        var gridView = dependencyObject as RadGridView;
        if (gridView != null)
        {
            DragDropManager.AddDragInitializeHandler(gridView, OnGridViewRowDragInitialize);
        }
    }

   private static void OnGridViewRowDragInitialize(object sender, DragInitializeEventArgs args)
    {
        args.AllowedEffects = DragDropEffects.All;
        args.DragVisualOffset = new Point(args.RelativeStartPoint.X, args.RelativeStartPoint.Y);
        var employee = (args.OriginalSource as FrameworkElement).DataContext as Employee;
        args.DragVisual = new TextBlock() { Margin = new Thickness(5), Background = Brushes.Bisque, Text = employee.FirstName + " " + employee.LastName };
    }
}
Example 6: Setting the attached property to the RadGridView
<telerik:RadGridView x:Name="gridView" Margin="5" Grid.Column="0"
                     CanUserReorderColumns="False"
                     ItemsSource="{Binding EmployeeData}"
                     VerticalAlignment="Top"
                     local:DragDropBehavior.IsEnabled="True">
    <telerik:RadGridView.RowStyle>
        <Style TargetType="telerik:GridViewRow">
            <Setter Property="telerik:DragDropManager.AllowDrag" Value="True" />
        </Style>
    </telerik:RadGridView.RowStyle>
</telerik:RadGridView>
Example 7: Subcribe to the PreviewDrop event
<telerik:RadDiagram Grid.Column="1" GraphSource="{Binding EmployeeGraphSource}"
                    x:Name="xDiagram"
                    PreviewDrop="RadDiagram_PreviewDrop" >
. . . .
</telerik:RadDiagram>
Example 8: PreviewDrop event handler
private void RadDiagram_PreviewDrop(object sender, System.Windows.DragEventArgs e)
{
    var droppedRow = e.Data.GetData(typeof(GridViewRow));
    var employee = (droppedRow as GridViewRow).DataContext as Employee;

    NodeViewModelBase node = new NodeViewModelBase();
    node.Position = e.GetPosition(this.xDiagram);
    node.Content = employee.FirstName + " " + employee.LastName;

    (this.DataContext as MainViewModel).EmployeeGraphSource.AddNode(node);
    (this.DataContext as MainViewModel).EmployeeData.Remove(employee);
}
For a more complex example, you can check out the DragDropToDiagram example in the RadGridView SDK examples section.