First Steps by Installing from a NuGet Package
NuGet is a popular .NET package manager. Progress maintains the Telerik NuGet Feed for registered users and you can include the Telerik UI for ASP.NET AJAX suite in your project as well as update to the latest available version from there. Installing the Telerik UI for ASP.NET AJAX library with NuGet works both for Windows and MacOS machines.
The legacy Telerik NuGet server is now deprecated. Make sure to switch to the new Telerik NuGet server, which is faster, lighter, and reduces the number of requests from your NuGet client.
This tutorial describes how to get up and running with the Telerik UI for ASP.NET AJAX library by downloading and installing the controls with NuGet.
- First, you will add the Telerik NuGet feed to Visual Studio and install the Telerik UI for ASP.NET AJAX library.
- Next, you'll create your ASP.NET AJAX application and add the Editor control to it.
- Then, you will dive deeper by defining the HtmlChart control and binding it to sample data.
- Finally, you will add some styling to the controls.
What about a free Telerik UI onboarding course? Learn how to take advantage of the Telerik Virtual Classroom.
Prerequisites
The following prerequisites are required for accomplishing the scenario in this tutorial. For more information on the third-party tooling versions supported by Telerik UI for ASP.NET AJAX, refer to the list with system requirements.
Install the ASP.NET Web Forms application on your development or production machine. ASP.NET Web Forms is available in the .NET 4.0-4.8 installations.
If a new user, create a Telerik account.
Step 1: Add the Telerik NuGet Feed to Visual Studio
Adding the Telerik NuGet feed to Visual Studio allows you to quickly install the required Telerik packages to your project.
The following video demonstrates the steps for adding the Telerik NuGet feed to Visual Studio. If you prefer, however, you can follow the steps that are listed in writing after the video.
To configure the Telerik NuGet Feed in Visual Studio:
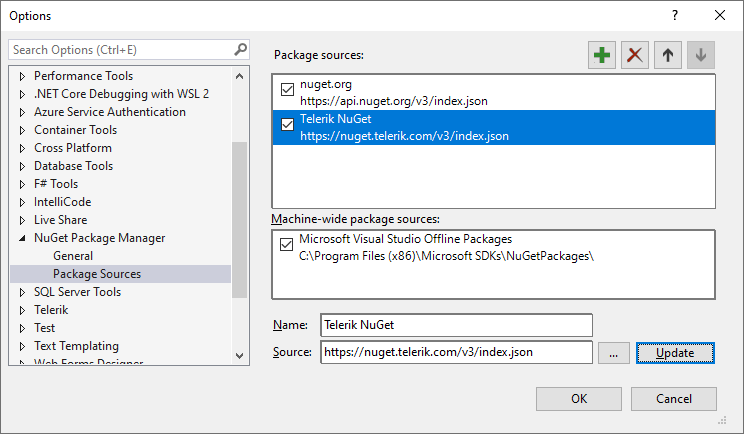
Open Visual Studio and go to Tools > NuGet Package Manager > Package Manager Settings.
Select Package Sources and then click the + button to add a new package source.
Enter a Name for the new package source, for example, Telerik NuGet.
-
Add the
https://nuget.telerik.com/v3/index.jsonURL as a Source. Click OK.The Visual Studio NuGet package manager and the Telerik NuGet feed
Step 2: Install Telerik UI for ASP.NET AJAX
Now that you have successfully added the Telerik NuGet feed as a package source, you need to authenticate your local NuGet instance, display the available packages, and install Telerik UI for ASP.NET AJAX:
Create a new WebForms project or open an existing one.
Go to Tools > NuGet Package Manager > Manage NuGet Packages for Solution....
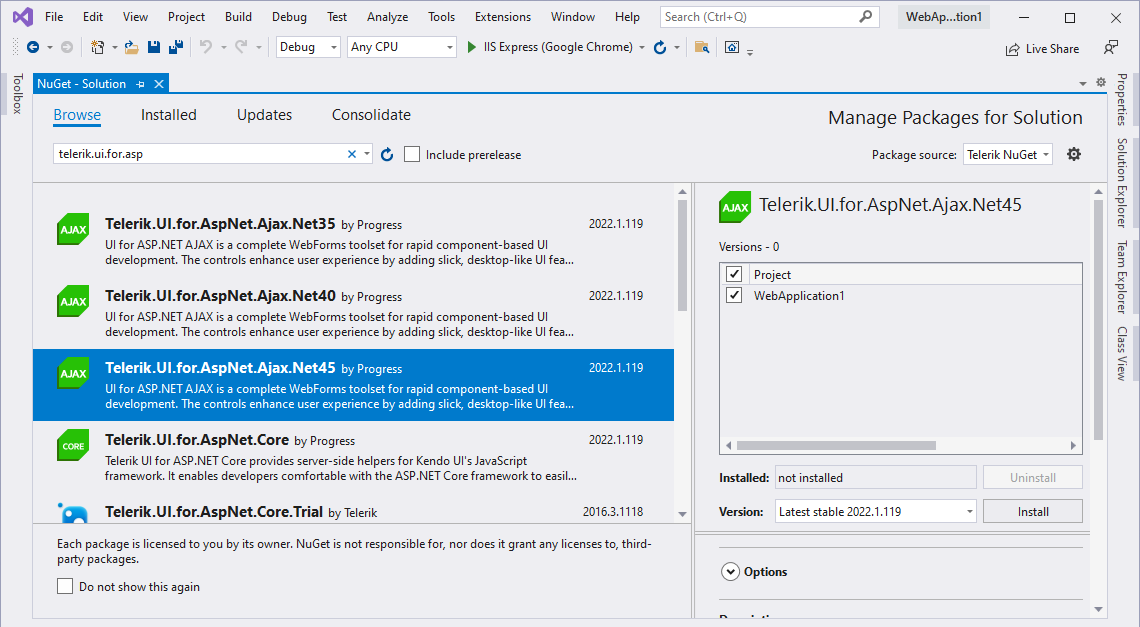
Select the Telerik NuGet Package source from the drop-down list on the left.
Select the Browse tab to see the available packages. In older Visual Studio versions, this tab is called Online.
-
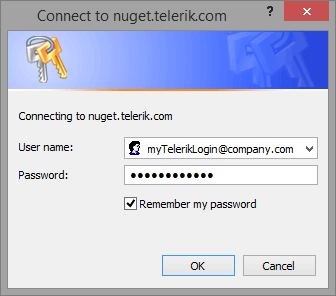
Enter your Telerik credentials in the Windows Authentication dialog.
Enter your Telerik credentials to access the Telerik NuGet feed
-
Select the desired Telerik UI for ASP.NET AJAX package and click Install. To select the correct package version for your project, the .NET version of your project must correspond to the
.Net<version>portion of the package name. For example, the correct package for.NET Framework 4projects isTelerik.UI.for.AspNet.Ajax.Net40.Add the Telerik UI for ASP.NET AJAX package to the solution
Unlike the Telerik UI for ASP.NET AJAX MSI package installation, the NuGet package does not automatically add the UI components to the Visual Studio toolbox. To add them manually, refer to the article on adding the Telerik controls to the Visual Studio toolbox.
Additionally, the NuGet does not install the Visual Studio Extensions for Telerik® UI for ASP.NET AJAX, which are valuable tools for WebForms developers working with the Telerik ASP.NET Web Forms components. However, these extensions can be downloaded and installed as a separate product from the Visual Studio Gallery.
Step 3: Add the Editor to Your Project
The Web Forms Site created through the Telerik project templates includes all basic references and registrations required by the Telerik UI for ASP.NET AJAX controls, including a ScriptManager control, which is required by all AJAX controls. That's why you can add the Editor to the page in a simple way as demonstrated in this step.
Alternatively, you can add the Editor to your project by dragging it directly from the VS toolbox. For more information, refer to the article on adding the Telerik controls to the Visual Studio toolbox.
-
Open
Default.aspxand declareRadEditorright afterRadScriptManager:<telerik:RadScriptManager ID="RadScriptManager1" runat="server"></telerik:RadScriptManager> <telerik:RadEditor runat="server" ID="RadEditor1" </telerik:RadEditor> -
Set the
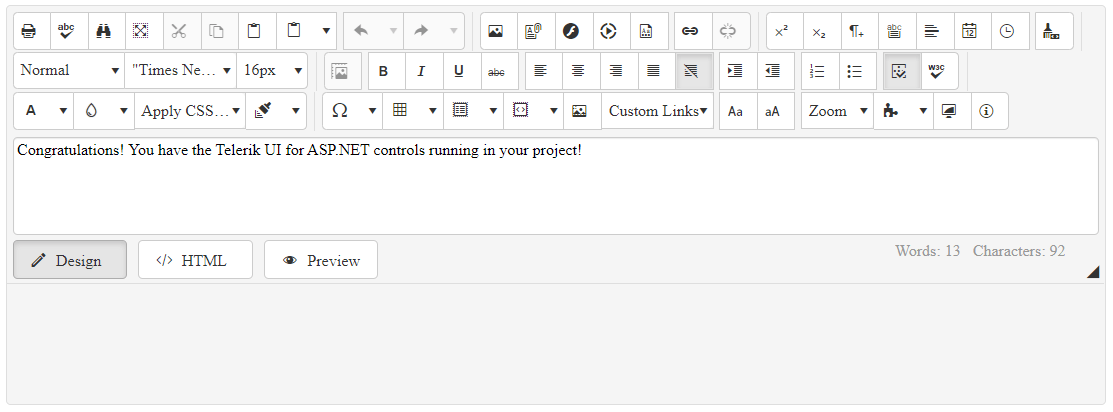
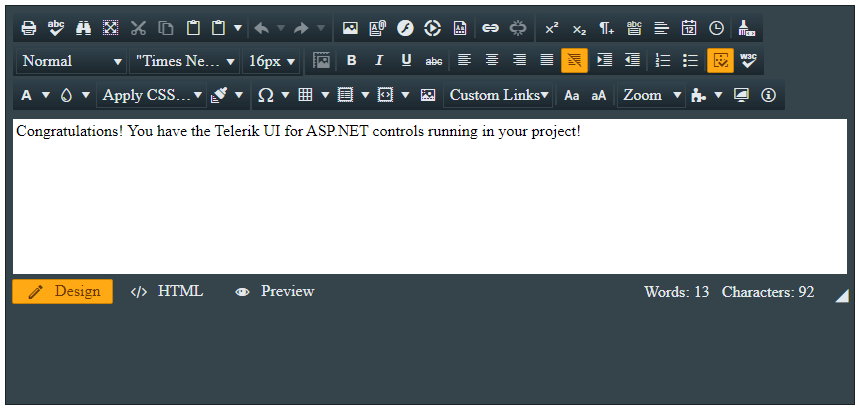
RenderModeandContentproperties of the Editor:<telerik:RadScriptManager ID="RadScriptManager1" runat="server"></telerik:RadScriptManager> <telerik:RadEditor runat="server" ID="RadEditor1" RenderMode="Lightweight"> <Content> Congratulations! You have the Telerik UI for ASP.NET controls running in your project! </Content> </telerik:RadEditor> Run your page by pressing
F5.
Add the Editor to the page
Step 4: Add the HtmlChart to Your Project
Let’s dive a little bit deeper in the configuration of the controls from the UI for ASP.NET AJAX suite. By following the steps below, you will create a data-bound HtmlChart. You will also add a handy tooltip that shows the values from a custom data field.
The sample uses a DataTable, but you can bind the HtmlChart to a preferred data source type. The page already contains a ScriptManager control, so you are ready to declare the HtmlChart right after the Editor control that you added in the previous step:
-
In
Default.aspx, define an HtmlChart withID="RadHtmlChart1":<telerik:RadHtmlChart ID="RadHtmlChart1" runat="server"> </telerik:RadHtmlChart> -
Add a
ChartTitleto the created HtmlChart:<telerik:RadHtmlChart ID="RadHtmlChart1" runat="server"> <ChartTitle Text="Sales Log"></ChartTitle> </telerik:RadHtmlChart> -
Add
ColumnSeriesto thePlotArea.Seriescollection of the control:<telerik:RadHtmlChart ID="RadHtmlChart1" runat="server"> <ChartTitle Text="Sales Log"></ChartTitle> <PlotArea> <Series> <telerik:ColumnSeries Name="Clothes"></telerik:ColumnSeries> </Series> </PlotArea> </telerik:RadHtmlChart> -
In the code-behind of the page, create a
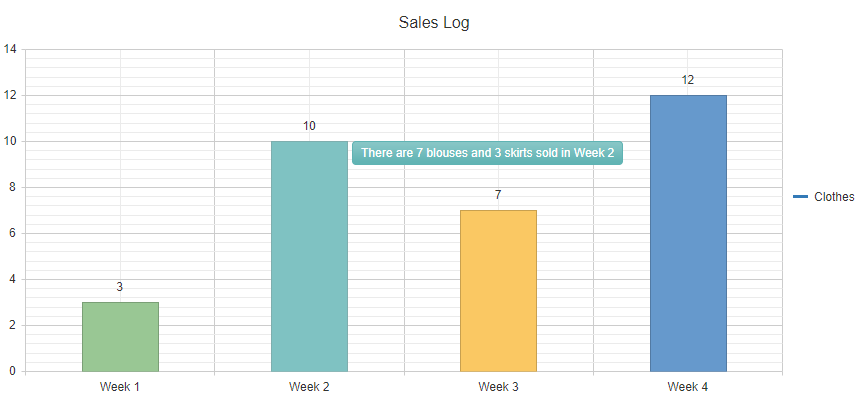
GetData()method. This method returns the sample data that you will bind to the chart:private DataTable GetData() { DataTable dt = new DataTable(); dt.Columns.Add("labels"); dt.Columns.Add("values"); dt.Columns.Add("colors"); dt.Columns.Add("description"); dt.Rows.Add("Week 1", 3, "#99C794", " 1 blouse and 2 trousers"); dt.Rows.Add("Week 2", 10, "#5FB3B3", "7 blouses and 3 skirts"); dt.Rows.Add("Week 3", 7, "#FAC863", "7 skirts"); dt.Rows.Add("Week 4", 12, "#6699CC", "5 blouses, 5 trousers and 2 skirts"); return dt; } ````Private Function GetData() As DataTable Dim dt As DataTable = New DataTable() dt.Columns.Add("labels") dt.Columns.Add("values") dt.Columns.Add("colors") dt.Columns.Add("description") dt.Rows.Add("Week 1", 3, "#99C794", " 1 blouse and 2 trousers") dt.Rows.Add("Week 2", 10, "#5FB3B3", "7 blouses and 3 skirts") dt.Rows.Add("Week 3", 7, "#FAC863", "7 skirts") dt.Rows.Add("Week 4", 12, "#6699CC", "5 blouses, 5 trousers and 2 skirts") Return dt End Function ```` -
Configure the data source of the chart to use the created sample data:
    protected void Page_Load(object sender, EventArgs e)
{
    if (!IsPostBack)
    {
        RadHtmlChart1.DataSource = GetData();
    }
}
````
Protected Sub Page_Load(ByVal sender As Object, ByVal e As EventArgs) Handles Me.Load If Not IsPostBack Then RadHtmlChart1.DataSource = GetData() End If End Sub ```` -
Set the
colorsandvaluesfield names to the SeriesDataFieldYandColorFieldproperties:<telerik:RadHtmlChart ID="RadHtmlChart1" runat="server"> <ChartTitle Text="Sales Log"></ChartTitle> <PlotArea> <Series> <telerik:ColumnSeries Name="Clothes" DataFieldY="values" ColorField="colors"></telerik:ColumnSeries> </Series> </PlotArea> </telerik:RadHtmlChart> -
Set the
labelsfield name to thePlotArea.XAxis.DataLabelsFieldvalue:<telerik:RadHtmlChart ID="RadHtmlChart1" runat="server"> <ChartTitle Text="Sales Log"></ChartTitle> <PlotArea> <Series> <telerik:ColumnSeries Name="Clothes" DataFieldY="values" ColorField="colors"></telerik:ColumnSeries> </Series> <XAxis DataLabelsField="labels"></XAxis> </PlotArea> </telerik:RadHtmlChart> -
Define a
TooltipsAppearancenested tag in the series declaration. Then define a custom Tooltip template in it. All fields from the passed data source are available through thedataItemobject of the template:<telerik:RadHtmlChart ID="RadHtmlChart1" runat="server"> <ChartTitle Text="Sales Log"></ChartTitle> <PlotArea> <Series> <telerik:ColumnSeries Name="Clothes" DataFieldY="values" ColorField="colors"> <TooltipsAppearance> <ClientTemplate> There are #=dataItem.description# sold in #=category# </ClientTemplate> </TooltipsAppearance> </telerik:ColumnSeries> </Series> <XAxis DataLabelsField="labels"></XAxis> </PlotArea> </telerik:RadHtmlChart> Run the page by pressing
F5. You are expected to see something similar to the following image:
Bound HtmlChart with a custom Tooltip template
Step 5: Style the Controls
Telerik UI for ASP.NET AJAX provides more than 20 predefined skins that allow you to change the look and feel of each component. To use the desired skin, set the skin name as the Skin property value of the control:
<telerik:RadEditor runat="server" ID="RadEditor2" Skin="Glow" RenderMode="Lightweight">
    <Content>
        Congratulations! You have the Telerik UI for ASP.NET controls running in your project!
    </Content>
</telerik:RadEditor>
Apply the Glow skin to the Editor
That was it! Now you are ready to dive more deeply into Telerik UI for ASP.NET AJAX and take full advantage of its slick functionalities!