Getting Started with the Telerik WebForms Wizard
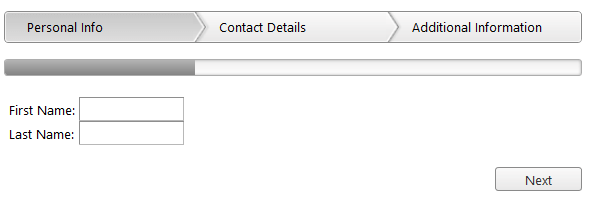
The following tutorial demonstrates how you can add a RadWizard control with three steps. The end result will be similar to Figure 1:
Figure 1: RadWizard with three steps.

Add a ScriptManager control on a Web Form.
Add a RadWizard control on this AJAX-enabled Web Form: Example 1: Declaration of a RadWizard control:
 <telerik:RadWizard RenderMode="Lightweight" ID="RadWizard2" runat="server" Width="550px">
    <WizardSteps>
        <telerik:RadWizardStep Title="Personal Infor">
            <telerik:RadTextBox RenderMode="Lightweight" ID="FirstNameTextBox" Label="First Name:" runat="server"></telerik:RadTextBox>
            <br />
            <telerik:RadTextBox RenderMode="Lightweight" ID="LastNameTextBox" Label="Last Name:" runat="server"></telerik:RadTextBox>
        </telerik:RadWizardStep>
        <telerik:RadWizardStep Title="Contact Details">
        </telerik:RadWizardStep>
        <telerik:RadWizardStep Title="Additional Information">
        </telerik:RadWizardStep>
    </WizardSteps>
</telerik:RadWizard>