Tutorial on Creating a Context Menu at Design Time
The following tutorial demonstrates how to build and attach Context Menus to RadTreeNodes. The tutorial also shows how to respond to Context Menu clicks both from the server and client sides.
Add a RadTreeView control to a new web page.
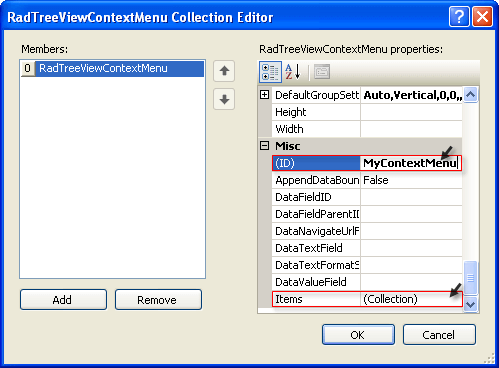
In the Properties Window, click the ContextMenus property ellipses button. This step will display the RadTreeViewContextMenu Collection Editor dialog.
Click the Add button to add a new RadTreeViewContextMenu item.
In the properties window on the right side of the dialog, set the ID property to "MyContextMenu". Locate the Items property and click the ellipses button. This step will display the RadContextMenu Item Builder dialog.
In the RadContextMenuItem Builder dialog click the Add Root Item button twice, select the second item and click the Add Child Item button twice.
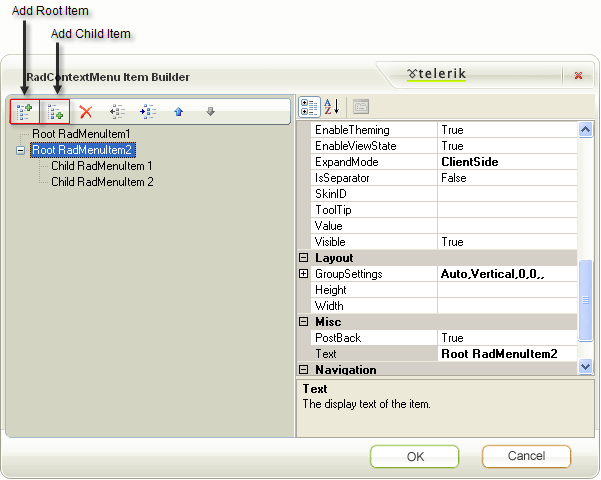
Select the first item and set the Text property of the two root Items to "Edit" and "Add". Set the Text property of "Add" child Items to "Before" and "After". The RadContextMenu Item Builder dialog should look something like the screenshot below.
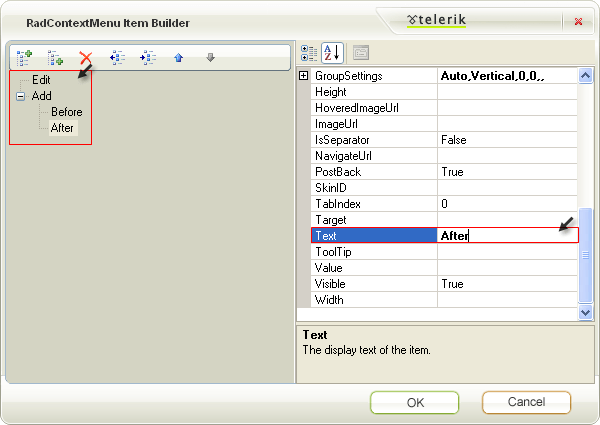
Click OK to close the RadContextMenu Item Builder dialog.
Click OK to close the RadTreeViewContextMenu Collection Editor dialog.
Open the RadTreeView Smart Tag and click the Build RadTreeView link. This step will open the RadTreeView Item Builder.
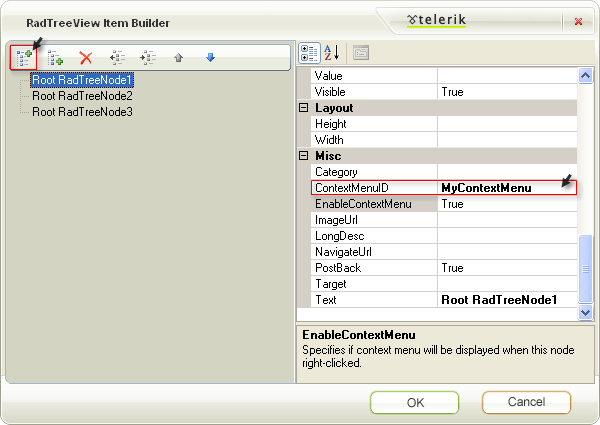
Click the Add Root Node button three times to create three RadTreeNode objects. Set the ContextMenuID property for all three items to "MyContextMenu".
Click the events button the Properties Window for the RadTreeView. Locate the ContextMenuItemClick event and double-click. This step will create a ContextMenuItemClick event handler and display the code view for it.
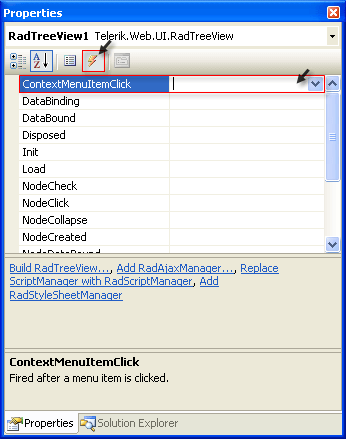
-
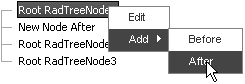
In the ContextMenuItemClick event handler add the code below. The code here handles the "Add Before" and "Add After" menu items. The "Edit" item will be handled on the client side in the following steps. Also notice the reference to *Telerik.Web.UI** used to support the RadTreeNode type.
using System;using Telerik.Web.UI;
namespace RadTreeView_ContextMenu
{
public partial class _Default : System.Web.UI.Page
{
    protected void RadTreeView1_ContextMenuItemClick(object sender, Telerik.Web.UI.RadTreeViewContextMenuEventArgs e)
    {
        if (e.MenuItem.Text == "Before")
        {
            e.Node.InsertBefore(new RadTreeNode("New Node Before"));

        }
        else if (e.MenuItem.Text == "After")
        {
            e.Node.InsertAfter(new RadTreeNode("New Node After"));
        }
    }
}
}
Imports System Imports Telerik.Web.UI Namespace RadTreeView_ContextMenu Partial Public Class _Default Inherits System.Web.UI.Page Protected Sub RadTreeView1_ContextMenuItemClick(ByVal sender As Object, ByVal e As Telerik.Web.UI.RadTreeViewContextMenuEventArgs) If e.MenuItem.Text = "Before" Then e.Node.InsertBefore(New RadTreeNode("New Node Before")) ElseIf e.MenuItem.Text = "After" Then e.Node.InsertAfter(New RadTreeNode("New Node After")) End If End Sub End Class End Namespace In the Properties Window set the RadTreeView OnClientContextMenuItemClicking property to "clientContextMenuItemClicking".
-
In the ASP.NET markup for the page add the script code below. This code gets references to the Context Menu Item that was clicked and the Node for that Context Menu Item. If the Menu Item text is "Edit" then the Node is put into editing state. set_cancel() is called to prevent the Postback. If you don't prevent the postback the refresh will end the Node editing, subsequently producing the following visual effect: Node opens for editing momentarily, then closes. Finally, the Menu is closed calling its hide() function.
<telerik:RadTreeView RenderMode="Lightweight" ID="RadTreeView1"
 runat="server"
 OnClientContextMenuItemClicking="clientContextMenuItemClicking"
 Skin="Default">
</telerik:RadTreeView>
function clientContextMenuItemClicking(sender, eventArgs) { var node = eventArgs.get_node(); var item = eventArgs.get_menuItem(); if (item.get_text() == "Edit") { node.startEdit(); // cancel the server event eventArgs.set_cancel(true); // close the menu item.get_menu().hide(); } } Press F5 to run the application. Click the "Add Before" and "Add After" Menu Items. Also notice that clicking the "Edit" Menu Item puts the Node into edit mode and that no postback occurs.