Client-side Data Binding
This article introduces the client-side data binding feature of the RadRotator control.
Getting Started with Client-side Data Binding
The RadRotator can be bound to various type of data sources to populate its items. To create a proper data binding you cause the RadClientDataSource control or fetch an already retrieved data via the dataBind() method, available in the Rotator's Client-side API.
The layout of the bound Rotator items should be defined in the ClientTemplate inner tag. You can create their design with HTML code where the fetched data source fields should be set with this syntax - #= datasourceField #.
The following two sections will provide more details about the data binding.
Simple Data Binding
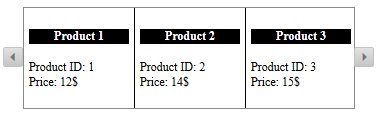
Simple data binding is used when the desired data source is already retrieved from the web service or from another appropriate source. Example 1 demonstrates how a simple JS array can be used for data binding, by using the dataBind() method in a function attached to the OnClientLoad event of the Rotator. The result of this implementation is shown in Figure 1.
Figure 1: RadRotator control bound to a simple JS array.
Example 1: Simple data binding.
<telerik:RadRotator RenderMode="Lightweight" runat="server" ID="RadRotator1" RotatorType="Buttons"
    Width="370" Height="100"  ItemWidth="100" ItemHeight="100" OnClientLoad="OnClientLoad">
    <ClientTemplate>
        <h4 class="productName">#= ProductName #</h4>
        <div class="productId"><span>Product ID: </span>#= ProductID #</div>
        <div class="price"><span>Price: </span>#= UnitPrice #$</div>
    </ClientTemplate>
</telerik:RadRotator>

<script type="text/javascript">
    var datasource = [
        { ProductID: 1, ProductName: "Product 1", UnitPrice: "12" },
        { ProductID: 2, ProductName: "Product 2", UnitPrice: "14" },
        { ProductID: 3, ProductName: "Product 3", UnitPrice: "15" },
        { ProductID: 4, ProductName: "Product 4", UnitPrice: "11" }
    ];

    function OnClientLoad(sender, args) {
        sender.set_dataSource(datasource);
        sender.dataBind();
    }
</script>
<style type="text/css">
    .rrItem {
        border-right:1px solid black;
        padding:5px;
    }

    .rrItem .productName {
        text-align:center;
        background-color:black;
        color:white;
    }
</style>
Data binding the rotator for the second time to a new data source is not possible with the Carousel and Coverflow modes. These 4 modes do not provide client-side items management and the new items cannot be cleared and re-created correctly. You can either use a different
RotatorType, or bind the rotator on the server during an AJAX request.
Using RadClientDataSource for Data Binding
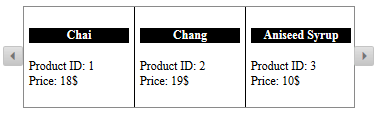
The RadClientDataSource provides the ability to connect to a web service and fetch data to bind any appropriate Telerik control. After configuring the ClientDataSource with the needed settings, all you need is to set its ID to the ClientDataSourceID property of the RadRotator control. Example 2 demonstrates a sample implementation of such approach and the corresponding result is shown in Figure 2.
Figure 2: Data bound Rotator via RadClientDataSource control.
Example 2: Using RadClientDataSource control for Rotator data binding.
 <telerik:RadClientDataSource runat="server" ID="RadClientDataSource1" PageSize="5" AllowPaging="true">
    <DataSource>
        <WebServiceDataSourceSettings BaseUrl="http://demos.kendoui.com/service/">
            <Select Url="Products" DataType="JSONP" />
        </WebServiceDataSourceSettings>
    </DataSource>
 </telerik:RadClientDataSource>

 <telerik:RadRotator RenderMode="Lightweight" runat="server" ID="Rotator" ClientDataSourceID="RadClientDataSource1"
    RotatorType="Buttons" Width="370" Height="100"  ItemWidth="100" ItemHeight="100">
    <ClientTemplate>
         <h4 class="productName">#= ProductName #</h4>
        <div class="productId"><span>Product ID: </span>#= ProductID #</div>
        <div class="price"><span>Price: </span>#= UnitPrice #$</div>
    </ClientTemplate>
 </telerik:RadRotator>
<style type="text/css">
    .rrItem {
        border-right:1px solid black;
        padding:5px;
    }

    .rrItem .productName {
        text-align:center;
        background-color:black;
        color:white;
    }
</style>