This article explains how to start using Telerik UI for Android in Android Studio after you have completed the download steps.
The Telerik UI for Android distribution for Android Studio is situated in the Controls\Android Studio folder in your Telerik UI for Android main installation folder. There is a set of .aar files where all of the components are packaged. Depending on the components you would like to use, you will have to make sure that all needed .aar files are referenced. The dependencies between the separate .aar files are described in the Installation contents and dependencies section section. You can reference an .aar file following the guidelines below.
Telerik UI for Android depends on the Android AppCompat v7 library. Additionally, the List module depends on RecyclerView v7. To be able to use the UI suite you will need to reference these libraries in your build.gradle file. Referencing the libraries in Gradle is done by extending the dependencies section of your build.gradle file as follows:
dependencies {
    compile 'com.android.support:appcompat-v7:23.1.1'
    compile 'com.android.support:recyclerview-v7:23.1.1'
}
The latest available version of Telerik UI for Android is built with versions 23.1.1 and targets API 23. The suite uses features that have been added with these versions which means that you need to reference the same appcompat version in your build.gradle and target the same API (or optionally newer versions in case they doesn't contain breaking changes). Please note, that the Target API level is different than the Minimum API level. UI for Android supports API 14 as a Minimum API level. Here's more about the difference between Minimum and Target API Levels.
Select File -> New Project from the menu bar in Android Studio.
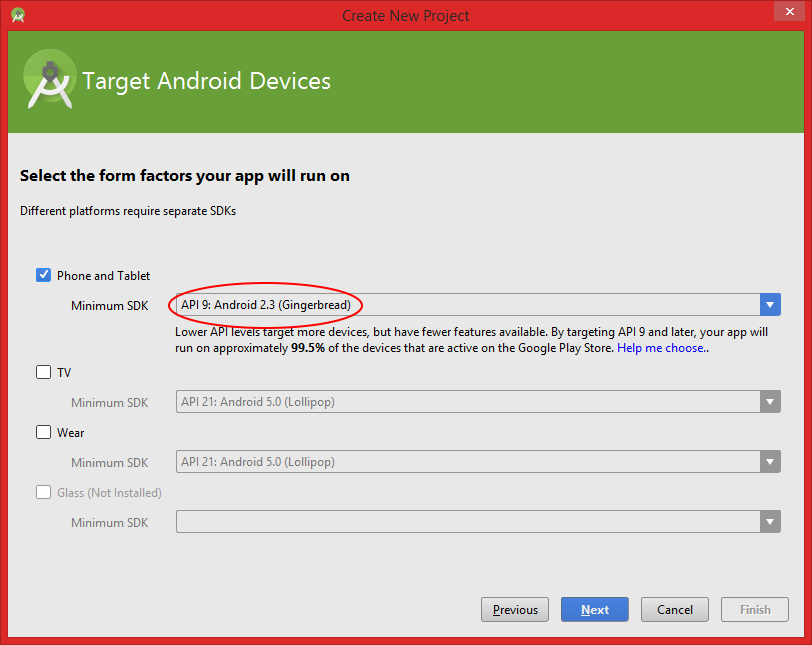
Fill in the required information about your application project and make sure that you select API 14: Android Ice Cream Sandwich or newer as Minimum Required SDK.

You can fill the other settings from the wizard according to your preferences.
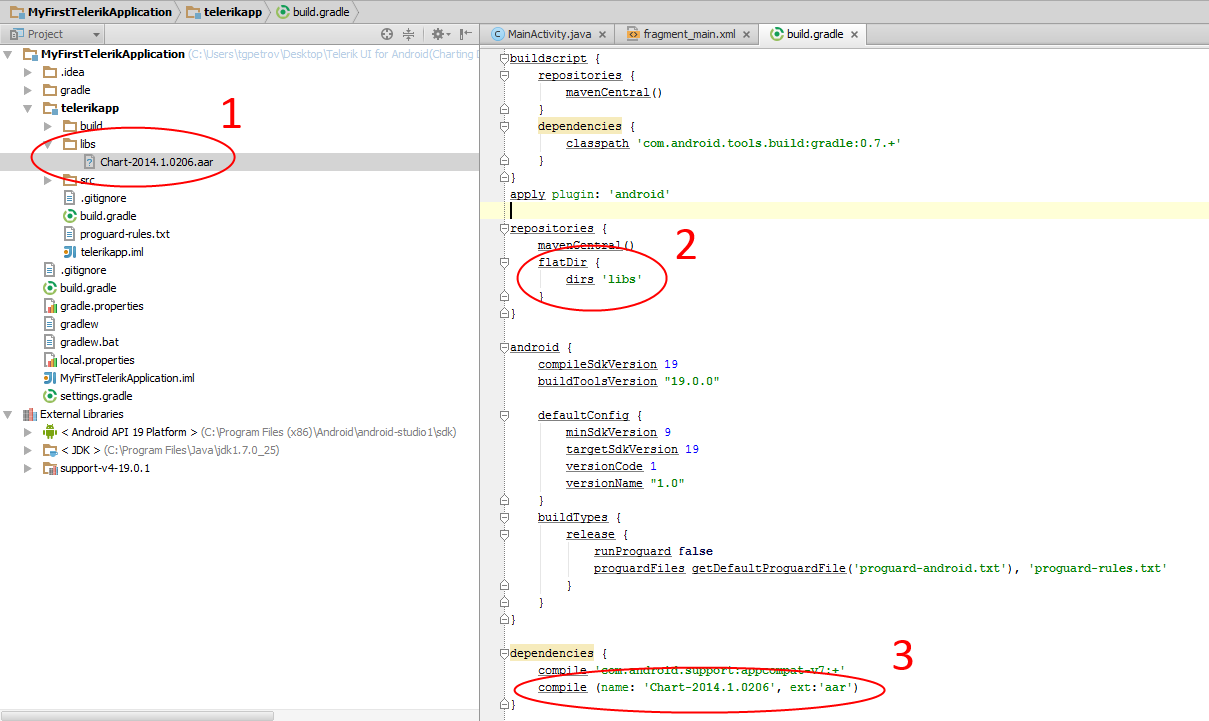
Create a new folder named libs (if it is not created already) in your project's directory and copy the needed aar file(s) located inside the Android UI root in the AndroidStudio sub-folder (C:\Program Files (x86)\Telerik\UI for Android [Version]\Controls\AndroidStudio if you installed the controls).
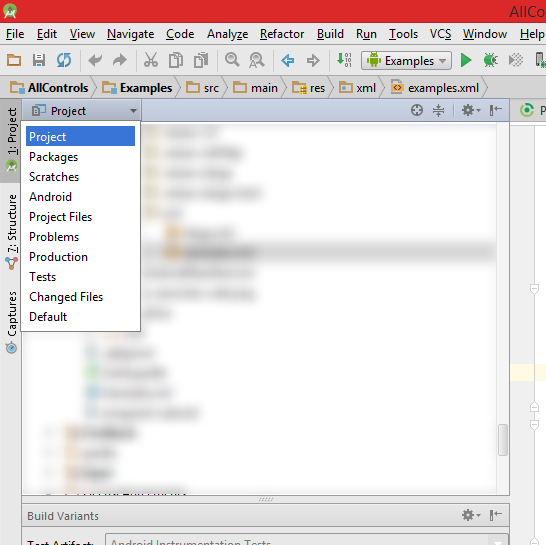
To see the full project structure in Android Studio make sure to select the
Projectoption from the top-left drop-down menu above the File Explorer as shown on the screenshot below:
Open the build.gradle file and add the libs folder as a flatDir repository:
repositories{
    flatDir{
        dirs 'libs'
    }
}

android {
    .
    .
    .
    .
    .
    .
}
Add a dependency to the aar files that you added during the previous step:
dependencies {
    compile fileTree(dir: 'libs', include: ['*.jar'])
    compile 'com.android.support:appcompat-v7:23.1.1'
    compile(name:'<name-of-the-aar-file>', ext:'aar')
    .
    .
    .
}
Depending on the functionality you would like to use, make sure to add all needed dependencies as described in the Installation contents and dependencies section
You may need to rebuild the solution and/or restart Android Studio for the changes to take effect. Now you are ready to use the controls from Telerik UI for Android inside your application.
Make sure your project targets an API level of at least Gingerbread (2.3).
Create a new folder named libs (if it is not created already) in your project's directory and copy the needed aar file(s) located inside the AndroidStudio folder (C:\Program Files (x86)\Telerik\UI for Android [Version]\Controls\AndroidStudio if you installed the controls).
Open the build.gradle file and add a flat filesystem directory as a repository and add a dependency to the aar file that you added during the previous step.

repositories{
    flatDir{
        dirs 'libs'
    }
}

android {
    .
    .
    .
    .
    .
    .
}
You may need to rebuild the solution and/or restart Android Studio for the changes to take effect. Now you are ready to use the controls from Telerik UI for Android inside your application.
We have prepared an Examples Android Studio project which you can find in the installation folder of Telerik UI for Android in the \Examples\AndroidStudio subfolder.
To be able to run the project you will need to import it using Android Studio:
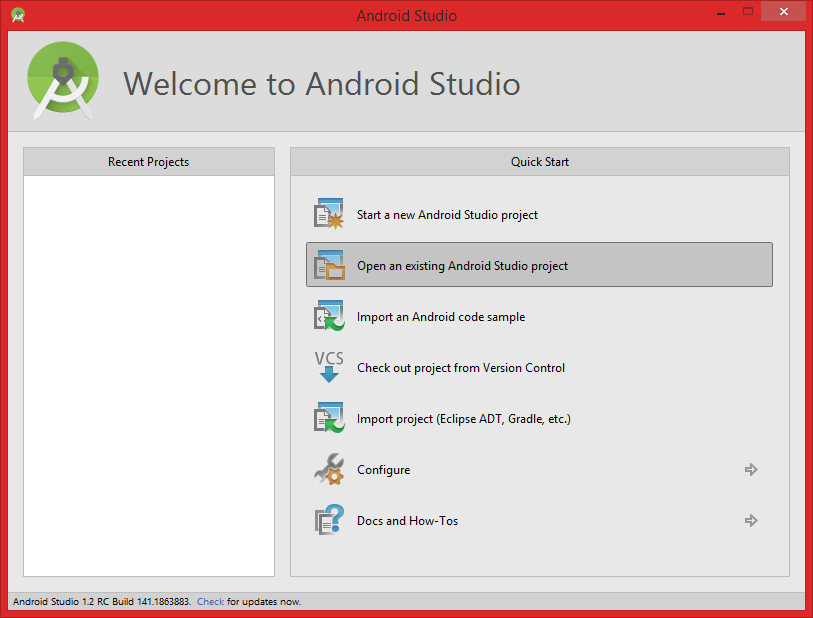
Start a new instance of Android Studio and choose Open an existing Android Studio project then choose the build.gradle file inside the AndroidStudio folder inside Examples:
Make sure you have copied all files from the
Examples\AndroidStudiosubfolder to a location suitable for you that does not require Administrator access to write to or that you are running Android Studio as administrator.

2. After importing the project make sure your Gradle settings are up-to-date. You should be able to build and run the Examples solution.