How to: Use the OpenAccessDataSource Wizard
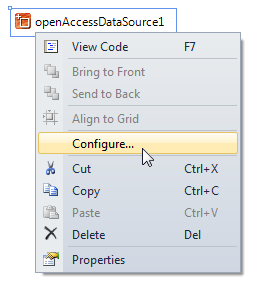
The most simple way to configure OpenAccessDataSource in Report Designer is to use OpenAccessDataSource Wizard. That wizard is started automatically when you create a new OpenAccessDataSource, but you can invoke it manually at any time from the context menu associated with the data source by choosing "Configure":
If you want to configure the OpenAccessDataSource component programmatically you need to perform the following steps:
- How to: Connect to a Telerik Data Access Model
- How to: Use Parameters with the OpenAccessDataSource Component
- How to: Configure Database Connectivity
- How to: Maintain the Lifecycle of the OpenAccessContext
- How to: Retrieve Data from a Telerik Data Access Model
After the OpenAccessDataSource wizard appears you have to perform the following steps:
- Choose your data connection
- Choose an object context
- Choose an object context member
- Choose data source parameters
Choose Your Data Connection
In this step, you have to specify a data connection for the OpenAccessDataSource component. There are two possible options for specifying the data connection:
-
Choose an existing data connection – selecting this option allows you to specify an existing data connection stored in the configuration file of the current project from the drop-down list.
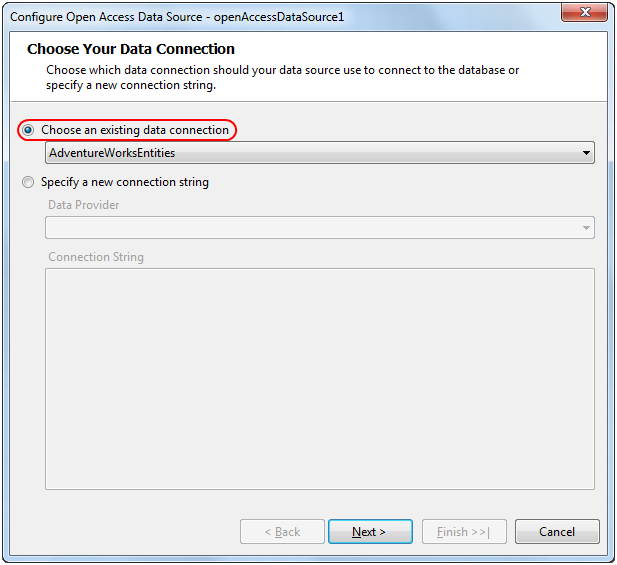
The drop-down list displays only data connections that are stored in the configuration file of the current project. If your Data Access Model is located in a different project from the report class library, you have to copy the appropriate connection string to the configuration file of the report library to make it appear in the wizard.
The connection string stored in the configuration file of the report class library is used only during design time. When running the report in production it is necessary to copy that connection string to the corresponding configuration file of your application or web site as well.
-
Specify a new connection string – selecting this option allows you to specify a new connection string. Choose the appropriate data provider from the drop-down list and enter the connection string in the text area below.
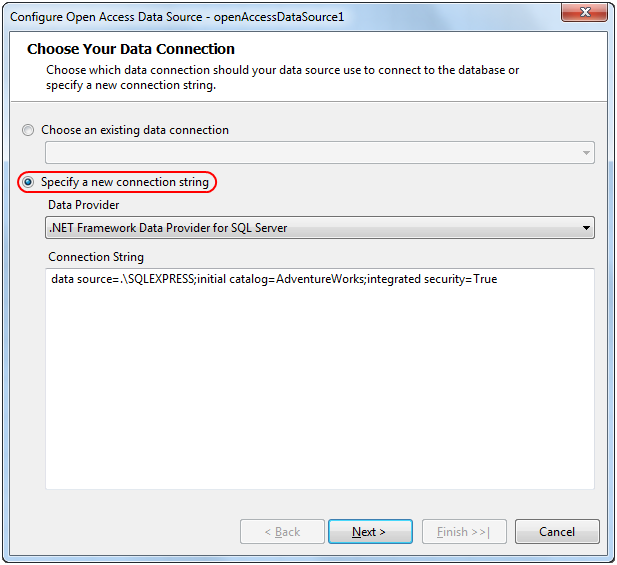
This option is useful for testing purposes only. Embedding the connection string directly in the reports is not recommended, because it can make it difficult to maintain all your reports later, when that connection string changes. The recommended approach is to store your connection string in the configuration file of the report class library and then choose it by name from the drop-down list.
Choose an Object Context
In this step, you have to specify an existing OpenAccessContext that is responsible for accessing your Data Access Model. The available OpenAccessContext types are organized in a hierarchical manner grouped by a namespace, as shown in the following screenshot:
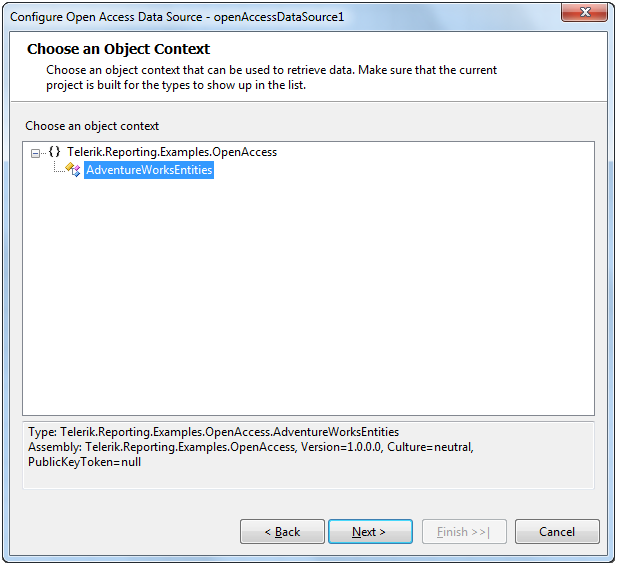
If the desired OpenAccessContext type does not appear in the list, make sure that the current project is built and all necessary project references are added.
Choose an Object Context Member
In this step, you have to specify a member of the chosen OpenAccessContext that is responsible for the data retrieval. You can choose either a property that returns the desired entities directly or a method that executes some business logic against the Data Access Model to obtain the required data for the report.
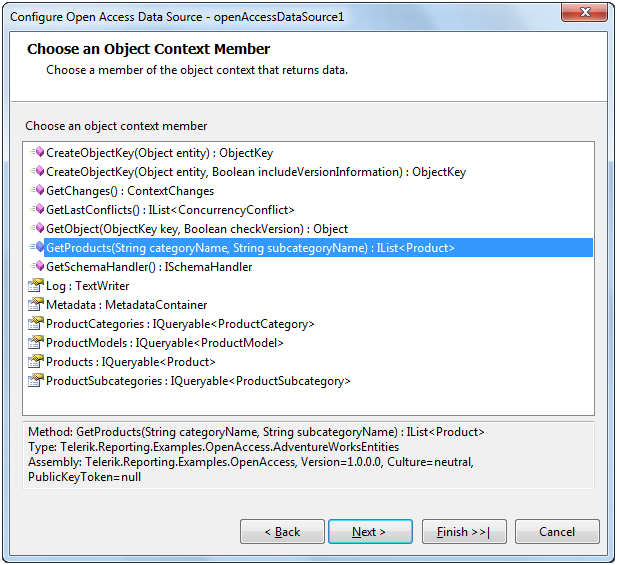
If the chosen member does not have any parameters, this is the last step of the wizard. However, if the specified member is a method with parameters, the next step allows you to configure those parameters.
Configure Data Source Parameters
Each argument of the selected method corresponds to a data source parameter. This step allows you to specify for each parameter a constant value, an expression, or to create a new ReportParameter and the expression will be automatically set to it.
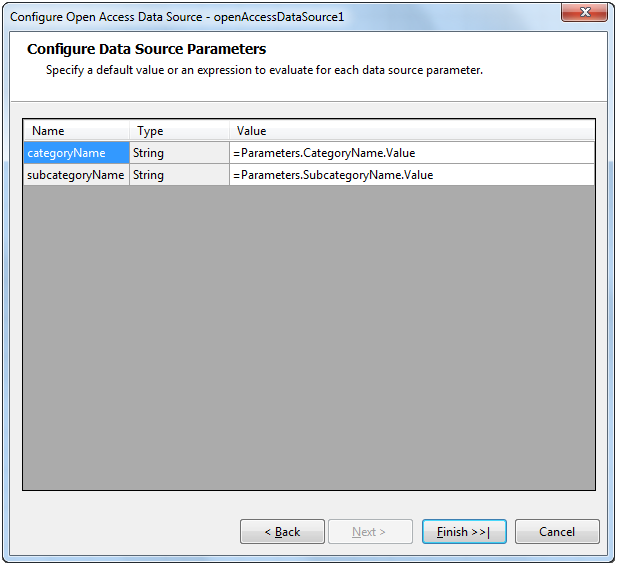
The names and types of the defined parameters should match the arguments of the selected method. In case this requirement is not fulfilled the OpenAccessDataSource component will not be able to resolve or to correctly call the method and will raise an exception at runtime.
This is the last step of the wizard. After pressing the Finish button the wizard will configure the OpenAccessDataSource component with the specified settings and will then close.
