How to: Create a Domain Model from an Existing Database
This article is relevant to entity models that utilize the deprecated Visual Studio integration of Telerik Data Access. The current documentation of the Data Access framework is available here.
To meet the needs of developers who want to derive a domain model from an existing database, Telerik Data Access provides a set of modeling tools that generate a domain model, validate a domain model, and create persistent classes based on the storage (database) model. The database first scenario has been available since the very beginning of Telerik Data Access.
To create Telerik Data Access Domain Model from an existing database:
- Select File > New Project in Visual Studio.
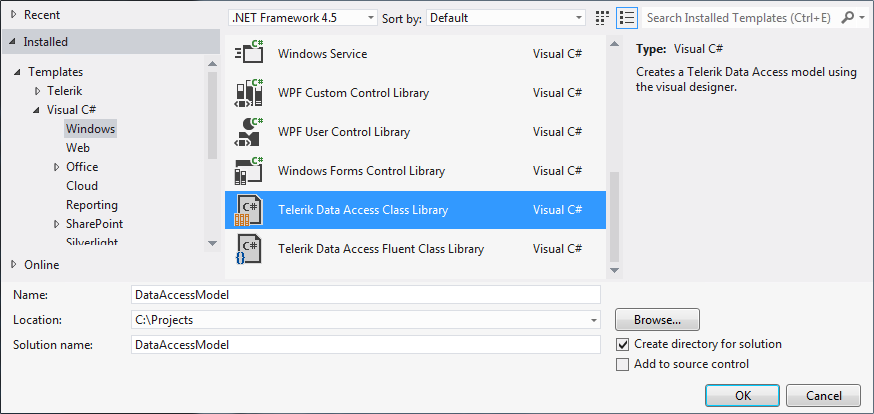
- In the list of Installed Templates on the left side of the dialog, select Visual C# or Visual Basic.
-
Then select Telerik Data Access Class Library. Give the new project a name, and then click OK.
-
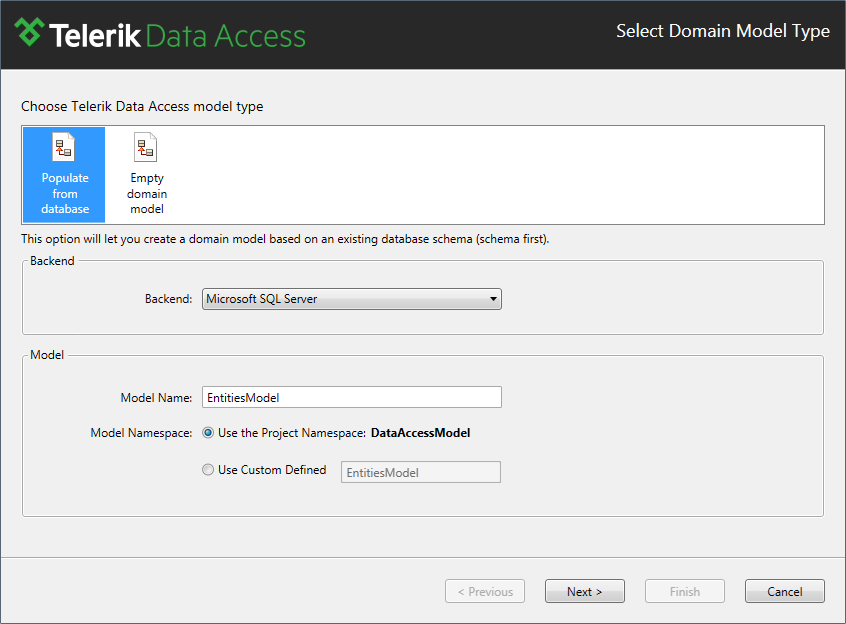
This will start Telerik Data Access New Domain Model Wizard. The first step in the wizard lets you choose the type of model you want to use. In this step, you have the option of generating a model from a database or starting with an empty model. This topic deals with generating a model from an existing database, so select the Populate from Database option as shown on the figure below.
-
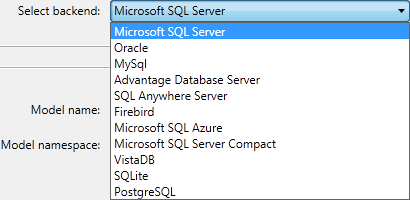
Select the backend provider (the default backend is Microsoft SQL Server).
Give the model a name or use the default one, and click Next to proceed.
-
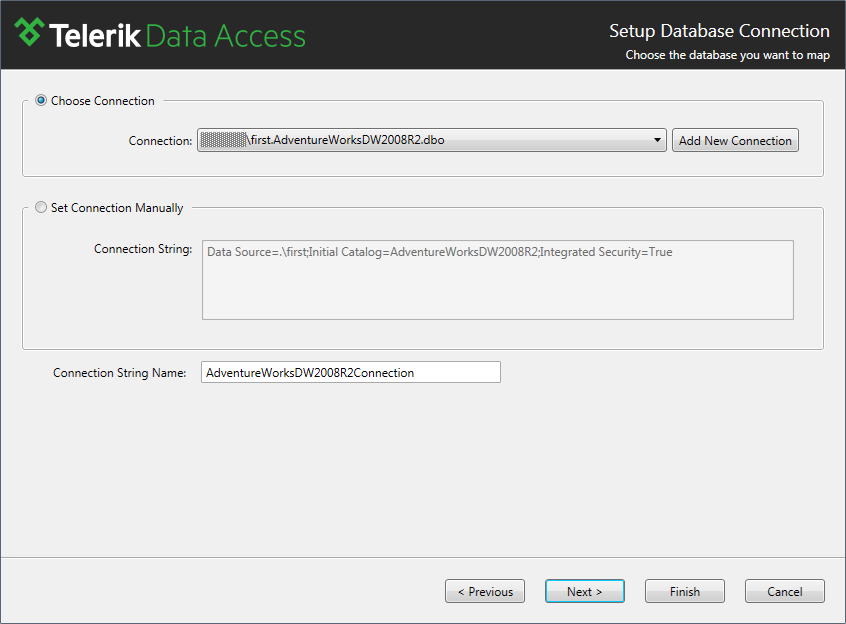
The next page in the wizard lets you specify the data connection for your domain model. If you have previously created connections they will show up in the list. The next image shows this step in the wizard.
If you haven't created any connections you will need to create one, and this can be done by clicking the New Connection button. This will open the standard Connection Properties dialog. The Connection Properties dialog looks very similar to most of the other SQL Server connection dialogs in which you need to provide the server name, authentication method, and the database name. Select the target database and click the Test Connection button to make sure all the connection settings are correct. If everything checks out fine, click OK.

Clicking OK will take you back to the data connection page of the wizard with your new connection shown in the connection drop-down. The other option in Setup Database Connection page allows you to modify the name of the connection string. This should be a unique name, which identifies the connection string in the <connectionStrings> </connectionStrings> section of the App.Config or Web.Config file (depending on the project type). For the sake of this demo, accept the default name. Click Next, once you have made all the necessary selections.
-
The next step of the wizard allows you to select the database objects to include in the domain model. On this page, you can select tables, views, stored procedures and functions.
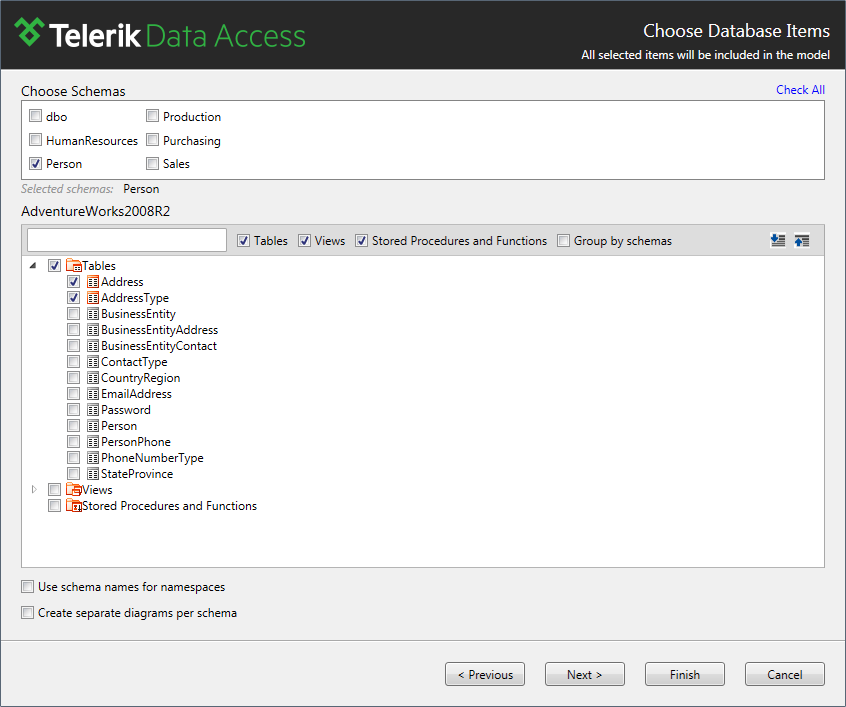
At this point your model is ready to be built. But before you click the Finish button, explore the rest of the pages in the wizard. Click Next, once you have made all necessary selections.
-
The next step of the wizard allows you to specify how class and member names are generated.
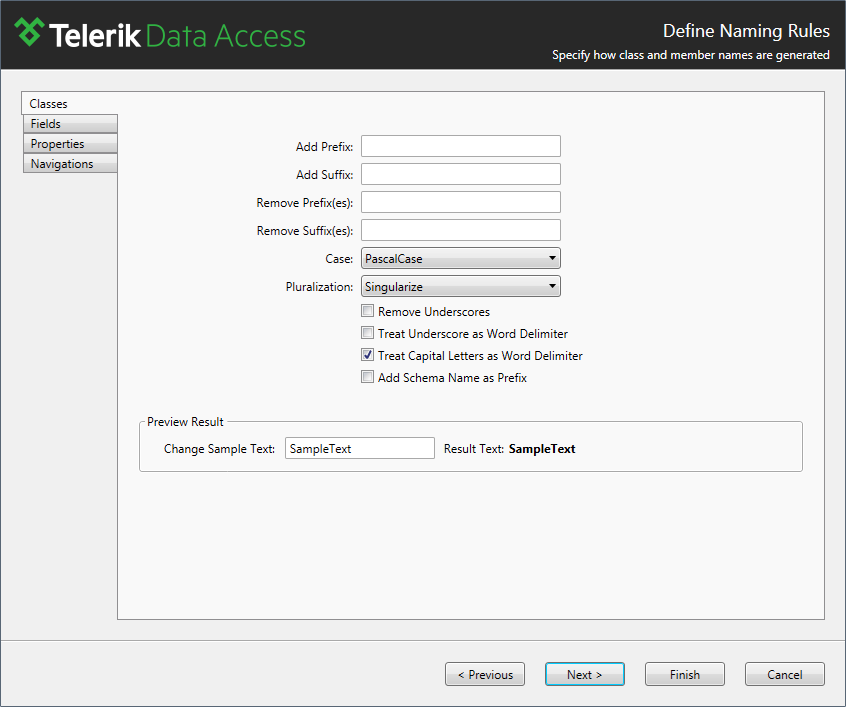
The Naming Rules dialog consists of three parts - naming rules for classes, fields and properties. For the sake of this demo, accept the default settings and click Next. For more information about the Naming Settings, check out Modifying Naming Settings.
-
The last step of Telerik Data Access Create Domain Model Wizard is the Advanced Options dialog. Here you could specify model and code generation settings.
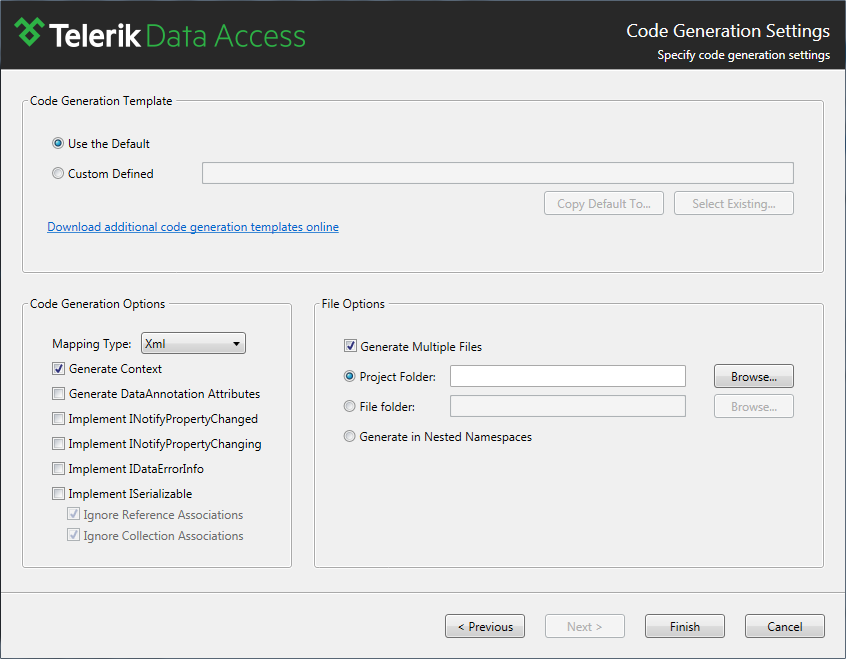
Code generation lets you use templates to generate part of your application's source code and other resources from a model. Telerik Data Access uses code generation templates to generate your persistent classes. One common scenario is to modify the code generation templates used by Telerik Data Access Visual Designer, in order to automatically implement INotifyPropertyChanging/ed interfaces in the generated persistent classes. For more information about that and other scenarios, please refer to the Customizing Code Generation section.
Go ahead and click the Finish button on Telerik Data Access Create Domain Model Wizard.
What Just Happened?
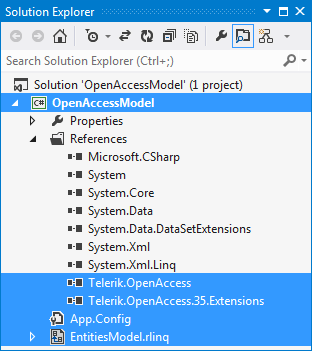
When you click Finish, the wizard will enhance the project to work with Telerik Data Access. In addition, it will add the required references (Telerik.OpenAccess.dll, Telerik.OpenAccess.35.Extensions.dll). It will then create a new configuration file containing the connection string to the target database, and will add an .rlinq file to the project.
The App.config file contains the connection string to the underlying database.
<?xml version="1.0" encoding="utf-8"?>
<configuration>
 <connectionStrings>
   <add name="AdventureWorksConnection"
        connectionString="data source=(local);initial catalog=AdventureWorks;
                          integrated security=True"
        providerName="System.Data.SqlClient" />
 </connectionStrings>
</configuration>
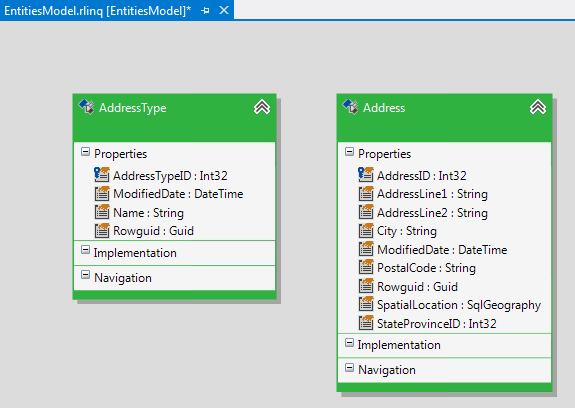
Exploring the Model
Double click the rlinq file to open the generated domain model in Visual Designer.
Next Steps
For further reference: