How to: Create a Fluent Mapping Library
This article is relevant to entity models that utilize the deprecated Visual Studio integration of Telerik Data Access. The current documentation of the Data Access framework is available here.
Telerik Data Access provides a Fluent Mapping API, also known as code-first, for defining data models using only code. The Fluent Mapping API gives developers complete control over the domain model mapping configuration, and schema management. This topic demonstrates how to get started by creating a new Fluent Mapping Library. You can create a new Fluent Mapping model:
- Using the Telerik Data Access Fluent Library Template in Visual Studio. Read more
- Using the Telerik Data Access NuGet Packages for Code First Development. Read more
Finally, you will define two sample classes that will be used in the next topics. Read more
Using the Telerik Data Access Fluent Library Template in Visual Studio
Telerik Data Access provides you a Visual Studio template for creating a Telerik Data Access model using the FluentMapping API. This is the Telerik Data Access Fluent Library template. This template works in the same way as the Telerik Data Access Class Library project template. The template will create a new class library project and will run the Telerik Data Access New Model Wizard. However, it will create a new model (from an existing database or an empty one) by using the fluent mapping code generation. It will add a new project to the solution, the project will contain an OpenAccessContext implementation and a FluentMappingSource class:
- In Visual Studio, select File > New > Project.
- Select Visual C# / Visual Basic in the Installed Template tree.
-
Then select Telerik Data Access Fluent Library. Set the Name of the project to Data, the Solution Name to FluentMappingDemo.

-
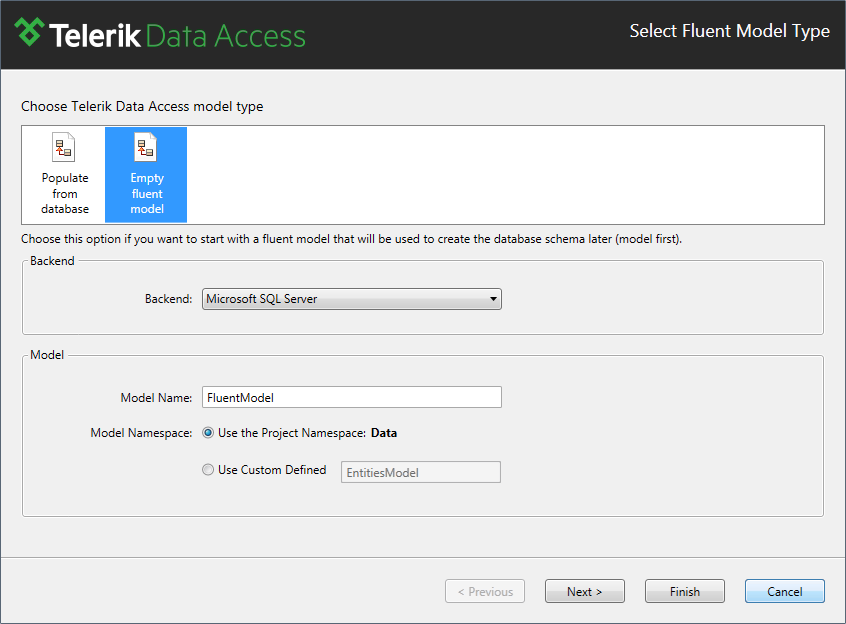
Click OK. This will run the Telerik Data Access New Model Wizard. The first step in the wizard lets you choose the type of model you want to use. In this step, you have the option of generating a model from a database or starting with an empty model. In this article, you will manually create all fluent classes, so select the Empty fluent model option as shown on the figure below.
-
Click Finish to generate the project.
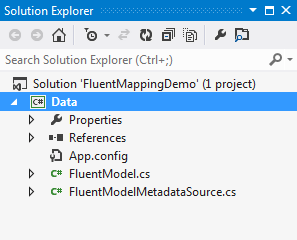
The template will create a new project and will enhance it to work with Telerik Data Access. In addition, it will add the required references and will add several code files.
Open the FluentModelMetadataSource class. It derives from the abstract Telerik.OpenAccess.Metadata.Fluent.FluentMetadataSource class. It will serve as a mapping source that uses fluent configuration to create a mapping model. You have to override the abstract PrepareMapping method (its implementation is described in the Using Per-Class Configuration article). The PrepareMapping method will be your entry point for working with the Telerik Data Access FluentMapping API. It is called when the context instance is initializing and a model needs to be obtained. Or in other words the new FluentModelMetadataSource class will hold the entire configuration for your classes.
Important: The custom FluentModelMetadataSource class and your POCO classes must be located in the same project.
When you use Fluent Mapping API, your classes have no knowledge at all about Telerik Data Access. This is a good thing, as it is the desired effect. However, you need to let Telerik Data Access be aware of the classes. Recall that Telerik Data Access Create Model Wizard creates the entity classes and a class that inherits from OpenAccessContext as well. In an empty fluent model, the Telerik Data Access Fluent Library project template and the Telerik Data Access Fluent Model item template generate the basic frame of the class which will become your context. It inherits from OpenAccessContext and contains constructors, a basic backend configuration and a declaration for the IFluentModelUnitOfWork interface. To implement a context that is specific to your model and your entities, you need to connect it to the underlying database just like a generated context. To do this, you need to provide the name of a connection string to the connectionStringName property of the FluentModel class, a new instance of the BackendConfiguration class where you specify the backend to be used (in this example - MS SQL database) and an instance of the FluentModelMetadataSource class that holds the entire configuration for your classes.
Let's take a look at the declaration of the connection string.
private static string connectionStringName = @"";
Private Shared connectionStringName As String = ""
Note that you are passing a connection string name to the base constructor (not the real connection string). The real connection string is defined in the configuration file (App.config).
<?xml version="1.0" encoding="utf-8" ?>
<configuration>
 <connectionStrings>
   <add name="connectionId"
        connectionString="data source=.\sqlexpress;initial catalog=FluentMappingDatabase;integrated security=True"
        providerName="System.Data.SqlClient" />
 </connectionStrings>
</configuration>
You need to pass the same connection string name to the FluentModel constructor as the one defined in the configuration file, i.e., you need to pass "connectionId". Modify the connection string declaration in the FluentModel class and set the same name:
private static string connectionStringName = @"connectionId";
Private Shared connectionStringName As String = "connectionId"
Next you need to specify a property of type IQueryable<T> for each of the domain class you create. For example: If your model contains the Product persistent class, its corresponding property should be similar to this:
public IQueryable<Product> Products
{
    get
    {
        return this.GetAll<Product>();
    }
}
Public ReadOnly Property Products() As  IQueryable(Of Product) Implements IFluentModelUnitOfWork.Products
    Get
        Return Me.GetAll(Of Product)()
    End Get
End Property
And the IFluentModelUnitOfWork interface should include:
IQueryable<Product> Products
{
    get;
}
ReadOnly Property Products() As IQueryable(Of Product)
Using the Telerik Data Access NuGet Packages for Code First Development
Telerik Data Access provides NuGet packages that make it even easier to get started building a domain model using Fluent Mapping API. These NuGet packages have an additional benefit aside from being extremely helpful for creating a new fluent mapping model. When you install the package, all of the files required by Telerik Data Access are dropped in the packages folder. This leaves the new project's Telerik Data Access version completely independent from the version installed on the system.
The first thing you need to do is to create a new Class Library Project. Once the project is created it is time to add the NuGet package by using the Package Manager Console (Tools > Library Package Manager > Package Manager Console):
- Install-Package OpenAccess.CodeFirst or
- Install-Package OpenAccess.CodeFirst.Sample
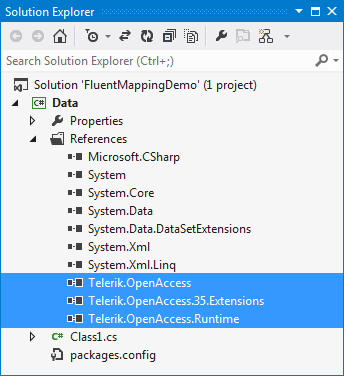
The Telerik Data Access.CodeFirst package sets up the project for code first development with Telerik Data Access. It will add code to the project file which integrates the project with the Telerik Data Access enhancer, and it will add all required assembly references. Other than that, the project will look the same as it did before installing the package.
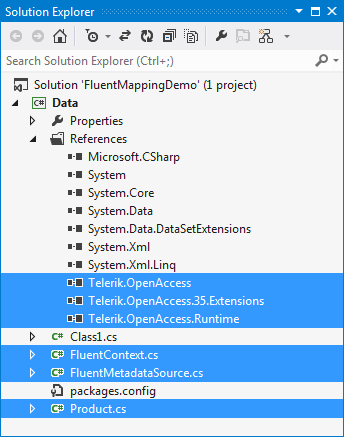
The Telerik Data Access.CodeFirst.Sample package adds additional classes to the project which help you to get the basic code first project skeleton set up. It will also create an example entity, and an example mapping configuration for that entity. Practically, the package will add the same classes as the Telerik Data Access Fluent Library Visual Studio template.
The next step is to define sample entities that will be used in the next topics.
Defining Sample Classes
Add two classes named Category and Product in the Data project.
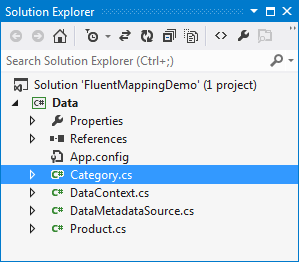
Open it and replace the code in the Category class with the following:
using System.Collections.Generic;
namespace Data
{
   public class Category
   {
       public Category()
       {
           this.Products = new List<Product>();
       }
       public int Id
       {
           get;
           set;
       }
       public string Name
       {
           get;
           set;
       }
       public IList<Product> Products
       {
           get;
           set;
       }
   }
}
Public Class Category
    Public Sub New()
        Me.Products = New List(Of Product)()
    End Sub

    Private _id As Integer
    Public Property Id() As Integer
        Get
            Return _id
        End Get
        Set(ByVal value As Integer)
            _id = value
        End Set
    End Property

    Private _name As String
    Public Property Name() As String
        Get
            Return _name
        End Get
        Set(ByVal value As String)
            _name = value
        End Set
    End Property

    Private _products As IList(Of Product)
    Public Property Products() As IList(Of Product)
        Get
            Return _products
        End Get
        Set(ByVal value As IList(Of Product))
            _products = value
        End Set
    End Property
End Class
Now for the Product class. Open it and replace the code in that class with the following:
namespace Data
{
   public class Product
   {
       public int Id
       {
           get;
           set;
       }

       public string Name
       {
           get;
           set;
       }

       public bool Discontinued
       {
           get;
           set;
       }

       public Category Category
       {
           get;
           set;
       }

       public int CategoryId
       {
           get;
           set;
       }
   }
}
Public Class Product
    Private _id As Integer
    Public Property Id() As Integer
        Get
            Return _id
        End Get
        Set(ByVal value As Integer)
            _id = value
        End Set
    End Property

    Private _name As String
    Public Property Name() As String
        Get
            Return _name
        End Get
        Set(ByVal value As String)
            _name = value
        End Set
    End Property

    Private _discontinued As Boolean
    Public Property Discontinued() As Boolean
        Get
            Return _discontinued
        End Get
        Set(ByVal value As Boolean)
            _discontinued = value
        End Set
    End Property

    Private _category As Category
    Public Property Category() As Category
        Get
            Return _category
        End Get
        Set(ByVal value As Category)
            _category = value
        End Set
    End Property

    Private _categoryId As Integer
    Public Property CategoryId() As Integer
        Get
            Return _categoryId
        End Get
        Set(ByVal value As Integer)
            _categoryId = value
        End Set
    End Property
End Class
At this point you are pretty much done with your data project. You haven't defined any relationships or configuration items, but you will do that shortly in the same project. In the next two topics, you will see how to configure your model by using Explicit Mapping and Default Mapping.
In case you are creating an Empty fluent model, you may want to create and migrate your database to the latest model state. For more information, please refer to How to: Create/Migrate Your Database.
