Getting Started with OpenAccessLinqDataSource
This article is relevant to entity models that utilize the deprecated Visual Studio integration of Telerik Data Access. The current documentation of the Data Access framework is available here.
Although you can bind query results directly to any data-bound control in a web application, updating persistent objects could be a challenging task due to the life cycle of the ASP.NET page. Fortunately, Telerik Data Access provides an easy way to use persistent classes in web applications when you are looking for a quick solution. The OpenAccessLinqDataSource simplifies data binding for CRUD operations. You can configure the OpenAccessLinqDataSource control by using the DataSource Configuration Wizard and it will handle all of the work for reading, inserting, deleting and updating data from the database. When you've configured an OpenAccessLinqDataSource control, you can bind it to any web control that supports data binding. For example, you can bind a GridView control, a ListView control or DetailsView control to an OpenAccessLinqDataSource control. The data-bound control automatically creates the user interface to display the data from the OpenAccessLinqDataSource control.
The OpenAccessLinqDataSource control is available for Visual Studio 2010 Web Applications or Web Sites that use .NET version 4.
In this topic, you will create a sample ASP.NET Web Page that uses the OpenAccessLinqDataSource control. You will use a data-bound (e.g. RadGrid) control to display the data.
Creating a New ASP.NET Web Application
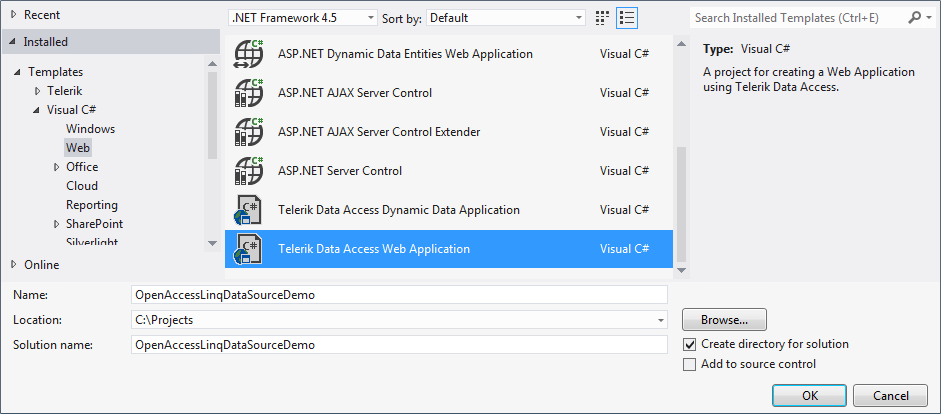
The first step is to create a new ASP.NET Web Application and add a new Telerik Data Access Domain Model based on the SofiaCarRental Database. The simplest way to do this is to use the Telerik Data Access Web Application project template in Visual Studio. This project type will create a new ASP.NET AJAX web application, and open the Telerik Data Access New Domain Model Wizard. Once you run through the wizard, the new domain model will be added to the web project. Here are step-by-step instructions:
- Start Visual Studio, on the File menu select New, and then select Project.
- In the New Project dialog box, select Visual Basic or Visual C# as the programming language.
-
In the Templates pane, select Telerik Data Access Web Application. Give the project a name.
The Telerik Data Access Web Application template is available only in Visual Studio 2010 for applications that use .NET version 4.
Click OK. The ASP.NET Web Application is created.
- The Telerik Data Access New Domain Model wizard appears automatically. In the Select Domain Model Type screen, select Populate from database. Click Next to continue.
- In the Setup Database Connection screen, create a data connection to the SofiaCarRental database and click Next.
-
In the Choose Database Items screen, select all tables. Click Finish to create the model.

Build your solution.
Creating and Configuring an OpenAccessLinqDataSource Control
Now that you have created a new ASP.NET Web Application and Telerik Data Access Domain Model, you can use an OpenAccessLinqDataSource control on an ASP.NET Web page to display and manage data.
To create and configure a new OpenAccessLinqDataSource control:
- In Visual Studio, open the Default.aspx web page and switch to Design view.
-
Drag a new OpenAccessLinqDataSource component from the Toolbox to the designer. By default, the OpenAccessLinqDataSource control is located in the Telerik.OpenAccess.Web section.

If for some reason you cannot find the data source control in the Toolbox, check out the How to: Add the OpenAccessLinqDataSource Control to the Toolbox topic. In that topic, you will learn how to add the control in the Toolbox manually.
-
The OpenAccessLinqDataSource will need to know where its persistent classes come from. The next step is to configure the component. In the Smart Tag panel, click Configure Data Source.

This will start the OpenAccessLinqDataSource Configuration Wizard. The wizard will walk you through the important properties that need to be configured.
-
The first page of the wizard will allow you to select an OpenAccessContext that can be used to retrieve or update data. In the Select your domain context type drop-down, select your context. From the second drop-down, you need to select which persistent type you want to retrieve. Select the Categories entity and click Next.

The second page of the wizard allows you to specify which properties will be selected (retrieved) from the database. Also, you could filter, sort and group the retrieved records. All these operations are discussed in subsequent topics. For now, you need to learn one specific thing about the Select functionality. When you check the Select All (*) option, full entities are returned instead of results that contain individual properties. (*) is the default selection, i.e. all of the properties will be used. If you choose specific properties, you won't get an entity object back. Instead, you will get a projection, which cannot be change-tracked, and therefore cannot be updated. In this case automatic inserts, updates, and deletes are not allowed.
-
For this demo, leave Select All (*) checked.
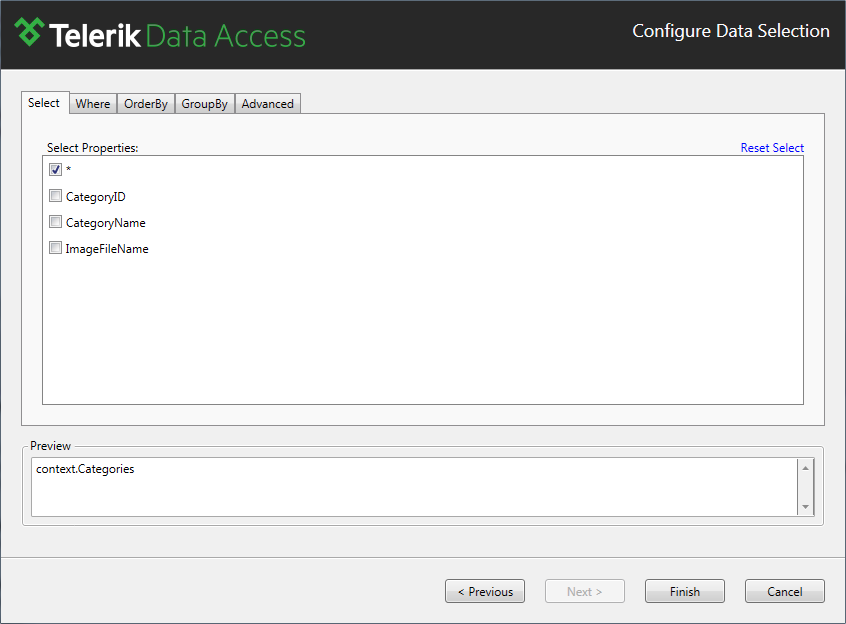
Click Finish to close the wizard.
-
The following example shows the markup for the OpenAccessLinqDataSource.
<telerik:OpenAccessLinqDataSource
   ID="OpenAccessLinqDataSource1"
   runat="server"
   ContextTypeName="OpenAccessLinqDataSourceDemo.EntitiesModel"
   ResourceSetName="Categories"
   EntityTypeName="" />
Adding a Data-Bound Control to Display Data
You can now add a data-bound control and bind it to the OpenAccessLinqDataSource control. In this example a RadGrid control will be used.
To connect the data from the OpenAccessLinqDataSource control to a data-bound control:
- In Visual Studio, open the Default.aspx web page and switch to Design view.
- Drag a new RadScriptManager component from the Toolbox to the designer. RadScriptManager needs an HttpHandler to be declared in the application configuration file to operate properly. The addition of the handler is made easy by the SmartTags of the control. Right-click the RadScriptManager and select Show Smart Tag. Then select Register Telerik.Web.UI.WebResource.axd.
-
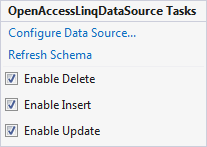
Drag a new RadGrid control from the Toolbox. In the Smart Tag panel, set the data source to OpenAccessLinqDataSource1.

By using the SmartTag panel of the RadGrid control, click the Refresh Schema link.
-
The following code-snippet shows the markup:
<telerik:OpenAccessLinqDataSource
   ID="OpenAccessLinqDataSource1"
   runat="server"
   ContextTypeName="OpenAccessLinqDataSourceDemo.EntitiesModel"
   ResourceSetName="Categories"
   EntityTypeName="" />

<telerik:RadGrid ID="RadGrid1" runat="server" DataSourceID="OpenAccessLinqDataSource1">
   <MasterTableView DataSourceID="OpenAccessLinqDataSource1">
       <CommandItemSettings ExportToPdfText="Export to PDF"></CommandItemSettings>
       <RowIndicatorColumn FilterControlAltText="Filter RowIndicator column">
           <HeaderStyle Width="20px"></HeaderStyle>
       </RowIndicatorColumn>
       <ExpandCollapseColumn FilterControlAltText="Filter ExpandColumn column">
           <HeaderStyle Width="20px"></HeaderStyle>
       </ExpandCollapseColumn>
       <EditFormSettings>
           <EditColumn FilterControlAltText="Filter EditCommandColumn column">
           </EditColumn>
       </EditFormSettings>
   </MasterTableView>
   <FilterMenu EnableImageSprites="False">
   </FilterMenu>
   <HeaderContextMenu CssClass="GridContextMenu GridContextMenu_Default">
   </HeaderContextMenu>
</telerik:RadGrid>
Testing the Application
You are now ready to test your project. Press F5 to run your application.

Enabling Insert, Update and Delete Operations
The OpenAccessLinqDataSource control can create commands for inserting, updating and deleting data.
To enable insert, update and delete operations:
-
By using the Smart Tag panel of the OpenAccessLinqDataSource control, check the Enable Delete, Enable Insert and Enable Update options.
To customize the RadGrid control to support insert, update and delete operations:
Select the RadGrid control and press F4 to open the Properties pane. Set the following properties:
Set AllowAutomaticUpdates to True.
- Set AllowAutomaticInserts to True.
- Set AllowAutomaticDeletes to True.
- Set AutoGenerateDeleteColumn to True.
- Set AutoGenerateEditColumn to True.
- Expand the MasterTableView section and set the CommandItemDisplay property to TopAndBottom.
Next, run your application and test the Insert, Update and Delete operations.
If you attempt to delete a category that has related data (cars), you will get a foreign key constraint error.
Next Steps
This topic has shown you the basic functionality of retrieving, updating, inserting, and deleting records by using the OpenAccessLinqDataSource control. Check out the following topics to learn about the additional capabilities of the OpenAccessLinqDataSource control: