Step Failure Details
The Step Failure Details dialog collects all the information related to the failed test step. This includes failure details, screenshots, and a snapshot of the DOM. The Step Failure Details section lists handy suggestion how you can resolve the specific error.
Let's use any sample test which fails as an example for the below article.
Step Failure Details Section
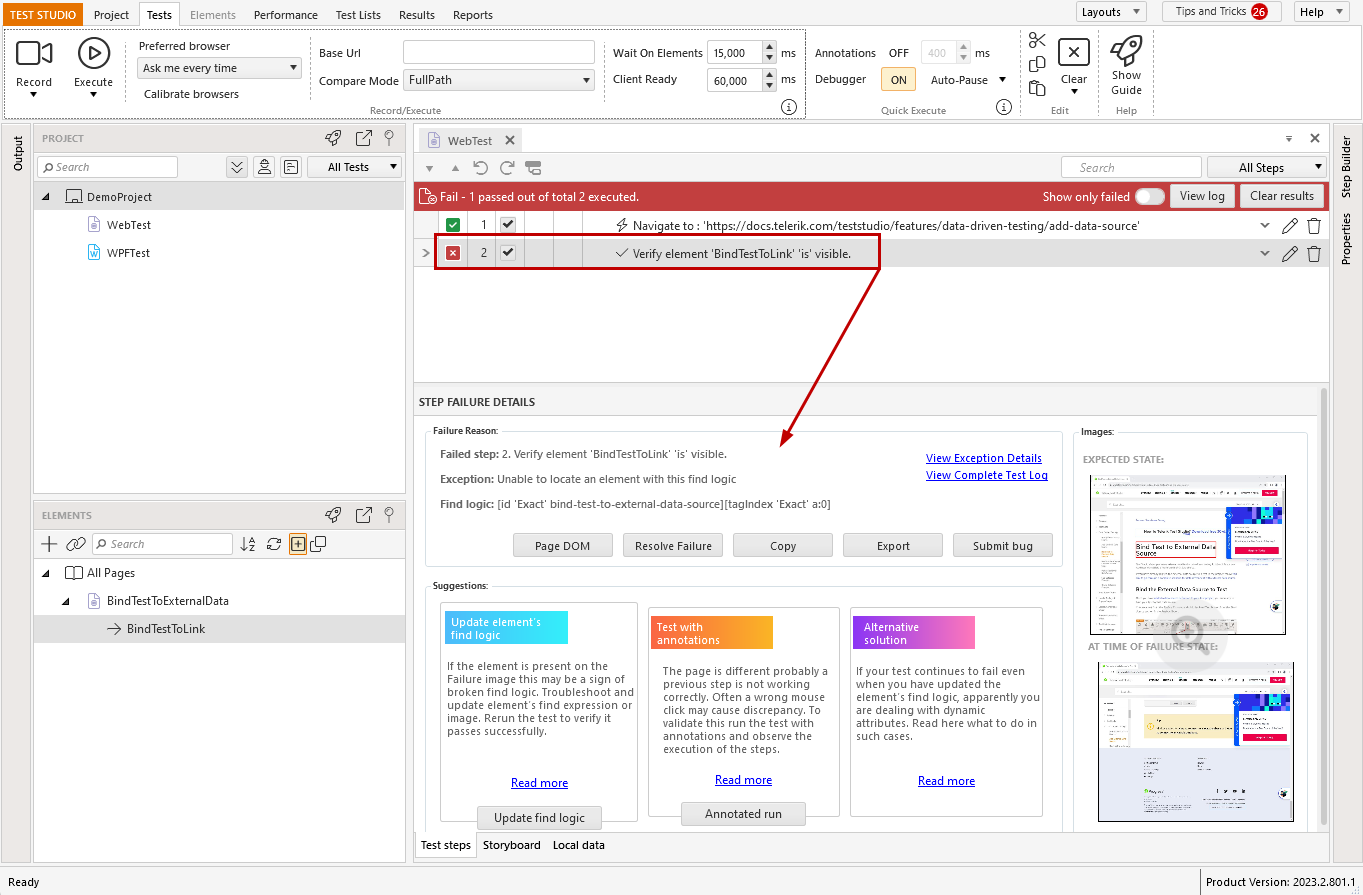
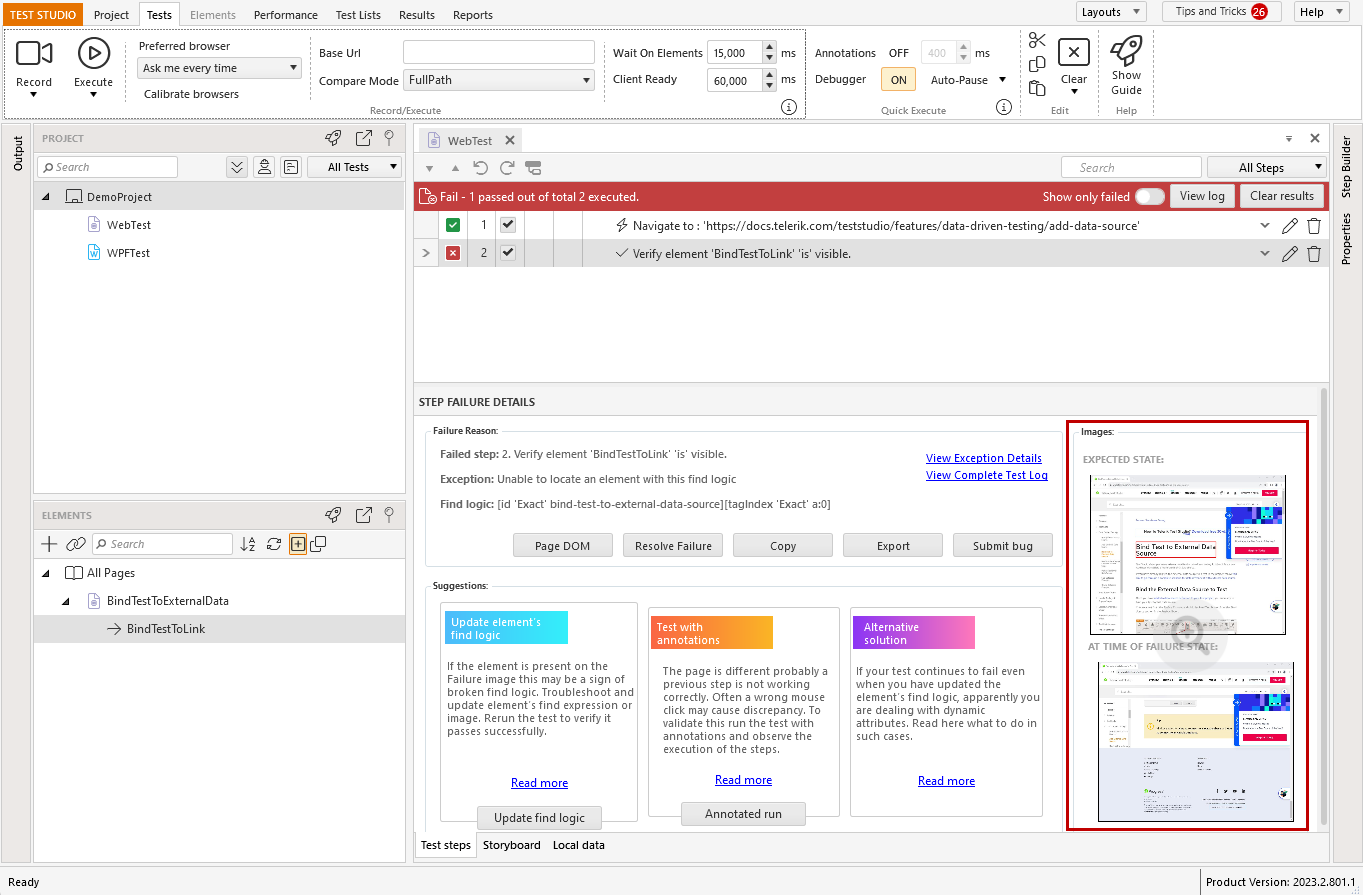
Execute the sample test and wait for the run to finish. The overall result of the test run is reported failed and the failing step is marked in the test. The Step Failure Details section displayed under provides an overview of the reason for the failure, the images, and suggestions what options you have to troubleshoot the error.
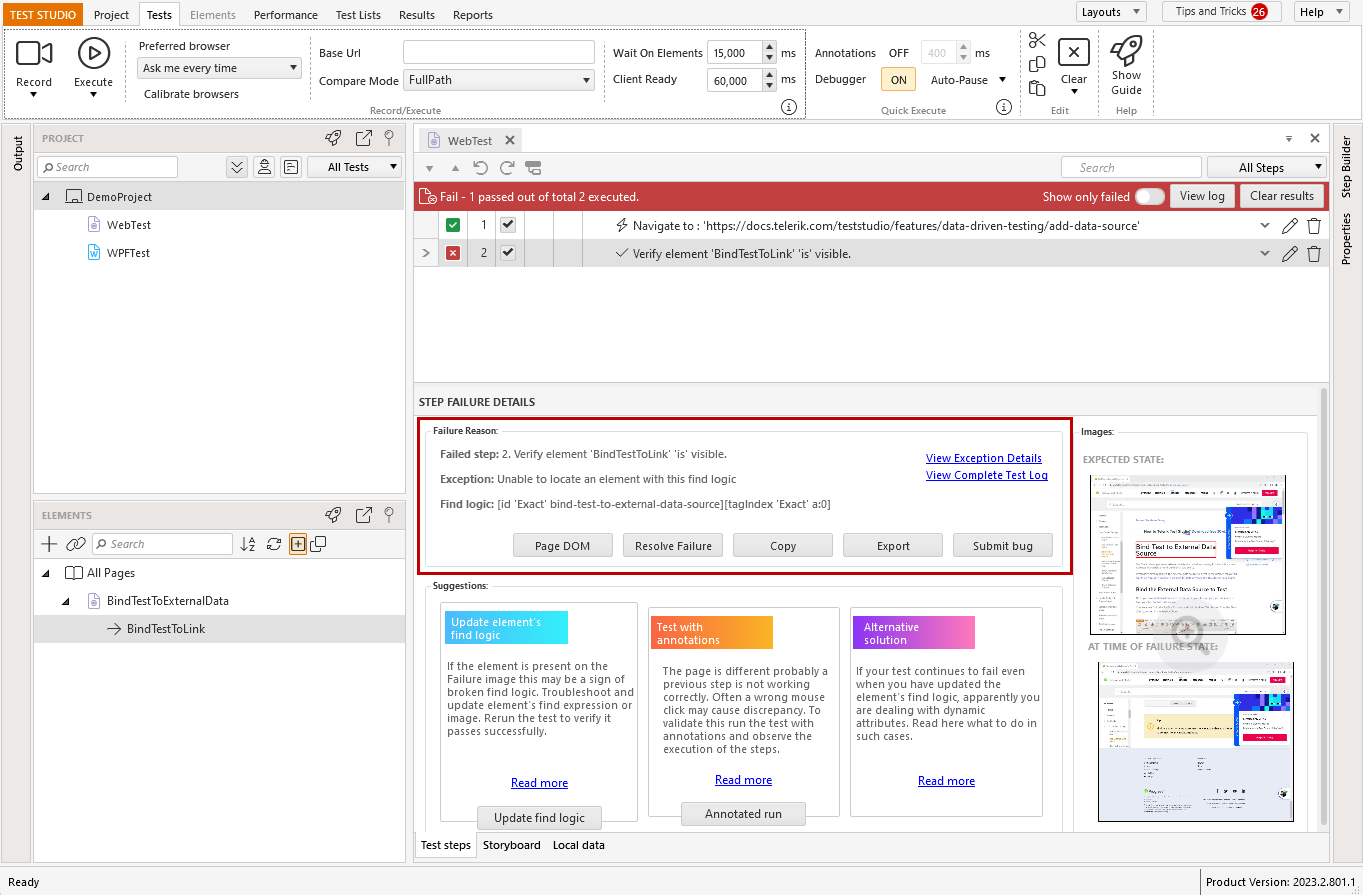
Failure Reason Section
The Failure Reason section shows a summary of the error, which caused the failure. In it you have quick access to the following details:
- DOM tree on failure,
- Resolve failure suggestions,
- Copy button to get the error log in clipboard,
- Export the overall step failure details,
- Trigger the form to submit a bug, if you have configured a bug tracking tool for the project.
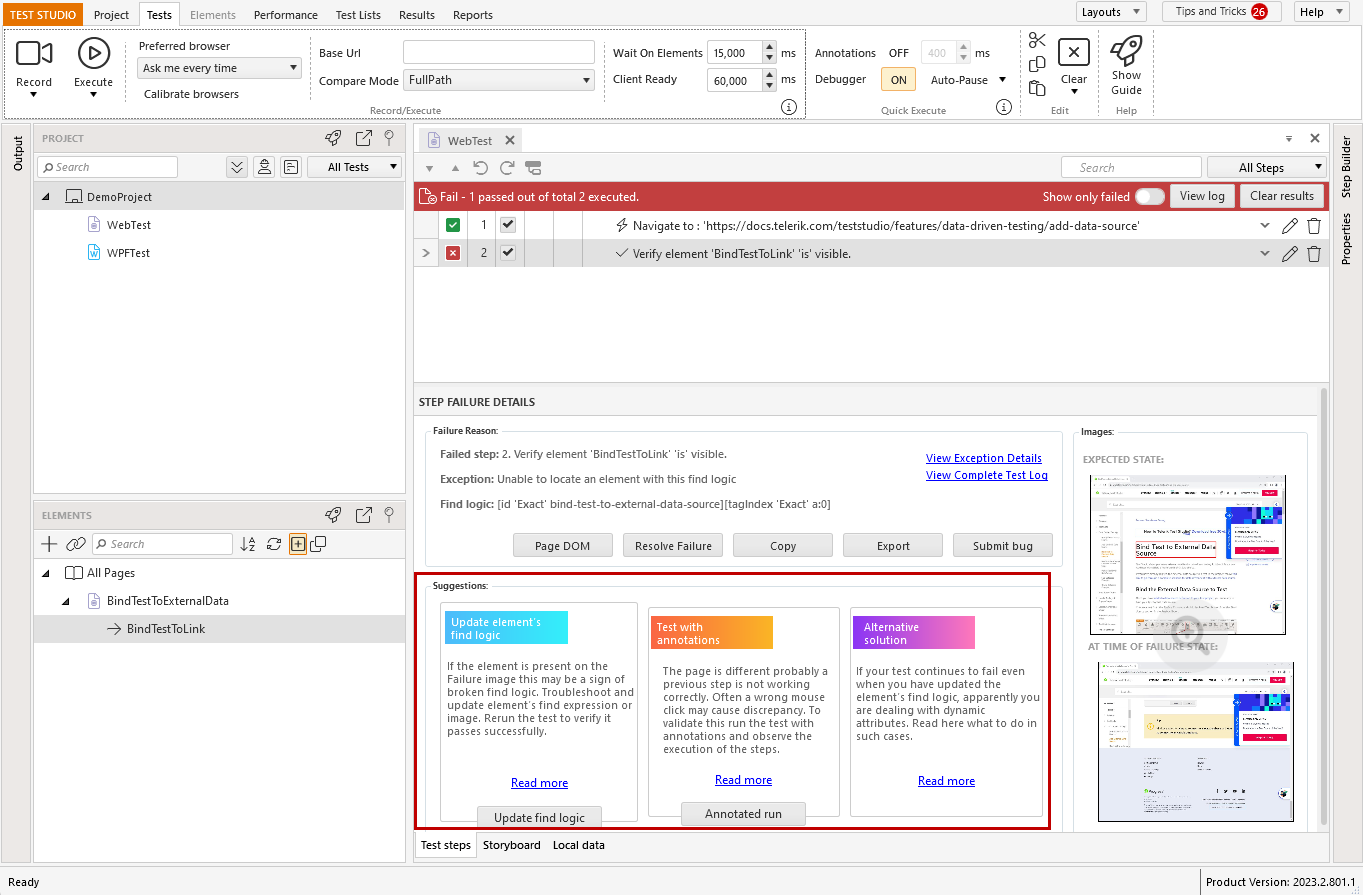
Suggestions Section
The Suggestion section hints you with handy features in Test Studio for troubleshooting a failing test and these are based on the specific error. Among these are
- How to update the verification definition
- how to resolve an error for not found element
- How to use the partial test execution
- How to trigger an annotated test execution
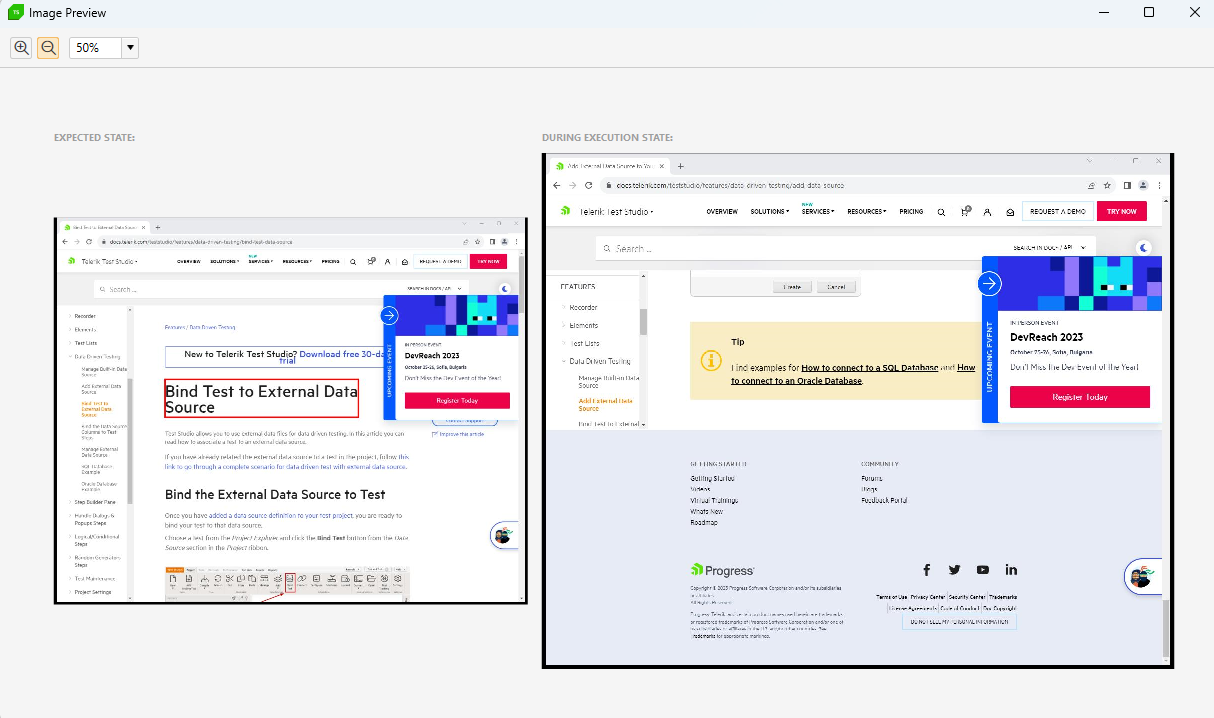
Images Section
The Images section lists the state of the application at the time of failure compared to what was captured when the test steps were recorded. The images are often useful to identify that certain step gets executed before the application is in the correct state to accept the action. Such timing issues are usually resolved by adding wait steps or execution delays before the action is sent towards the page.
If you click the magnifier icon, the images are opened in full size and can be zoomed.
How to Open the Step Failure Details Window?
Execute the sample test and wait until it fails. Hover the mouse over the red cross next to the failed step - a Step Failure Summary will popup for a while.
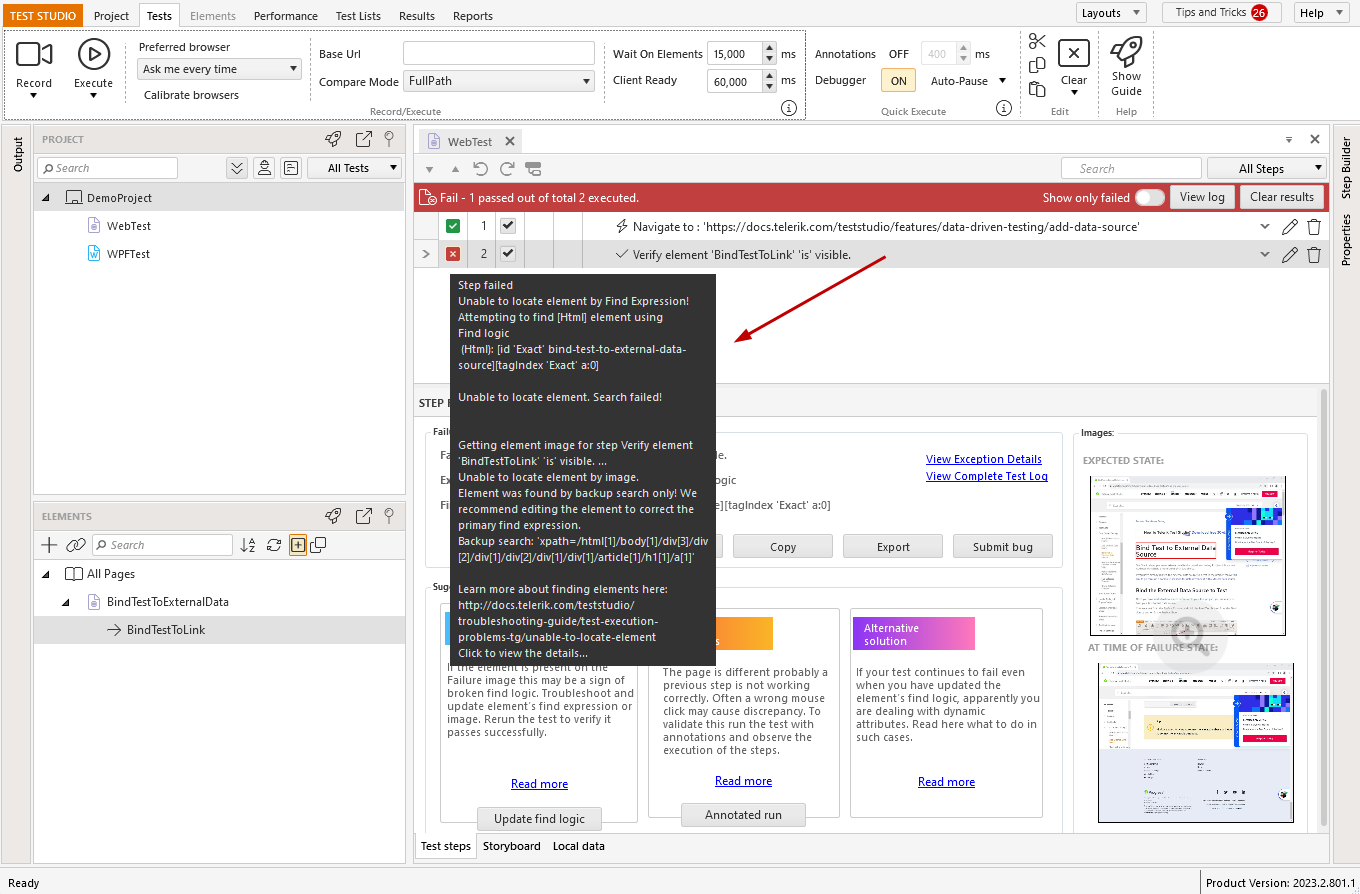
Click on the red cross to open the overall Step Failure Details with possible options to resolve the encountered error.
What to Look for in the Step Failure Details?
The failure dialog provides a variety of useful details, which can be used for the different failure scenarios, divided in few tabs. Let's have an overview for each of these tabs and how these can help us find the solution for the failing step.
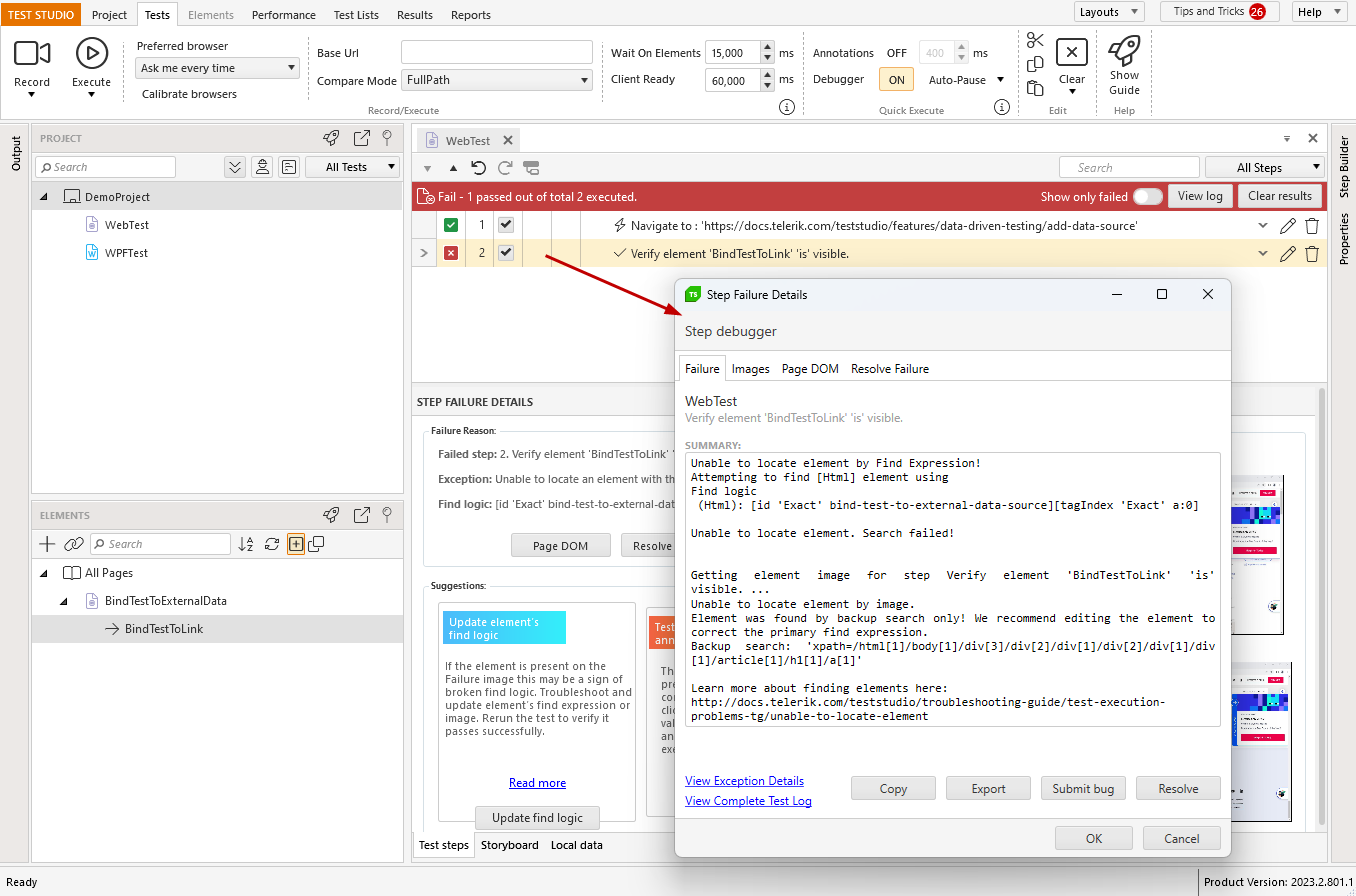
Failure Tab
The Failure tab provides a summarized information for the encountered error - sometimes this can be quite descriptive, and other times it could be more generic.
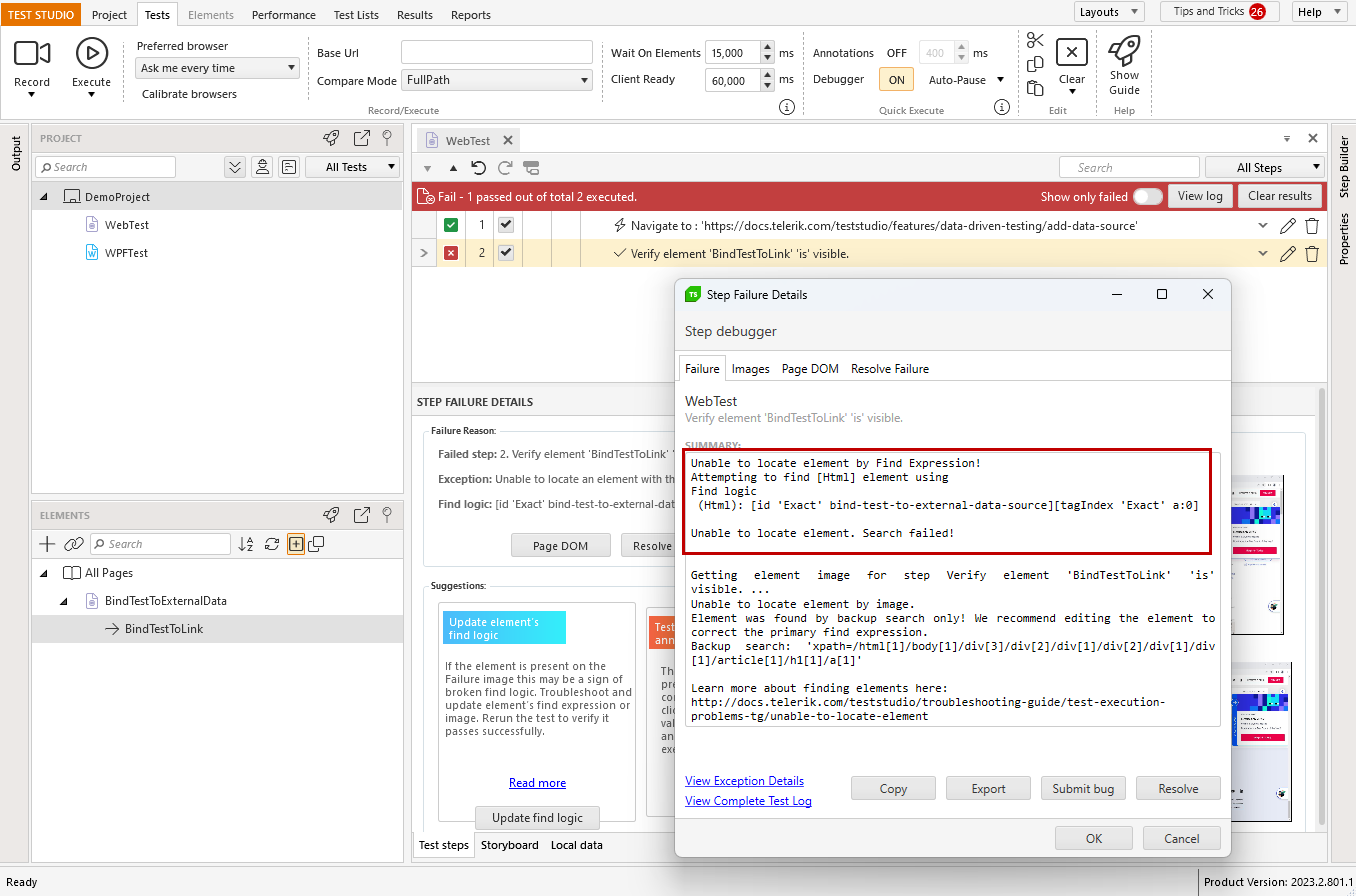
From this view you can also access other useful options:
View Exception Details: lists the log for the failed test step only.
Complete Test Log: displays the entire test log in the format of the quick execution log.
Copy: copies the exception details for the failed step to the clipboard to paste into another application.
Export: saves a zipped file containing a text file with the failed step log, the complete test log, a screenshot of the web page when the failure occurred, and a snapshot of the DOM tree in XML form.
Submit Bug: loads the Submit Bug dialog and logs a bug, if you have configured a bug tracking application.
Resolve: navigates to the 'Resolve Failure' tab, where you will get suggestions to apply a fix depending on the error.
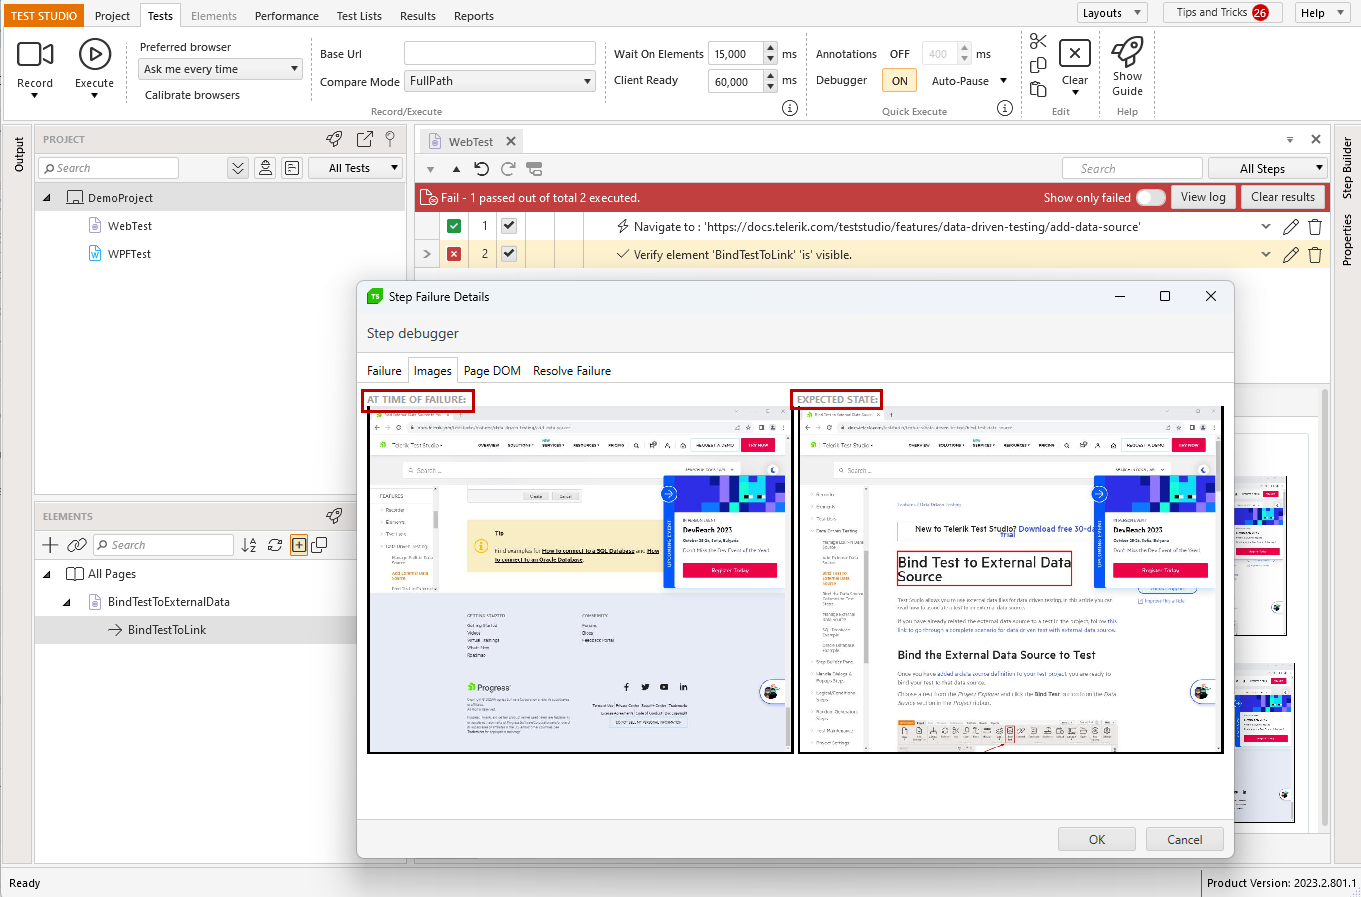
Images Tab
The Images tab displays two screenshots of the browser: the state at time of failure and the expected state. Storyboard must be enabled in Project Settings for the expected state image to appear.
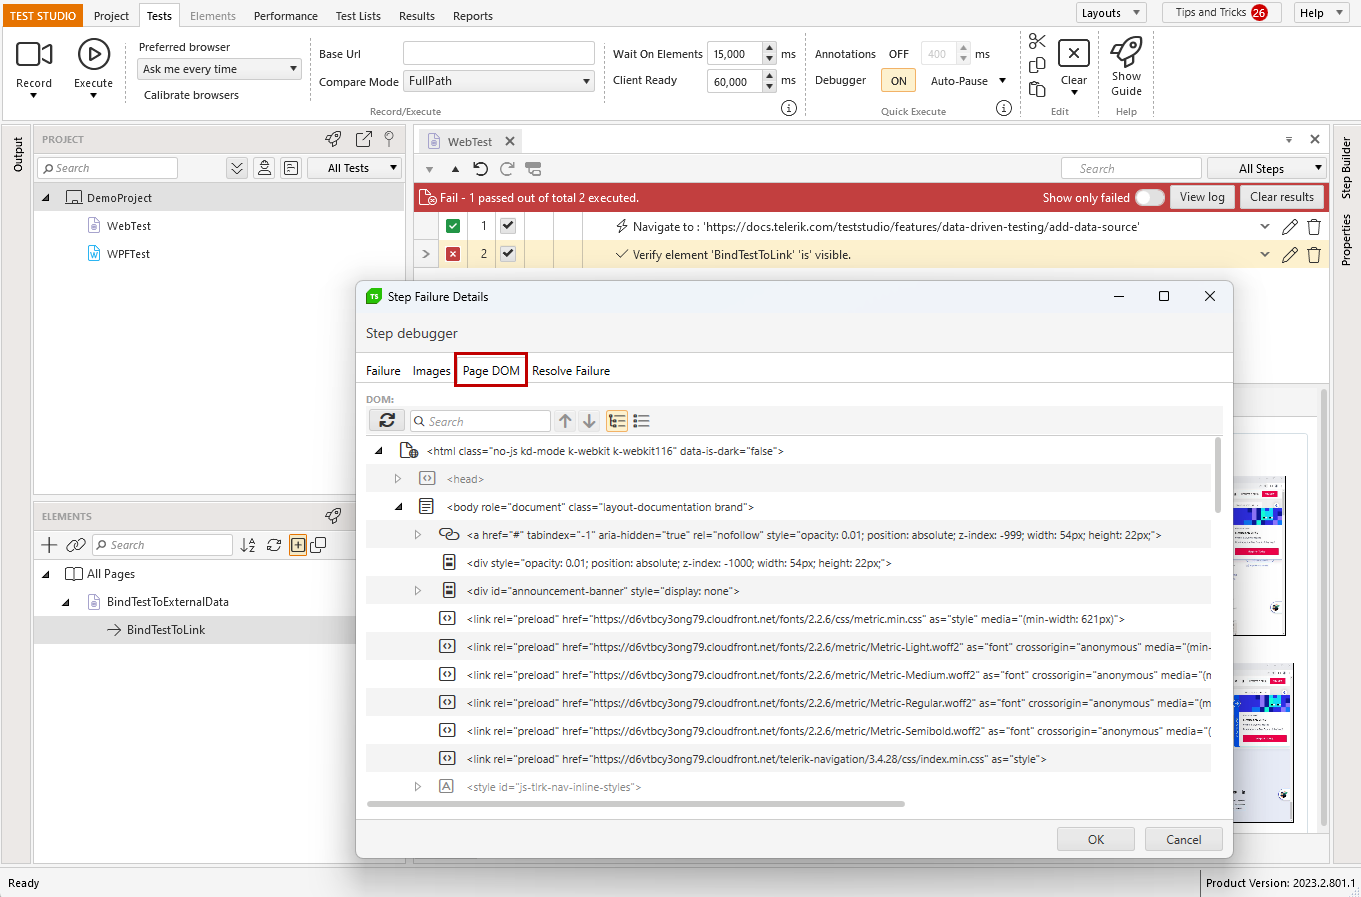
Page DOM Tab
The Page DOM tab displays a snapshot of the DOM state at the time of failure. You can use it to locate the element in the DOM tree and check its state, content, etc.
When to use the DOM on Failure?
The DOM on Failure is most helpful in situations where a test does not properly locate and act on a particular element. This includes any of the following, when unexpected:
- 'Element does not exist' exceptions;
- 'Element not found' exceptions;
- 'Timed out waiting for element' exceptions;
- Test execution targets incorrect element.
What to look for in the DOM on Failure?
The DOM on Failure provides a record of the elements that Test Studio could see in the browser at the time the test failed. Compare with the find logic of the element that Test Studio expects to be in the browser during the failed step. This helps to identify which element should have been targeted, why the incorrect element may have been targeted, or what state the browser may have been in instead of the correct state.
Resolve Failure Tab
The 'Resolve Failure' tab provides the opportunity to identify and correct the issue that caused the failure. For validation steps, the Sentence Verification Builder allows you to reload the page, make changes to the verification sentence, and re-run the verification until the verification passes.
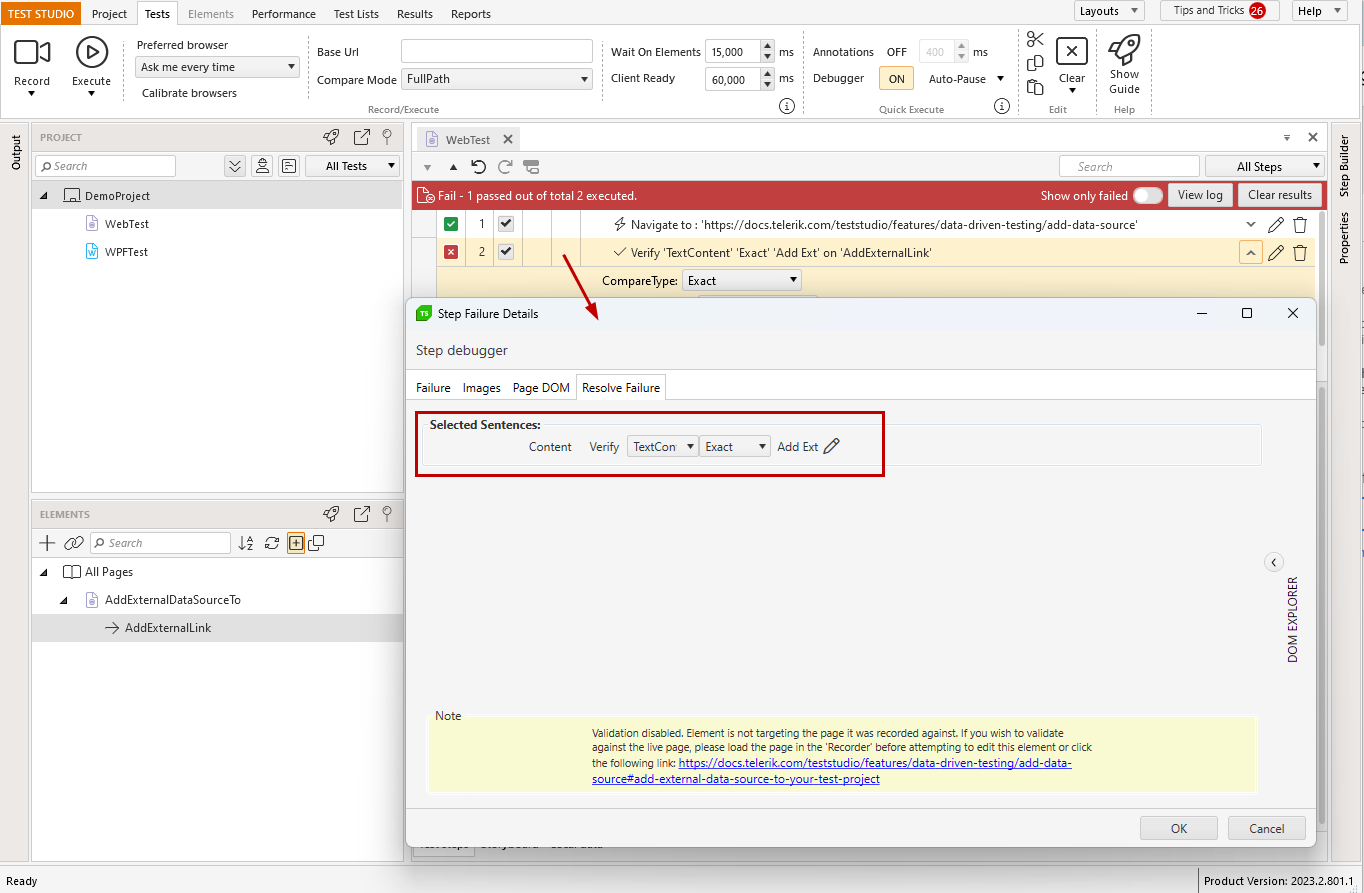
In case the failure is caused by an element, which cannot be located on the page, the 'Resolve Failure' tab provides different options to change the elements find expression.
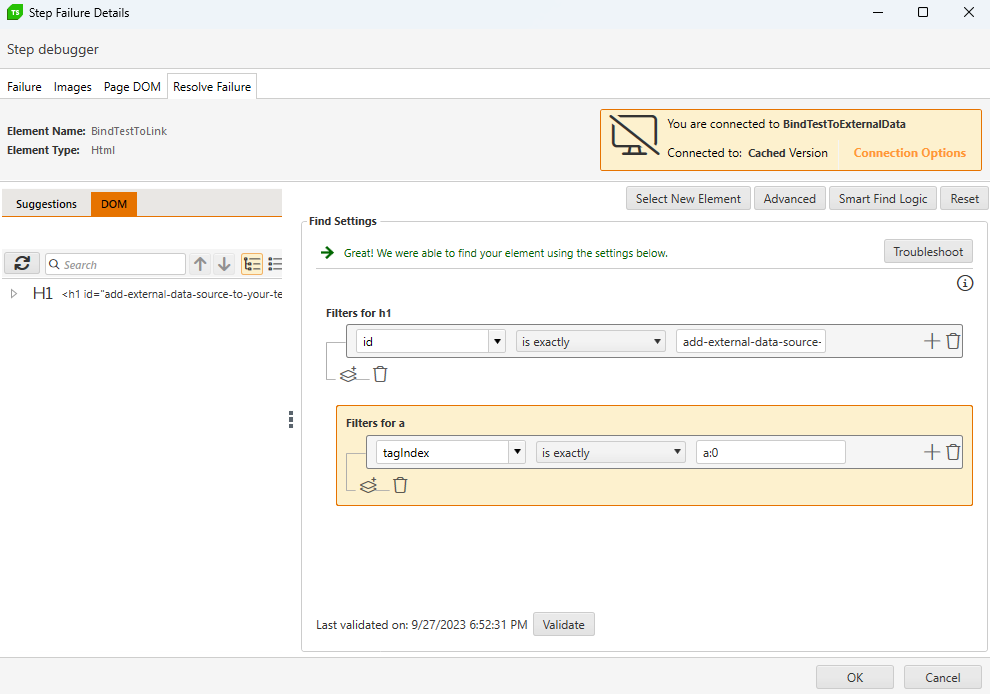
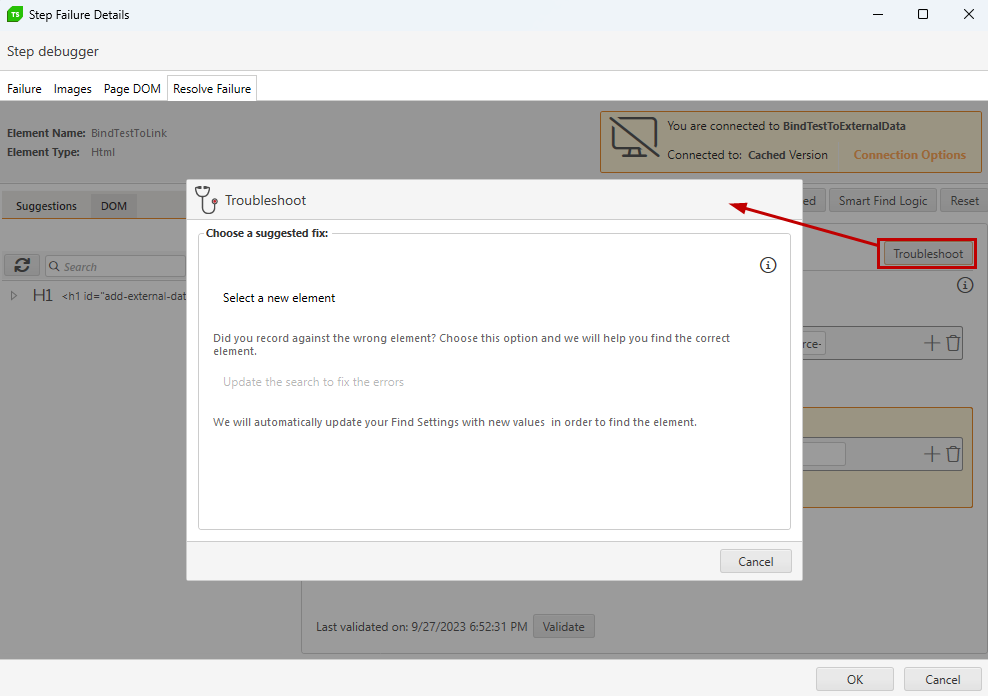
If the element was located on the page using the backup search recorded for it, you can directly choose the 'Troubleshoot' button. You can choose between the automatic update of search criteria used, or manually select a new element.
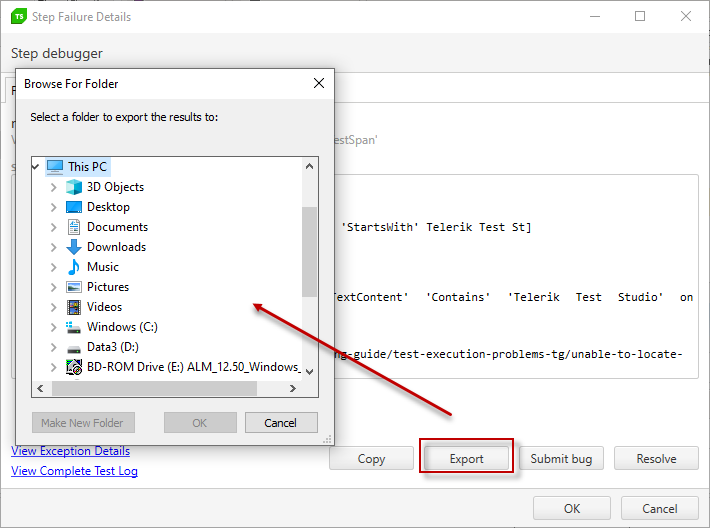
How to Export the Step Failure Details?
When a test is failing and you need to share the identified faulty behavior with a team mate, developer, or the Test Studio Support team, you can easily export the complete set of failure details into a single zipped file. The archive contains the failed step log, the complete test execution log, a screenshot of the web page and a snapshot of the DOM tree at the time of failure.
-
One option to get the zipped folder is to use the Export button in the Failure Reason Section.

-
The other option to get the zipped file is to use the Export button on the Failure tab in the Step Failure window and choose a folder where to store it.