Skin Registration
Skins use Cascading Style Sheets (CSS) to define a control's visual appearance. The CSS file needs to be registered in the page for the skin to take effect.
The built-in skins are registered automatically and you need to register manually custom skins.
Additionally, built-in skins and custom stylesheets can be registered through RadStyleSheetManager.
You can also control skin settings for all controls in the application through web.config settings. This includes skin name and disabling the built-in skins which is a prerequisite for using custom skins.
Automatic skin registration
If the Skin property is set to some built-in skin and EnableEmbeddedSkins is set to true (the default value) the control will automatically register the CSS file.
Manual skin registration
If the user needs a custom or a modified skin, the CSS file should be registered by hand. The skin CSS file can be registered
You can also let RadSkinManager register the custom skin for you.
To use a custom skin, set the
EnableEmbeddedSkinsproperty of the corresponding control tofalseand itsSkinproperty to the name of the custom skin. See the Global skin settings for the entire website/application section for ways to do that globally.
Declarative registration
To register declaratively the skin CSS please follow these steps:
-
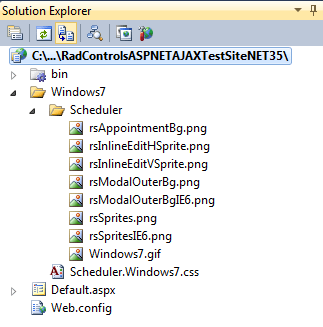
Copy the CSS file and all required resources (e.g. images) in your application folder. The example below is for RadScheduler for ASP.NET AJAX:
-
Drag-and-drop the CSS file into your page. You should end up with the following HTML:
XML
<head id="Head1" runat="server"> <title>Untitled Page</title> <link href="Windows7/Scheduler.Windows7.css" rel="stylesheet" type="text/css" /> </head> -
Optionally, you can make the
hrefattribute of the<link>tag application relative - insert a tilde~/- and addrunat="server":XML
<head id="Head2" runat="server">
    <title>Untitled Page</title>
    <link id="Link1" href="~/Windows7/Scheduler.Windows7.css" rel="stylesheet" type="text/css" runat="server" />
</head>
Programmatic registration
You can register the CSS file of the skin by adding a HtmlLink control in the Header property of your Page. The <head> tag must include the runat="server" attribute.
HtmlLink link = new HtmlLink();
link.Href = "~/Windows7/Scheduler.Windows7.css";
link.Attributes.Add("type", "text/css");
link.Attributes.Add("rel", "stylesheet");
Page.Header.Controls.Add(link);
Dim link As New HtmlLink
link.Href = "~/Windows7/Scheduler.Windows7.css"
link.Attributes.Add("type", "text/css")
link.Attributes.Add("rel", "stylesheet")
Page.Header.Controls.Add(link)
Skin registration with RadStyleSheetManager
The RadStyleSheetManager control is able to register CSS files, which are embedded in an assembly. This can be beneficial in several ways, or in some cases may be even required:
RadStyleSheetManager can improve the page performance by combining the CSS files into one on the fly and thus, reducing the number of HTTP requests;
Internet Explorer is unable to handle more than 31 CSS files due to a limitation. Combining the embedded CSS files will make all skins apply as expected;
you can register a built-in skin CSS file for a control, that is not present on the page - the control can be added to the page later, or you may want to use the built-in skin for generic HTML content;
Here is how to register a Telerik control's built-in skin:
<telerik:RadStyleSheetManager ID="RadStyleSheetManager1" runat="server">
   <StyleSheets>
       <telerik:StyleSheetReference Name="Telerik.Web.UI.Skins.Vista.Grid.Vista.css" Assembly="Telerik.Web.UI" />
   </StyleSheets>
</telerik:RadStyleSheetManager>
The general pattern for the Telerik controls built-in stylesheets' names is: Telerik.Web.UI.Skins.SkinName.ControlName.SkinName.css.
For more information about registering custom embedded skins, please refer to the following forum thread: Tool for Embedding Custom Skins into an Assembly
Global skin settings for the entire website/application
There are several switches in the appSettings section of the web.config that you can use to set the skin globally for the application, or to disable the embedded skins (so you can use custom skins). Here follows a list of examples.
-
If you need to register a common skin for all Telerik controls in your website or web application, add the following lines in the web.config file:
web.config
<appSettings>
    <!-- Sets the skin for all Telerik controls to Silk -->
    <add key="Telerik.Skin" value="Silk"/>
</appSettings>
Just change Silk to the name of the desired skin.
-
If you need to globally assign a skin to all instances of a particular Telerik control, add the following lines in the web.config file:
web.config
<appSettings>
    <!-- Sets the skin for every instance of RadMenu to Glow"  -->
    <add key="Telerik.Menu.Skin" value="Glow"  />
</appSettings>
Just change Menu to the name of the control you want - TreeView, ComboBox, Upload, etc. and Glow to the skin name you want.
-
You can combine the two approaches above - set the skin of all Telerik controls to Silk, except the Menu and ComboBox, which will have the Glow skin:
web.config
<appSettings>
    <add key="Telerik.Skin" value="Silk" />
    <add key="Telerik.Menu.Skin" value="Glow" />
    <add key="Telerik.ComboBox.Skin" value="Glow" />
</appSettings>
Setting the value to an empty string disables the skin for the control(s).
-
In addition to specifying a skin name globally, you can also disable embedded skins and/or base stylesheets from the web.cofig:
web.config
<appSettings> <add key="Telerik.EnableEmbeddedSkins" value="false" /> <add key="Telerik.EnableEmbeddedBaseStylesheet" value="false" /> </appSettings> -
In order to disable embedded skins and base stylesheet for a particular control, use:
web.config
<appSettings>
    <add key="Telerik.Menu.EnableEmbeddedSkins" value="false" />
    <add key="Telerik.Menu.EnableEmbeddedBaseStylesheet" value="false" />
</appSettings>
Alternatively, take advantage of the ASP.NET Theme mechanism to specify global application style settings for Telerik controls.