Getting Started
This quick start tutorial will help you setup and add a ImageEditor control to an application.
First, you need to add reference to the following Telerik assemblies:
- Telerik.Core.dll
- Telerik.UI.Xaml.Primitives.dll
- Telerik.UI.Xaml.Input.dll
Alternatively, you can add a reference to Telerik UI for Windows Universal SDK.
If you wish to use our set of predefined tools you have to add the Lumia Imaging SDK 2.0 (you can do this via NUGet package manager) and the following assembly that provides integration with the Lumia Imaging SDK which is CPU architecture dependent:
- Telerik.UI.Xaml.Controls.Input.ImageEditor.Tools.dll
You are ready to add the RadImageEditor to your project. Here is the XAML definition:
<input:RadImageEditor x:Name="imageEditor">
    <tools:ImageEditorBasicGroup/>
    <tools:ImageEditorEffectsGroup/>
    <tools:ImageEditorTransformGroup/>
</input:RadImageEditor>
Where:
xmlns:imageEditor="using:Telerik.UI.Xaml.Controls.Input.ImageEditor"
xmlns:input="using:Telerik.UI.Xaml.Controls.Input"
xmlns:tools="using:Telerik.UI.Xaml.Controls.Input.ImageEditor.Tools"
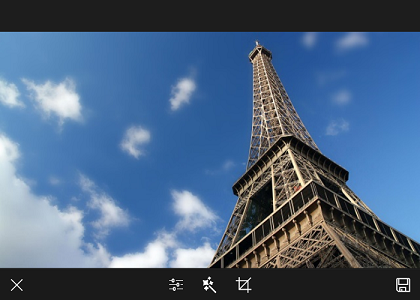
And here is how you can set the image source:
private async void LoadImage()
{
    var folder = await Package.Current.InstalledLocation.GetFolderAsync("Images");
    var imageFile = await folder.GetFileAsync("Eiffel-Tower.jpg");
    this.imageEditor.Source = imageFile;
}
This is the result:
