Create Your First Test
Once you have successfully created a project in Test Studio, you can start with recording the automation tests against the application under test. In this article you can find useful hints on the below topics.
Tip
Check this step-by-step tutorial blog post on how to create your first test.
Add a Test to the Project
Let's go ahead and add a new Web test in the test project.
-
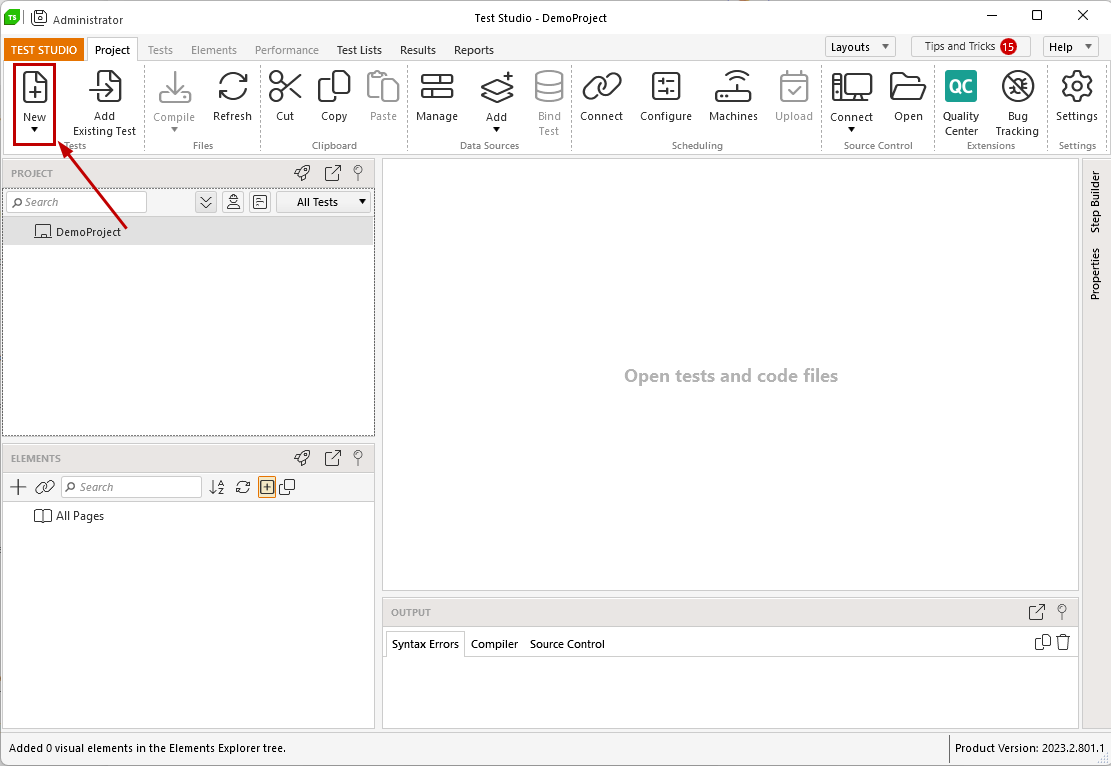
Go to the Project ribbon in the project and click on the New button. This button consists of two areas - the upper one adds a web test by default, the lower one opens a dropdown and lets you choose the type of test to add (skip to step 3. in this tutorial). Use the upper area of the button to add your first web test for this project.
-
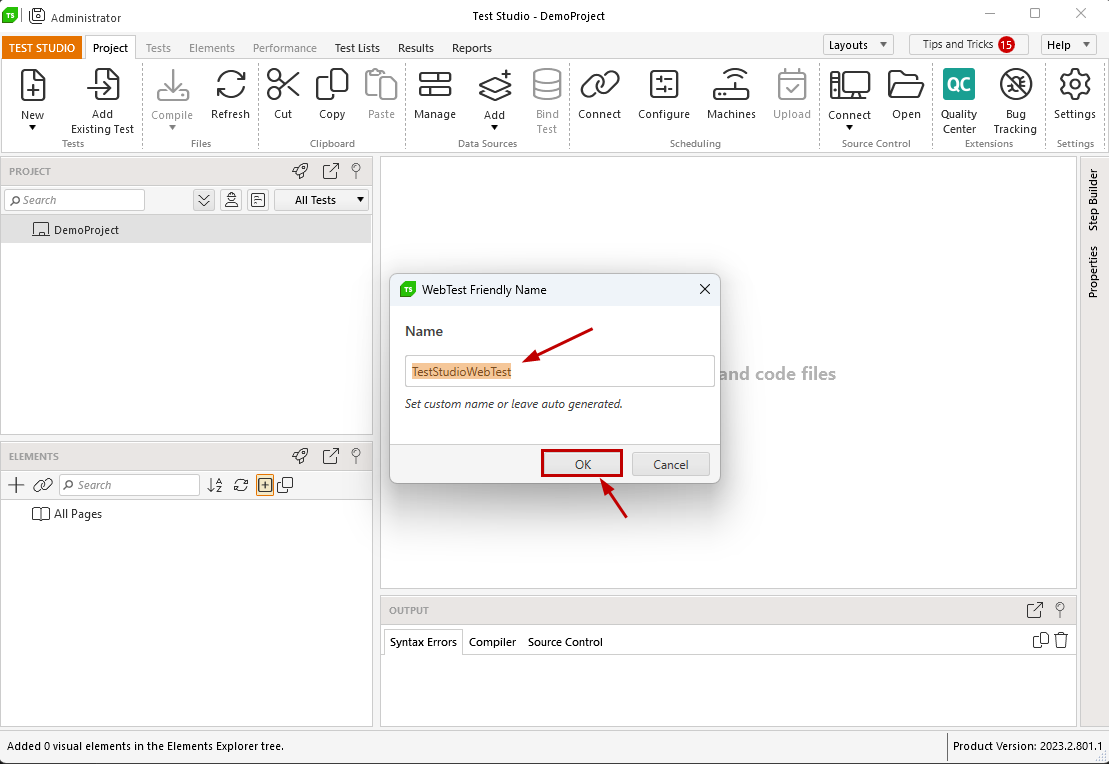
This brings up a popup window and allows you to enter a name for the test. Or, you can leave it with the default suggested name and rename it later from the Project Explorer Context Menu. Press the Ok button to confirm adding the new test - it appears in the Project Explorer and is opened on focus in the test area.
-
To add a test from any of the other test types, click the down arrow area of the New button in the Project ribbon and select the desired one from the dropdown list. You can change the default test name in a similar popup window and confirm the selection by pressing the Ok button. The test appears in the Project Explorer and is opened on focus in the test area.
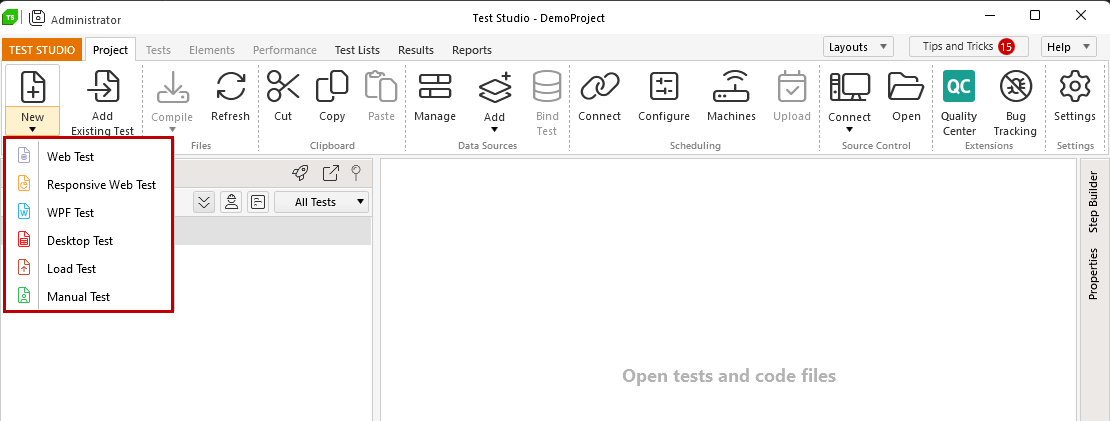
You can use the links below to find out more detailed information on all test types you can add in a Test Studio Web&Desktop project:
Tip
When you start working in the project, you get tips and tricks with useful information and links to the documentation. These are based on your actions and you can access the list of Tips and Tricks at any time from the top right corner of Test Studio.
Start a Recording Session
The click-and-record functionality in Test Studio is designed to record the user's actions in web and WPF apps and to represent these as steps in an automated test. Follow the below instructions and find out how to start a recording session and generate the steps of your test scenario.
-
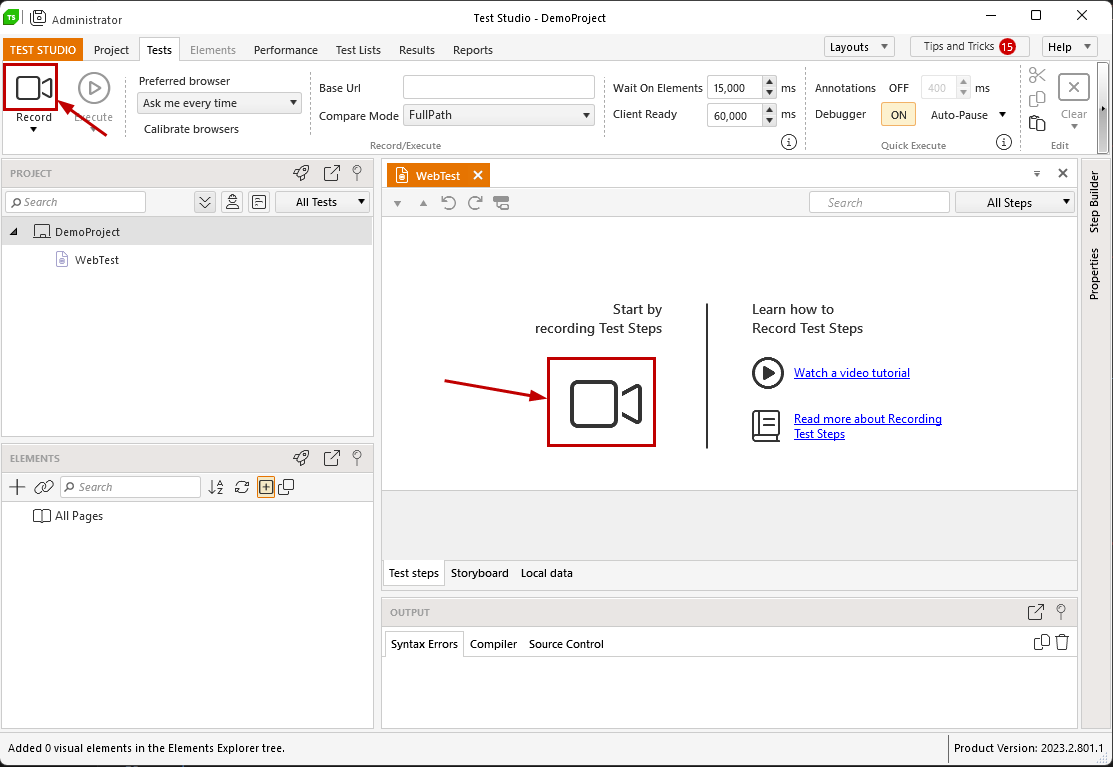
You can continue in the sample project you just created. Select the test you added in the Project Explorer and double click on it - the focus is set in the empty test area and the tools ribbon is switched to Tests. You can trigger the recording session either by clicking on the Record button in the ribbon, or the camera icon in the test area.
Tip
You can use the keyboard shortcut Ctrl+R to start the recording session in the context of the active test. -
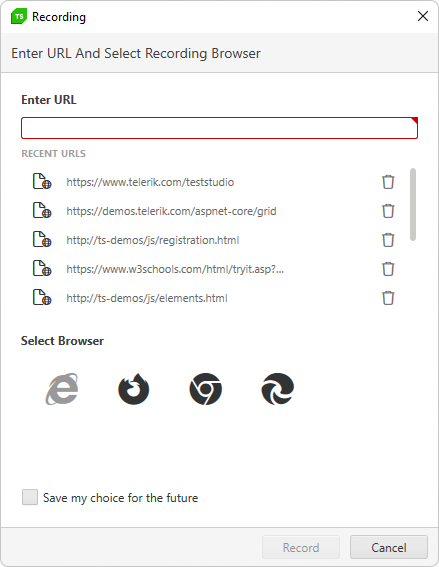
Starting the recording session from a web test triggers the Recording dialog. You need to type the URL to navigate to (you can pick a URL from the list of recently used URLs) and select any of the supported for recording browsers. Click the Record button or press the Enter key to start the recording.
Tip
If you have already set a preferred browser, the recording always starts with this type of browser. -
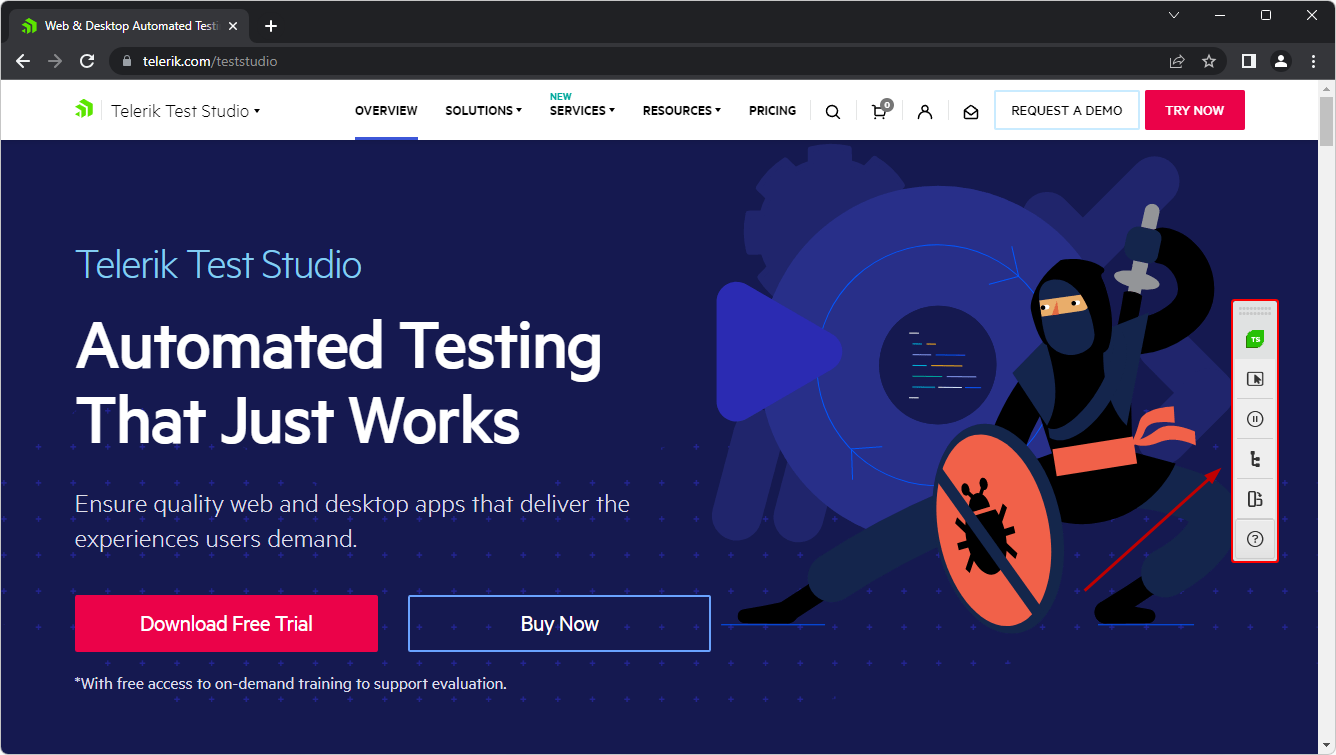
The selected browser starts and navigates to the selected page and once the page is entirely loaded the Test Studio Compact Recording Toolbar gets attached to the browser instance. A Navigate step is recorded in the test for this initial action and you can continue acting upon the page as usually. Test Studio records all user actions towards the page and represents these as steps in the test.
Important
While recording a web test, do not start another instance of the same browser until the current recording session is finished! -
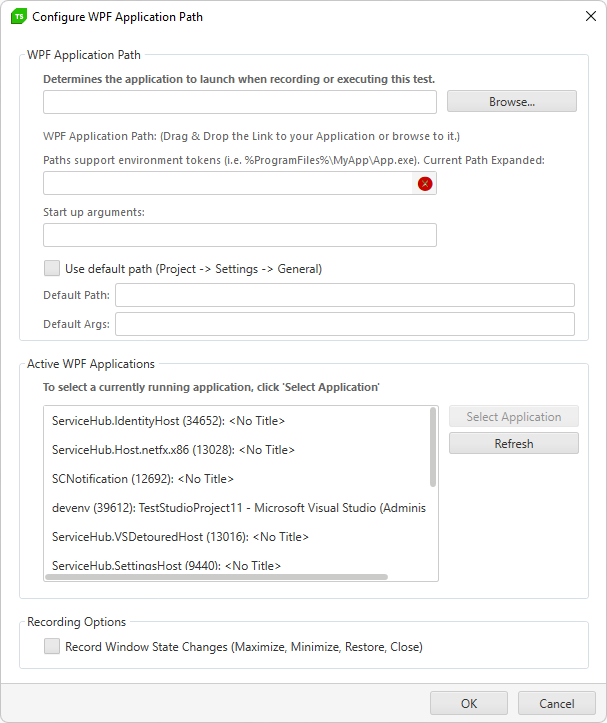
Starting the recording session from a WPF test for first time triggers the Configure WPF Application Path dialog. You need to specify the application to be used for creating the tests, then click the OK button to trigger the recording. Once the test is configured with an application, the Record button starts that one automatically in recording mode.
-
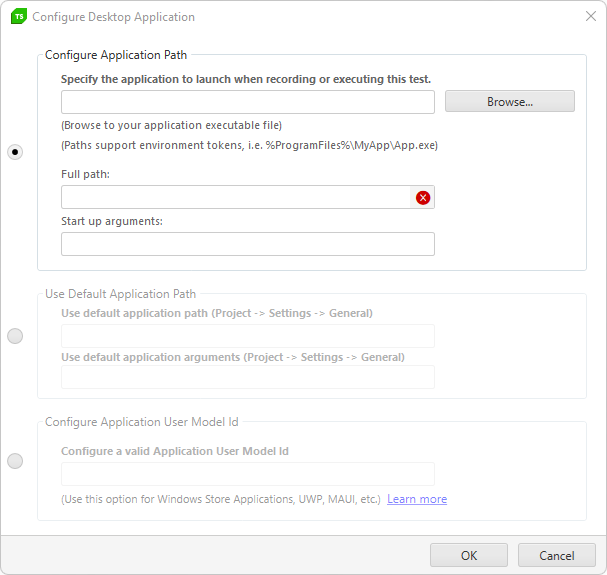
Starting the recording session from a desktop test for first time triggers the Configure Desktop Application Path dialog. You need to specify the application to be used for creating the tests, then click the OK button to trigger the recording. Once the test is configured with an application, the Record button starts that one automatically in recording mode.
-
The configured application - WPF or Desktop - starts and once it is loaded entirely the Test Studio Compact Recording Toolbar gets attached to it.
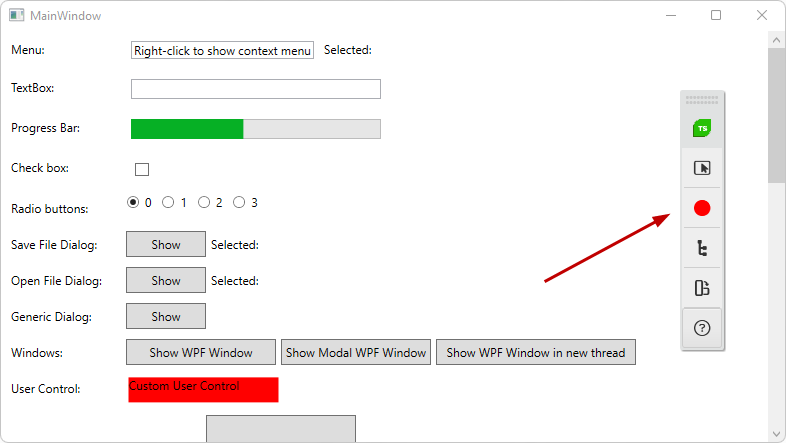
Recording WPF Application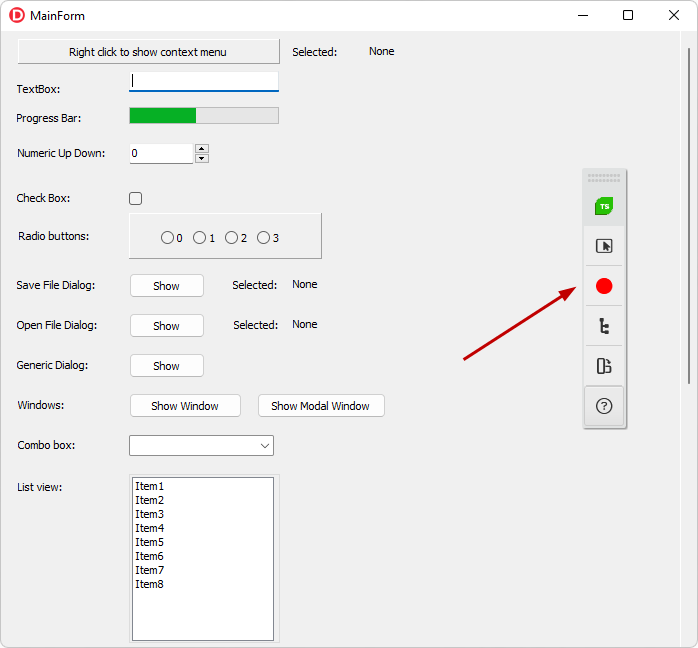
Recording Desktop ApplicationTo stop the recording session, close the application instance (browser, desktop or WPF) with the attached Recording Toolbar.
Compact Recording Toolbar
Following the above steps, you noticed that starting the recording session attached the Test Studio Compact Recording Toolbar to the browser selected for test recording. Let's check what options provides the Compact Recording Toolbar.
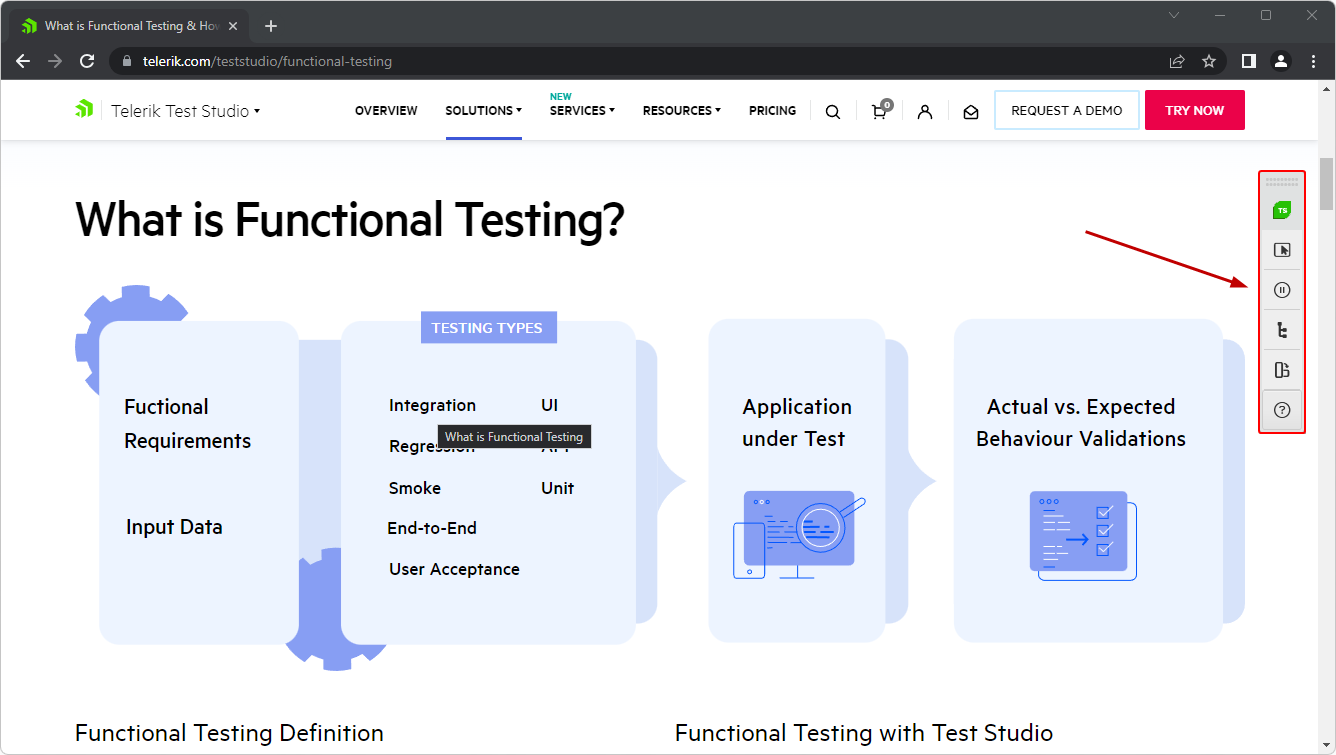
The Compact Recording Toolbar is a powerful tool, which enables additional useful features to enhance the recording experience. You can pause or continue the recording of actions, enable or disable the elements highlighting to use the Quick Step menu, open the Advanced Recording Tools to explore the DOM in further details, etc. Check the list below for details of the options in the toolbar.
 1. Highlight Element - enables or disables the Element Highlighting and the Quick Steps menu.
2. Recording State - there is a Pause button in case you need to perform any actions against the application, but don't need to record these. When the recording is paused, the button is switched to a Resume mode to trigger the recording again.
3. Advanced Recording Tools - open the Advanced Recording Tools window to explore the DOM tree of the application, add element specific steps or include browser specific actions or common steps between the recorded steps.
4. Rotate Compact Recording Toolbar - change the orientation of the Compact Recording Toolbar between vertical and horizontal. You can move it anywhere in the browser/WPF application.
5. Link to Documentation - follow the link to our documentation describing the recording process in details.
1. Highlight Element - enables or disables the Element Highlighting and the Quick Steps menu.
2. Recording State - there is a Pause button in case you need to perform any actions against the application, but don't need to record these. When the recording is paused, the button is switched to a Resume mode to trigger the recording again.
3. Advanced Recording Tools - open the Advanced Recording Tools window to explore the DOM tree of the application, add element specific steps or include browser specific actions or common steps between the recorded steps.
4. Rotate Compact Recording Toolbar - change the orientation of the Compact Recording Toolbar between vertical and horizontal. You can move it anywhere in the browser/WPF application.
5. Link to Documentation - follow the link to our documentation describing the recording process in details.
See Also: