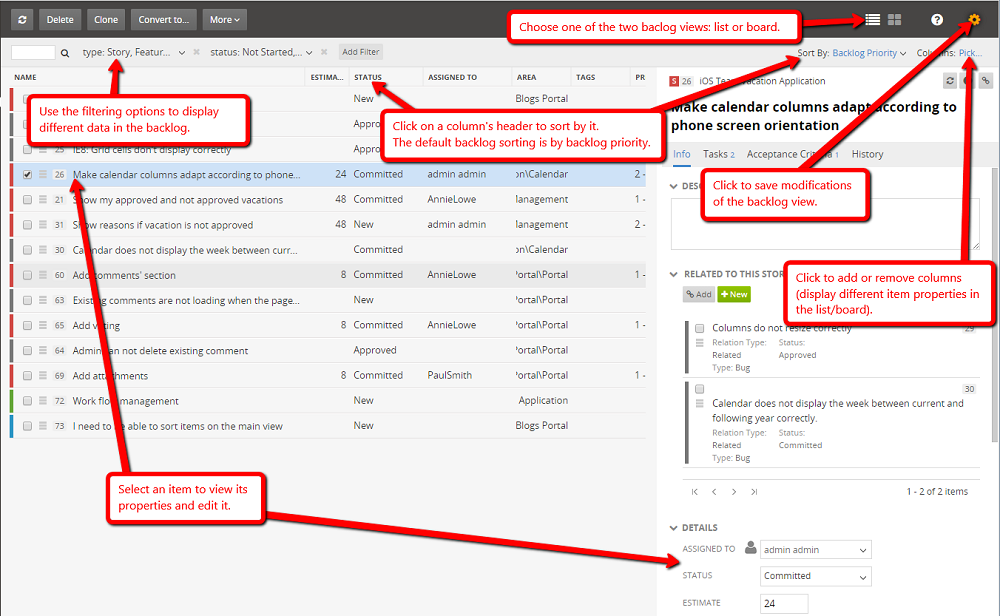
Most agile teams use a product backlog – which is the master list of all functionality desired in the product. The backlog is used in the release and iteration (sprint) planning sessions as the source of features and work. Or else said - think of the Backlog as the big white board with all the sticky notes necessary to manage until you finish your product. In TeamPulse you can choose between list or board view of the backlog. Go to Plan >> Backlog to get started
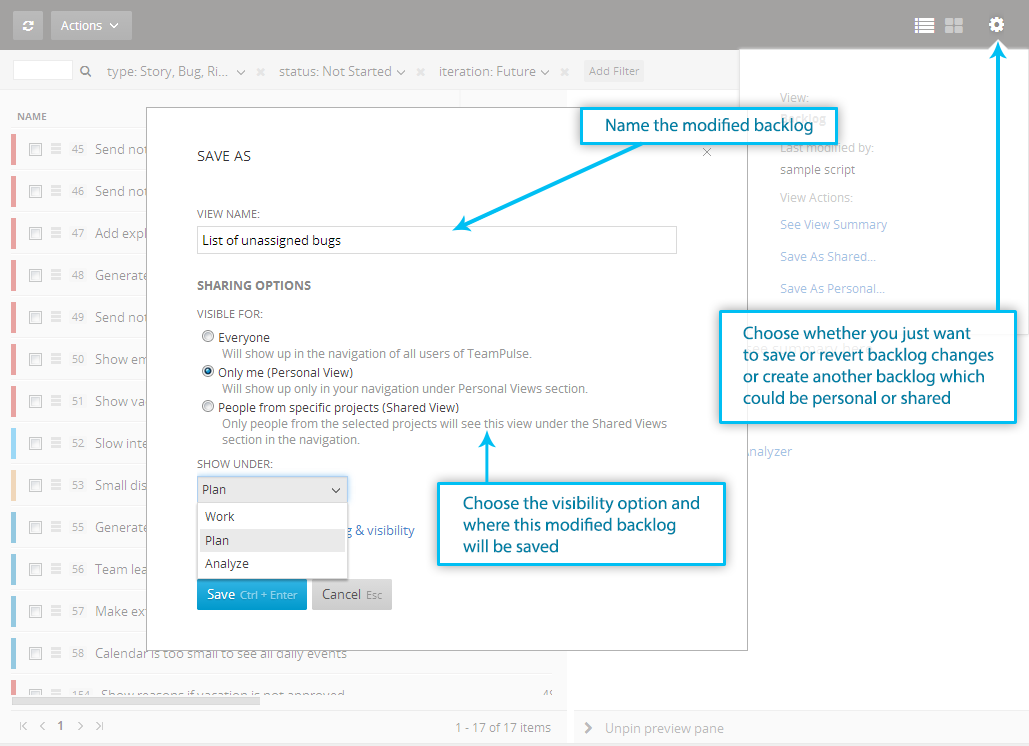
By default in TeamPulse, the backlog displays all of the work (features, stories, bug, issues, risks and feedback items) in your project that has not started yet. Selecting an item will allow you edit it directly on the screen, double click will open the item in question. You can also choose what to see in the backlog i.e. create a custom backlog which can be saved later by:
TeamPulse allows you to save your filter and column settings in the form of modified personal or shared backlog views. This way if, for example, you want to have separate personal backlog for unassigned bugs (see snapshot below) and a separate backlog for unscheduled user stories you can easily do it. Learn more about sharing and visibility here.
In the context of the backlog, the most important items must be on the top of your list. Before ordering them you should consider the global priority of the individual work items. For example each story has a “Priority” field and “Priority Class”
field.
On the snapshot below the four top items are a bug, two stories, and a feature. The bug is critical, so it should be on the top of the backlog. Both of the stories have Priority Class “Must Have”, but story ID 485 has a Priority 1 and
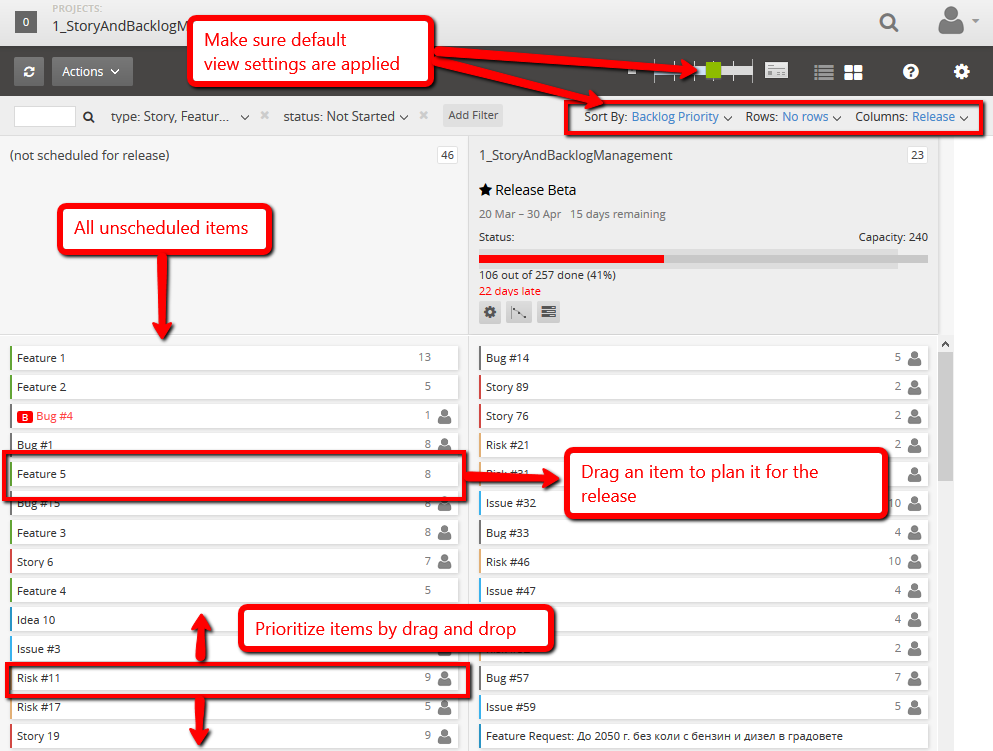
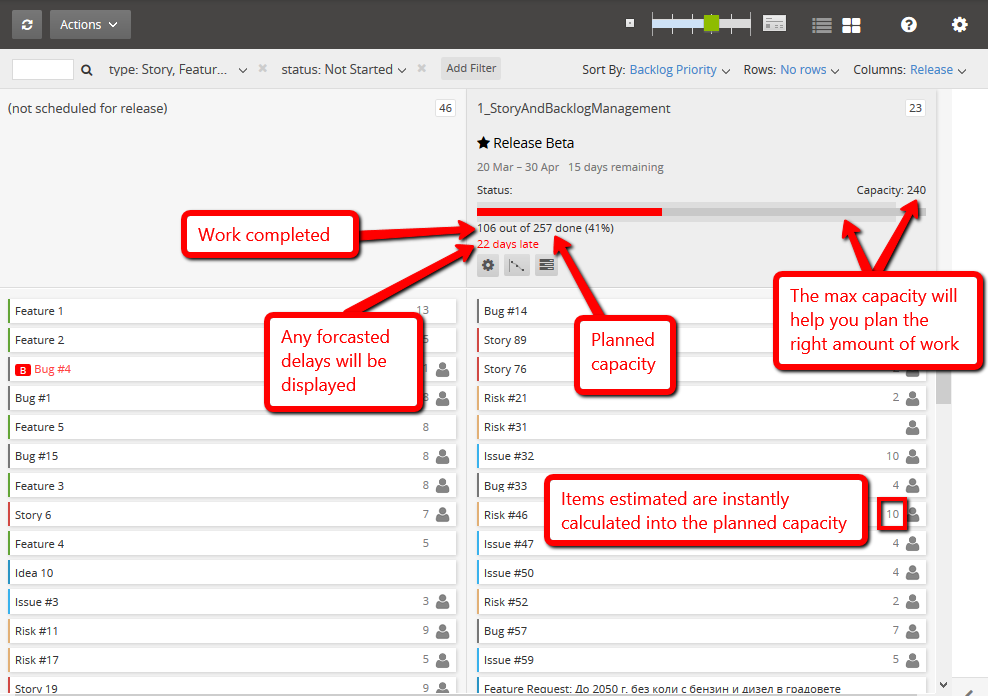
is quite mature, while story ID 872 is not mature and has a lower priority. In similar cases, you should put the ID 485 story on the top. This is an example how you can differentiate item from the same type using the global “Priority” field. With TeamPulse you can plan a release and devide it into iterations. According to Agile best practices an iteration/sprint is a fixed period of time in which a set of work items has to be completed. It is usually a 2-4 week increment after which working software has to delivered. Here is a short example of how to build a release schedule: Note that the start date of “Iteration 1” and end date of “Iteration 2” should coincide with the start and end date of the release “Release Aplha”. Like that, you have just created a release and splitted it in interations. Continuing from the example above, now you can go ahead and add work to release “Release Beta”. In order to do that, you need to have some work items created in advance.
Be very careful what is the capacity set for each of your releases and their current usage. If you need to remove an item from the release backlog drag it back to the unscheduled column. Keeping the planned capacity within the limits set will help you plan just the right amount of work for each release.
Once your release is planned, use the Iteration Planning view to schedule each item for an iteration.
Plan Work
The Product Backlog

Working with the Backlog

Create and Save Your Own Backlog View

Prioritizing the Backlog

Schedule Releases and Iterations (Work Cycles)


Assign Work to a Release


Assign Work to an Iteration

