Using the HTML5 ASP.NET MVC Report Viewer With Report Server
The quickest way to add a HTML5 MVC Report Viewer to your web project is with the Telerik HTML5 MVC Report Viewer item template in Visual Studio. This topic explains how to setup the HTML5 MVC Report Viewer to work with Telerik Report Server using the built-in Guest account.
Prerequisites
- Review the HTML5 MVC Report Viewer Requirements.
- The project must target ASP.NET 4.0 MVC or a newer framework.
- Installed and running Telerik Report Server.
- Report Server's built-in Guest user should be enabled.
- Report Server should contain at least one report that can be accessed by the Guest user account.
Configuring the HTML5 MVC Report Viewer to work with Report Server using Item Templates
The VS item template will integrate HTML5 MVC Report Viewer in a.cshtml page and will connect to the Telerik Report Server to process and render reports. The following describes what steps you should perform in order to add it in your application:
- To start the item template wizard, in Solution Explorer, select the target project. On the Project menu, click Add -> New Item. In the Add New Item dialog box, navigate to the Web category. Select Telerik MVC Report Viewer View item.
- You will be prompted to accept building the project. Click 'OK'.
-
The item template will open the 'Add new Report Viewer' dialog with the following steps:
-
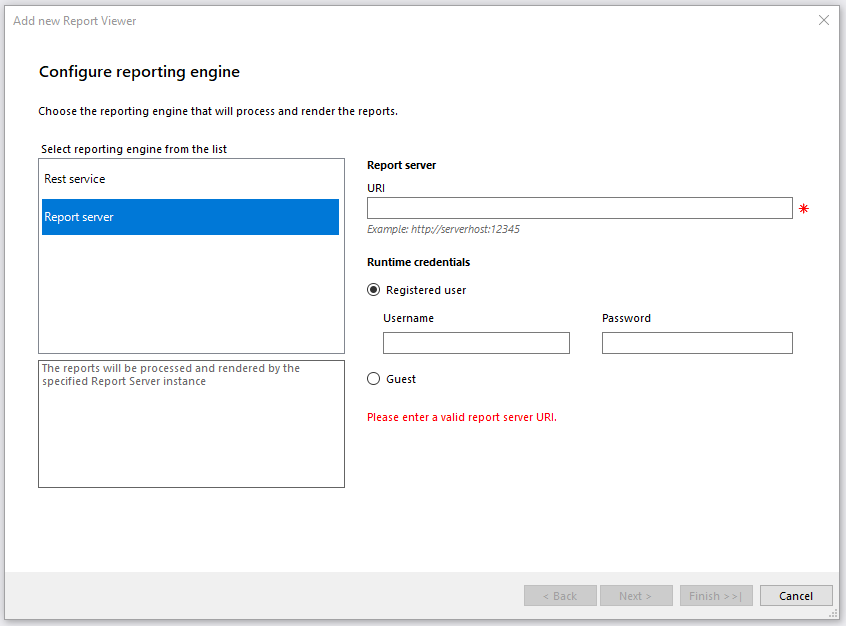
'Configure reporting engine' will configure the type of reporting engine that will process and render the reports. You have two options - REST service or Report server. Choose Report Server option. This way, the reports will be processed and rendered by the specified Report Server instance. On the right side of the dialog there are two things that you should enter:
- Report Server URI - enter a valid Report Server URI.
- Runtime credentials - enter Username and Password for Registered user or choose Guest user if it suits your needs. Make sure your Report Server instance has its Guest account enabled.
-
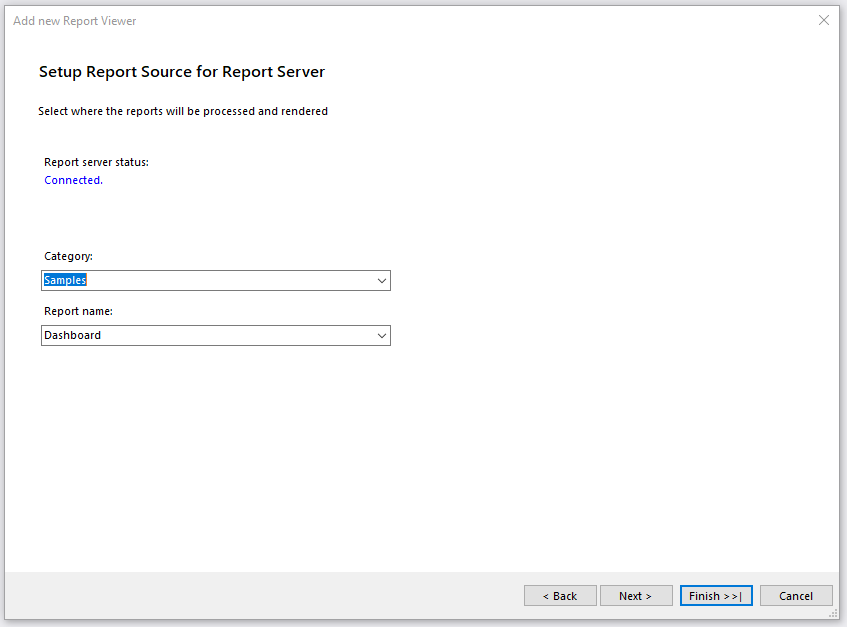
'Setup Report Source for Report Server' will choose a report definition for the report viewer. There are two things that you should select, but in case you are using Guest account, you will have to fill-in the fields manually. It is because the Guest user cannot read the available categories and reports for security reasons:
- Category - select a category from the drop-down menu which contains the desired report.
- Report name - select a report from the available reports.
-
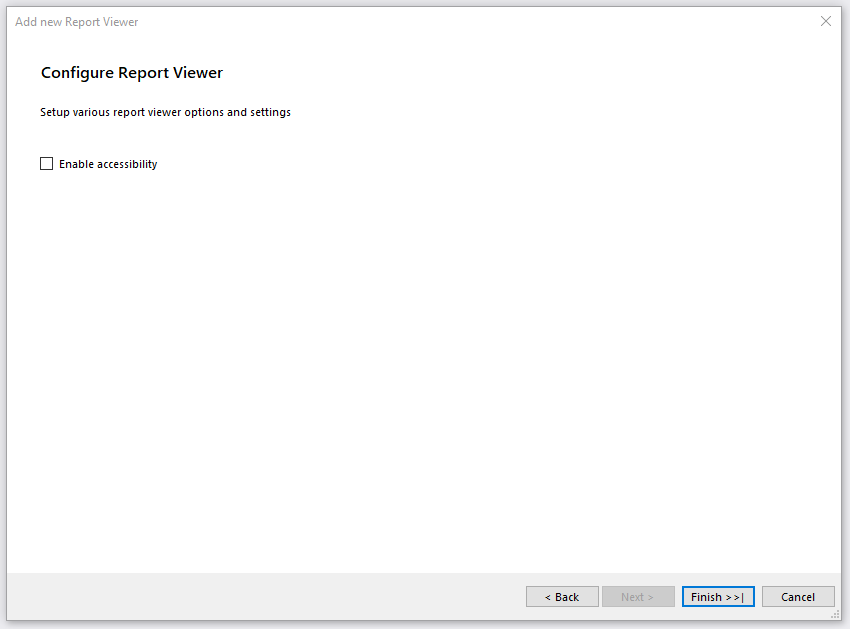
'Configure Report Viewer' exposes the option to enable accessibility for the report viewer.
-
After finishing, the item template automatically does the following:
- Configures the NuGet packages, if nessesary.
- Adds a
CSHTMLpage with the configured HTML5 MVC Report Viewer. - Displays a summary log that list all of the made changes.
To display the newly added MVC page, you will need to use your own MVC controller's action returning the view. Note that the auto-generated ReportsController is an ApiController. You can use the following steps to add an action (e.g. Reports) returning the desired view (e.g. Reports.cshtml), for example, to the HomeController.
- Move the auto-generated View file (i.e.
ReportViewerView1.cshtml) from the main folder to the 'View' folder of the chosen Controller (View/Homefor this example); - Rename the View accordingly (i.e. from
ReportViewerView1.cshtmltoReports.cshtml);