Telerik UI for Xamarin Toolbox
This article introduces Telerik UI for Xamarin Toolbox for Visual Studio, which eases the process of adding Telerik controls to your Xamarin.Forms application. The Xamarin Toolbox is part of the Visual Studio Extensions for Telerik UI for Xamarin.
Telerik UI for Xamarin Visual Studio Extensions are distributed with the Telerik UI for Xamarin MSI installation. You can also download and install them as a separate product from the Visual Studio Marketplace for Visual Studio 2019/2022.
For detailed instructions on how to install the Visual Studio Extensions, see Installing VSExtensions.
Showing the Telerik Toolbox
Visual Studio 2019
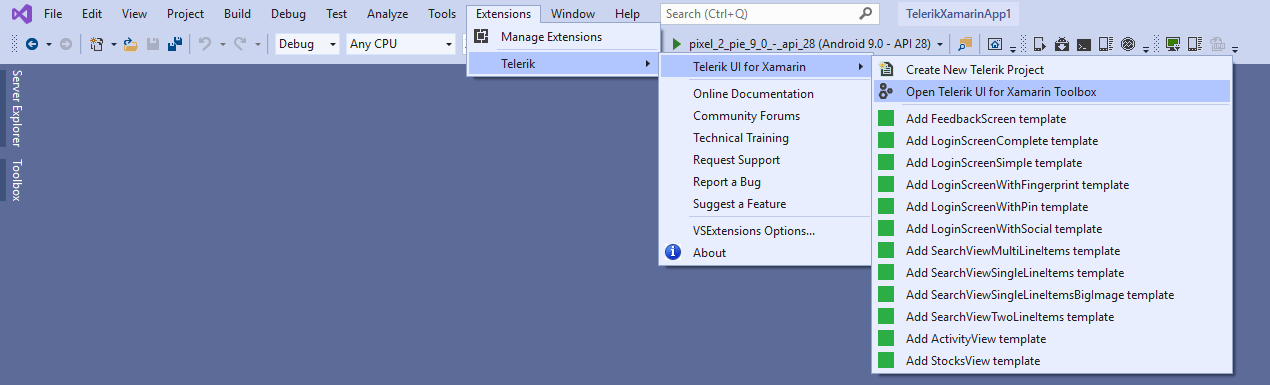
To show the Toolbox and start using the controls, navigate to the tab "Extensions" -> "Telerik" -> "Telerik UI for Xamarin" -> "Open Telerik UI for Xamarin Toolbox" within Visual Studio. You can also find this option when you type "Telerik UI for Xamarin Toolbox" in the Quick Launch search field (top right corner in Visual Studio).
Figure 1 shows where you can find the option in Visual Studio 2019:
Figure 1: Showing the Telerik UI for Xamarin Toolbox in Visual Studio 2019
Adding Controls to Your Project
Embedding the controls from the suite is made as easy as possible. All you need to do is simply drag one of the controls within your XAML file. This adds the control definition and maps the needed namespace declarations. Figure 3 shows how to perform this action.
Figure 2: Adding Telerik controls to your application
