Getting Started with WPF Chat
This topic will guide you through the process of creating a sample application containing RadChat.
Assembly References
- Telerik.Windows.Controls
- Telerik.Windows.Controls.Input
- Telerik.Windows.Controls.Navigation
- Telerik.Windows.Controls.ConversationalUI
Adding RadChat to the Project
Before proceeding with adding RadChat to your project, make sure the required assembly references are added to the project.
You can add Conversational UI manually by writing the XAML code in Example 1. You can also add the control by dragging it from the Visual Studio Toolbox and dropping it over the XAML view.
Example 1: Adding RadChat in XAML
<telerik:RadChat x:Name="chat" />
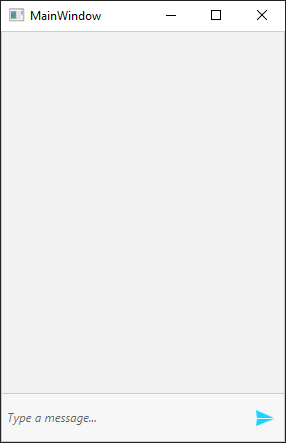
Figure 1: The Empty Chat Generated by the Code in Example 1
Adding Authors to RadChat
Two authors will be defined for this example. Note, that the CurrentAuthor property of RadChat must be set.
Example 3: Adding Authors to RadChat
public partial class MainWindow : Window
{
    private Author currentAuthor;
    private Author otherAuthor;

    public MainWindow()
    {
        InitializeComponent();

        currentAuthor = new Author("Peter");
        otherAuthor = new Author("Steven");
        this.chat.CurrentAuthor = currentAuthor;
    }
}
Partial Public Class MainWindow
    Inherits Window

        Private currentAuthor As Author
        Private otherAuthor As Author

        Public Sub New()
            InitializeComponent()

            currentAuthor = New Author("Peter")
            otherAuthor = New Author("Steven")
            Me.chat.CurrentAuthor = currentAuthor
        End Sub
End Class
Handling the Sent Message
The user's input can be handled by hooking up to the SendMessage event of RadChat. The event arguments are of type RoutedEventArgs which are extended by the Message property.
Example 4: Subscribing to the SendMessage event
<telerik:RadChat x:Name="chat" SendMessage="RadChat_SendMessage" />
Example 5: SendMessage event handler
private void RadChat_SendMessage(object sender, SendMessageEventArgs e)
{
    // We will handle the event in order to add a new message manually
    e.Handled = true;

    var updatedMessageText = "[Updated from event handler] " + (e.Message as TextMessage).Text;
    this.chat.AddMessage(this.chat.CurrentAuthor, updatedMessageText);
}
Private Sub RadChat_SendMessage(ByVal sender As Object, ByVal e As SendMessageEventArgs)
    ' We will handle the event in order to add a new message manually
    e.Handled = True

    Dim updatedMessageText = "[Updated from event handler] " & (TryCast(e.Message, TextMessage)).Text
    Me.chat.AddMessage(Me.chat.CurrentAuthor, updatedMessageText)
End Sub
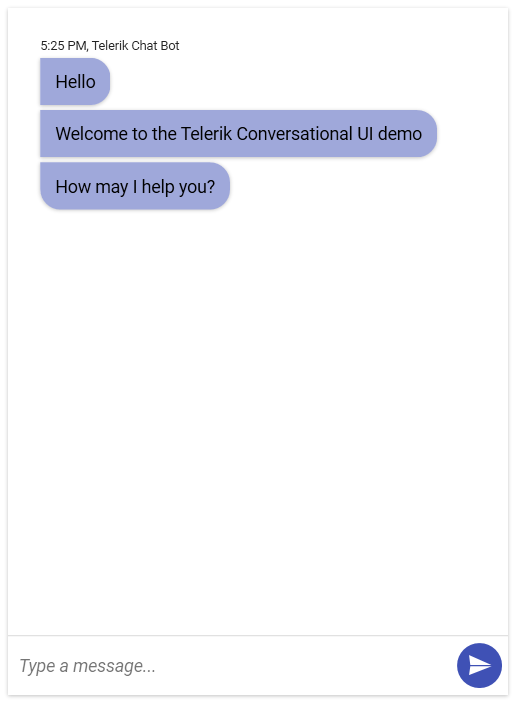
This setup will have the following result.
Figure 2: RadChat with Messages
Setting a Theme
The controls from our suite support different themes. You can see how to apply a theme different than the default one in the Setting a Theme help article.
Changing the theme using implicit styles will affect all controls that have styles defined in the merged resource dictionaries. This is applicable only for the controls in the scope in which the resources are merged.
To change the theme, you can follow the steps below:
Choose between the themes and add reference to the corresponding theme assembly (ex: Telerik.Windows.Themes.Material.dll). You can see the different themes applied in the Theming examples from our WPF Controls Examples application.
-
Merge the ResourceDictionaries with the namespace required for the controls that you are using from the theme assembly. For the RadChat, you will need to merge the following resources:
- Telerik.Windows.Controls
- Telerik.Windows.Controls.Input
- Telerik.Windows.Controls.Navigation
- Telerik.Windows.Controls.ConversationalUI
Example 6 demonstrates how to merge the ResourceDictionaries so that they are applied globally for the entire application.
Example 6: Merge the ResourceDictionaries
<Application.Resources>
    <ResourceDictionary>
        <ResourceDictionary.MergedDictionaries>
            <ResourceDictionary Source="/Telerik.Windows.Themes.Material;component/Themes/System.Windows.xaml"/>
            <ResourceDictionary Source="/Telerik.Windows.Themes.Material;component/Themes/Telerik.Windows.Controls.xaml"/>
            <ResourceDictionary Source="/Telerik.Windows.Themes.Material;component/Themes/Telerik.Windows.Controls.Input.xaml"/>
            <ResourceDictionary Source="/Telerik.Windows.Themes.Material;component/Themes/Telerik.Windows.Controls.Navigation.xaml"/>
            <ResourceDictionary Source="/Telerik.Windows.Themes.Material;component/Themes/Telerik.Windows.Controls.ConversationalUI.xaml"/>
        </ResourceDictionary.MergedDictionaries>
    </ResourceDictionary>
</Application.Resources>
Alternatively, you can use the theme of the control via the StyleManager.
Figure 3 shows a RadChat with the Material theme applied.
Figure 3: RadChat with the Material theme
Telerik UI for WPF Learning Resources
- Telerik UI for WPF ConversationalUI Component
- Getting Started with Telerik UI for WPF Components
- Telerik UI for WPF Installation
- Telerik UI for WPF and WinForms Integration
- Telerik UI for WPF Visual Studio Templates
- Setting a Theme with Telerik UI for WPF
- Telerik UI for WPF Virtual Classroom (Training Courses for Registered Users)
- Telerik UI for WPF License Agreement