Binding to database
RadGanttView supports binding to Database data. Levels are created using the Parent and Child members' values. You can read more on the data binding properties of RadGanttView in the binding basics article.
In a new Windows project drop a RadGanttView control on the form.
In the DataSource property drop down in the
Propertieswindow of from the Smart Tag of the control select the Add Project Data Source link.-
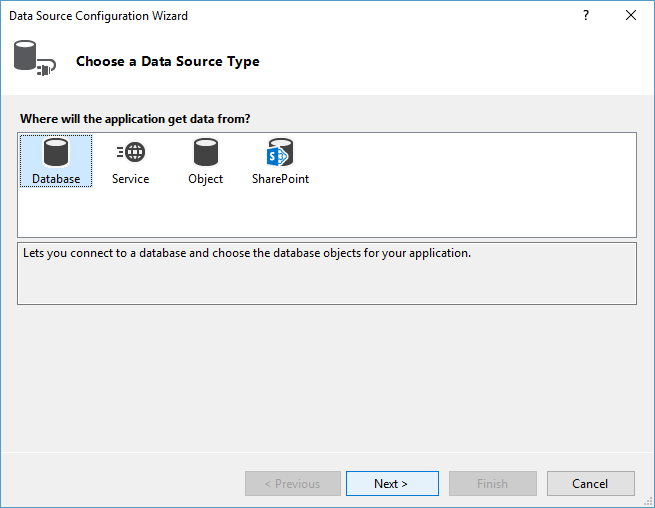
In the Choose a Data Source Type page select the Database icon, then click the Next button.
In the Choose Your Data Connection page of the wizard click the New Connection button.
-
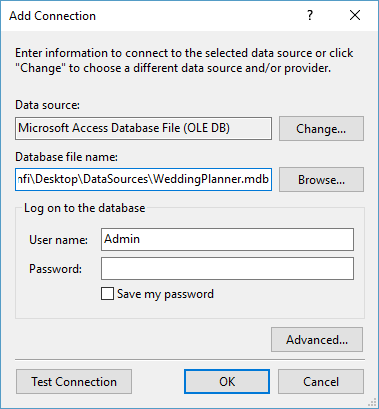
In the Add Connection dialog click Change, select "Microsoft Access Database File" and click OK. In the Database file name entry click Browse and locate the
WeddingPlanner.mdbfile. Click OK. When prompted if you would like to copy the local data file to your project click Yes.You can download the mdb file from here: WeddingPlanner.mdb
-
In the
Choose Your Database Objectspage of the wizard check the "Tasks" and "Links" tables checkboxes. Click Finish.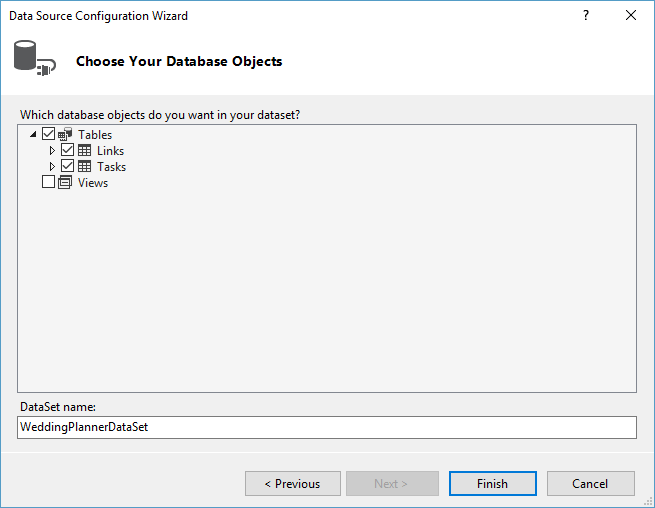
Set the DataSource property first to Tasks, then to Links datatable. This will create the necessary data-binding components in the component tray - a
DataSet,BindingSourcesandTableAdapters. TheDataSetis the container for the data, theTableAdaptersare used to fill theDataSet.-
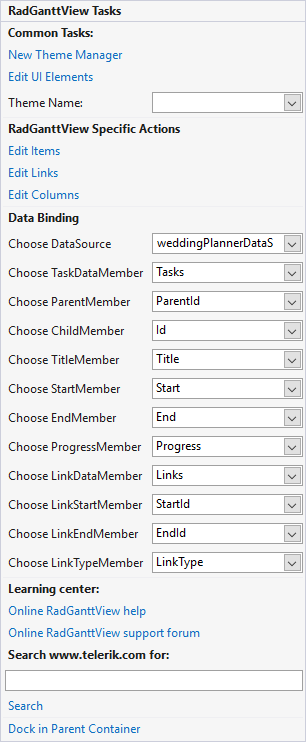
In the Smart Tag or in the properties window set the member properties in the following way.
-
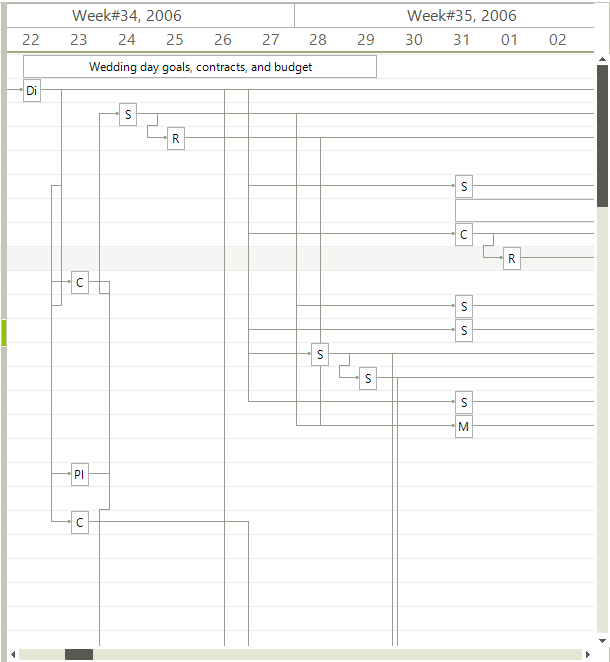
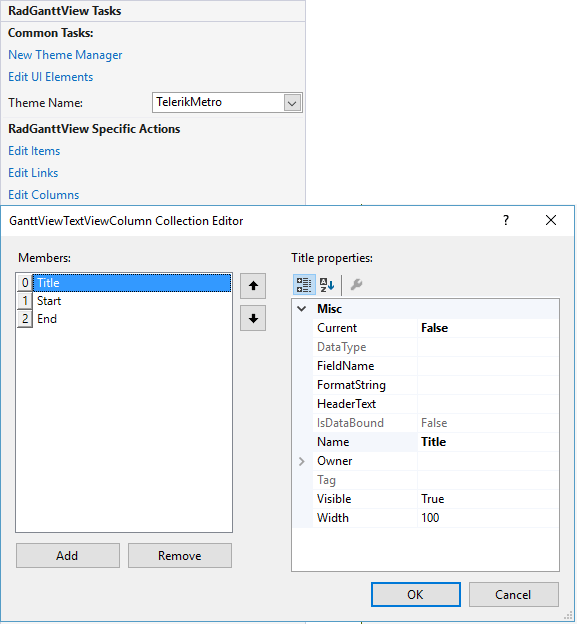
Once the binding is completed, you can open the Edit Columns option from the Smart Tag, where you can add three columns. Make sure to set their FieldName's to the respective fields - Title, Start and End.
Finally add this code to the form load event handler to specify the timeline range:
this.radGanttView1.GanttViewElement.GraphicalViewElement.TimelineStart = new DateTime(2006, 8, 2);
this.radGanttView1.GanttViewElement.GraphicalViewElement.TimelineEnd = new DateTime(2007, 4, 2);
Me.radGanttView1.GanttViewElement.GraphicalViewElement.TimelineStart = New DateTime(2006, 8, 2)
Me.radGanttView1.GanttViewElement.GraphicalViewElement.TimelineEnd = New DateTime(2007, 4, 2)