Getting Started with WinForms ListControl
| RELATED VIDEOS | |
|---|---|
|
Getting Started with RadListControl In this video, you will learn how to bind data to the new RadListControl. |
 |
This tutorial demonstrates how to manually populate RadListControl and how to react to a user's choice in code.
1. Place a RadListControl and a RadLabel control on a form.
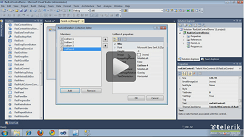
2. Select the RadListControl control, open its Smart Tag menu.
3. Select the Edit Items task.
4. In the RadItem Collection Editor, click Add.
5. Set the Text property of the new ListItem to "RadComboBox".
Figure 1: RadListDataItem Collection Editor
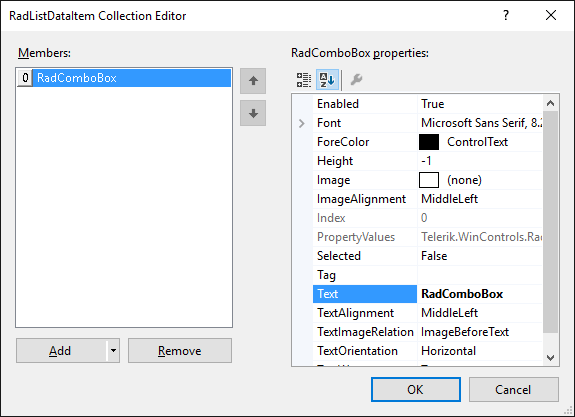
6. Add five more ListItems to the RadListControl. Set their Text properties to "RadDock", "RadMenu", "RadRibbonBar", "RadGridView", and "RadPageView".
7. Click OK.
8. In the Properties window, click the events button.
9. Double-click the SelectedIndexChanged event.
10. Replace the automatically-generated event handler with this code:
Handling the SelectedIndexChanged event
void radListControl1_SelectedIndexChanged(object sender, Telerik.WinControls.UI.Data.PositionChangedEventArgs e)
{
    RadListDataItem item = this.radListControl1.SelectedItem as RadListDataItem;
    radLabel1.Text = "Selected control: " + item.Text;
}
Private Sub radListControl1_SelectedIndexChanged(ByVal sender As Object, ByVal e As Telerik.WinControls.UI.Data.PositionChangedEventArgs)
    Dim item As RadListDataItem = TryCast(Me.radListControl1.SelectedItem, RadListDataItem)
    radLabel1.Text = "Selected control: " & item.Text
End Sub
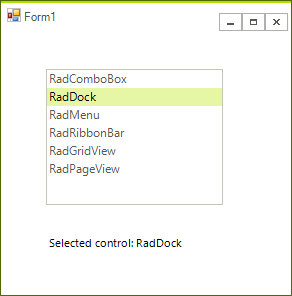
11. Press F5 to run the project. Select an item in the list box and note the value of the label.
See Also
Telerik UI for WinForms Learning Resources
- Telerik UI for WinForms Listcontrol Component
- Getting Started with Telerik UI for WinForms Components
- Telerik UI for WinForms Setup
- Telerik UI for WinForms Application Modernization
- Telerik UI for WinForms Visual Studio Templates
- Deploy Telerik UI for WinForms Applications
- Telerik UI for WinForms Virtual Classroom(Training Courses for Registered Users)
- Telerik UI for WinForms License Agreement)