Getting Started
How to create a simple RadAutoCompleteBox
This quick start tutorial will help you setup and add a RadAutoCompleteBox control to an application.
-
First you have to add a reference to Telerik UI for Universal Windows Platform extension SDK or to your binaries folder. If you choose to add binaries, you will need the following references:
- Telerik.Core
- Telerik.UI.Xaml.Primitives
- Telerik.UI.Xaml.Input
-
Add the following namespace in the MainPage.xaml:
xmlns:telerikInput="using:Telerik.UI.Xaml.Controls.Input" -
Define a RadAutoCompleteBox in XAML:
<telerikInput:RadAutoCompleteBox x:Name="radAutoCompleteBox" Width="200" VerticalAlignment="Top" /> -
Initialize the ItemsSource property so that suggestions can be shown as the user types:
List<string> suggestions = new List<string>();
for (int i = 0; i < 50; i++)
{
    suggestions.Add("Suggestion " + i);
}

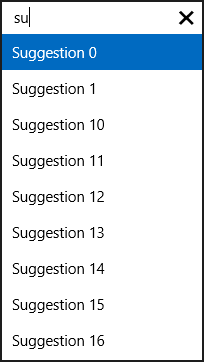
this.radAutoCompleteBox.ItemsSource = suggestions;
The result is:
