Shape Tool
The Shape Tool is one of the tools, which come out-of-the-box with the RadImageEditor and allow you to draw different shapes over an image.
The tool could be added to the UI of RadImageEditor as shown in Example 1.
Example 1: Add Shape Tool
<telerik:ImageToolItem ImageKey="Shape" telerik:LocalizationManager.ResourceKey="ImageEditor_Shape" Command="commands:ImageEditorRoutedCommands.ExecuteTool">
    <telerik:ImageToolItem.CommandParameter>
        <tools:ShapeTool>
            <tools:ShapeTool.Shapes>
                <shapes:RectangleShape />
            </tools:ShapeTool.Shapes>
        </tools:ShapeTool>
    </telerik:ImageToolItem.CommandParameter>
</telerik:ImageToolItem>
The namespaces that should be registered are as follows:
Example 2: Register namespaces
xmlns:telerik="http://schemas.telerik.com/2008/xaml/presentation"
xmlns:tools="clr-namespace:Telerik.Windows.Media.Imaging.Tools;assembly=Telerik.Windows.Controls.ImageEditor"
xmlns:shapes="clr-namespace:Telerik.Windows.Media.Imaging.Shapes;assembly=Telerik.Windows.Controls.ImageEditor"
xmlns:commands="clr-namespace:Telerik.Windows.Media.Imaging.ImageEditorCommands.RoutedCommands;assembly=Telerik.Windows.Controls.ImageEditor"
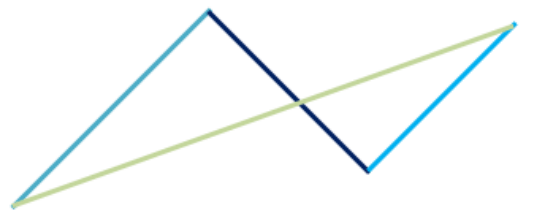
- Line: Allows to draw lines only with dragging.

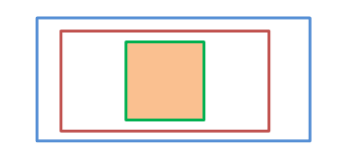
- Rectangle: Draws rectangles or squares (when the LockRatio property is set to true)

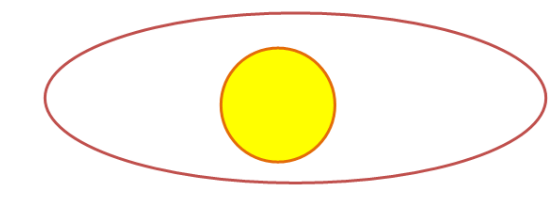
- Ellipse: Allows you to create ellipses or circles (when the LockRatio property is set to true)

The Shape Tool provides an options to easily customize your shape – you can choose if the shape will be filled with some color or it will consist only of borders, which color and thickness also depends on your preferences. You could take advantage of the LockRatio property, which will ensure that the proportions of the shape will be always the same when resizing.
How to Create a Custom Shape
You could customize the shapes in the ShapeTool to fit specific requirements. To create a custom shape, the simple IShape interface should be implemented.
Example 3: Inherit the IShape interface
public class TelerikLogo : IShape
Public Class TelerikLogo
    Implements IShape
    '...
It exposes two members:
- string DisplayName: Тhe name, which will be displayed in the dropdown list.
- Geometry GetShapeGeometry: Тhe exact figure.
Example 4 shows a sample implementation of a custom shape.
Example 4: Implement custom shape
public string DisplayName
{
    get
    {
        return "Telerik";
    }
}

public Geometry GetShapeGeometry()
{
    PathFigure outer = new PathFigure();
    outer.IsClosed = true;
    outer.StartPoint = new Point(0, 2.5);
    outer.Segments.Add(new LineSegment() { Point = new Point(2.5, 0) });
    outer.Segments.Add(new LineSegment() { Point = new Point(5, 2.5) });
    outer.Segments.Add(new LineSegment() { Point = new Point(7.5, 0) });
    outer.Segments.Add(new LineSegment() { Point = new Point(10, 2.5) });
    outer.Segments.Add(new LineSegment() { Point = new Point(9, 3.5) });
    outer.Segments.Add(new LineSegment() { Point = new Point(7.5, 2) });
    outer.Segments.Add(new LineSegment() { Point = new Point(6, 3.5) });
    outer.Segments.Add(new LineSegment() { Point = new Point(8.5, 6) });
    outer.Segments.Add(new LineSegment() { Point = new Point(5, 9.5) });
    outer.Segments.Add(new LineSegment() { Point = new Point(1.5, 6) });
    outer.Segments.Add(new LineSegment() { Point = new Point(4, 3.5) });
    outer.Segments.Add(new LineSegment() { Point = new Point(2.5, 2) });
    outer.Segments.Add(new LineSegment() { Point = new Point(1, 3.5) });

    PathFigure inner = new PathFigure();
    inner.StartPoint = new Point(3.5, 6);
    inner.IsClosed = true;
    inner.Segments.Add(new LineSegment() { Point = new Point(5, 7.5) });
    inner.Segments.Add(new LineSegment() { Point = new Point(6.5, 6) });
    inner.Segments.Add(new LineSegment() { Point = new Point(5, 4.5) });

    PathGeometry logoGeometry = new PathGeometry();
    logoGeometry.Figures.Add(inner);
    logoGeometry.Figures.Add(outer);

    return logoGeometry;
}
Public ReadOnly Property DisplayName() As String Implements IShape.DisplayName
    Get
        Return "Telerik"
    End Get
End Property

Public Function GetShapeGeometry() As Geometry Implements IShape.GetShapeGeometry
    Dim outer As New PathFigure()
    outer.IsClosed = True
    outer.StartPoint = New Point(0, 2.5)
    outer.Segments.Add(New LineSegment() With {.Point = New Point(2.5, 0)})
    outer.Segments.Add(New LineSegment() With {.Point = New Point(5, 2.5)})
    outer.Segments.Add(New LineSegment() With {.Point = New Point(7.5, 0)})
    outer.Segments.Add(New LineSegment() With {.Point = New Point(10, 2.5)})
    outer.Segments.Add(New LineSegment() With {.Point = New Point(9, 3.5)})
    outer.Segments.Add(New LineSegment() With {.Point = New Point(7.5, 2)})
    outer.Segments.Add(New LineSegment() With {.Point = New Point(6, 3.5)})
    outer.Segments.Add(New LineSegment() With {.Point = New Point(8.5, 6)})
    outer.Segments.Add(New LineSegment() With {.Point = New Point(5, 9.5)})
    outer.Segments.Add(New LineSegment() With {.Point = New Point(1.5, 6)})
    outer.Segments.Add(New LineSegment() With {.Point = New Point(4, 3.5)})
    outer.Segments.Add(New LineSegment() With {.Point = New Point(2.5, 2)})
    outer.Segments.Add(New LineSegment() With {.Point = New Point(1, 3.5)})

    Dim inner As New PathFigure()
    inner.StartPoint = New Point(3.5, 6)
    inner.IsClosed = True
    inner.Segments.Add(New LineSegment() With {.Point = New Point(5, 7.5)})
    inner.Segments.Add(New LineSegment() With {.Point = New Point(6.5, 6)})
    inner.Segments.Add(New LineSegment() With {.Point = New Point(5, 4.5)})

    Dim logoGeometry As New PathGeometry()
    logoGeometry.Figures.Add(inner)
    logoGeometry.Figures.Add(outer)

    Return logoGeometry
End Function
You could download runnable project with Custom Shape from our SDK repository
Add Custom Shape
After creating a custom shape, it should be registered in the tool. This could be achieved declaratively as well as in the code behind as shown in Examples 5 and 6. You could get or set the shapes in the ShapeTool trough the Shapes collection.
Example 5: Add custom shape to the shape tool
ShapeTool tool = new ShapeTool();
tool.Shapes.Add(new RectangleShape());
tool.Shapes.Add(new EllipseShape());
tool.Shapes.Add(new LineShape());
tool.Shapes.Add(new TelerikLogo());
Dim tool As New ShapeTool()
tool.Shapes.Add(New RectangleShape())
tool.Shapes.Add(New EllipseShape())
tool.Shapes.Add(New LineShape())
tool.Shapes.Add(New TelerikLogo())
Example 5: Add custom shape to the shape tool
<tools:ShapeTool>
    <tools:ShapeTool.Shapes>
        <shapes:RectangleShape />
        <shapes:EllipseShape />
        <shapes:LineShape />
        <local:TelerikLogo />
    </tools:ShapeTool.Shapes>
</tools:ShapeTool>