Zooming
RadImageEditor provides out of the box zooming functionality.
You can zoom in the opened image by holding Ctrl and spinning the mouse wheel or by using the slider and dropdown of the ZoomController provided by the RadImageEditorUI.
Figure 1: Default zoom capabilities
Disabling the MouseWheel Zooming
In order to disable the zooming with the mouse wheel, you can set the AllowMouseWheelScaling property to False as demonstrated in Example 1.
Example 1: Setting the AllowMouseWheelScaling property
<telerik:RadImageEditor AllowMouseWheelScaling="False" />
Zoom to Mouse Cursor
As can be seen in Figure 1, the default zooming mechanism does not take into account the position of the mouse cursor.
As of version 2018.2.716, both RadImageEditor and RadImageEditorUI controls expose a ZoomToCursor property. By setting this property to True, holding Ctrl and spinning the mouse wheel will zoom towards the position of the mouse cursor. The result can be observed in Figure 2.
Figure 2: Zooming to the mouse cursor
Zooming Programmatically
The RadImageEditor API allows you to zoom programmatically via the ScaleFactor property.
The minimum allowed scale factor is 0, which is the default value. Setting ScaleFactor to 0 autoscales the image. You can also do this by calling the RadImageEditor's AutoScaleImage method.
The value of 1 means that the image is not zoomed-in and its original size is used. A value less than 1, zooms-out the image. A value greater than 1, zooms-in the image.
Example 2: Setting ScaleFactor to zoom-in the image
<telerik:RadImageEditor ScaleFactor="1.5" />
To listen for changes in the zoom level, use the ScaleFactorChanged event of RadImageEditor.
Example 3: Subscribing to the ScaleFactorChanged event
<telerik:RadImageEditor ScaleFactorChanged="RadImageEditor_ScaleFactorChanged" />
Example 4: Defining ScaleFactorChanged event handler
private void RadImageEditor_ScaleFactorChanged(object sender, EventArgs e)
{
}
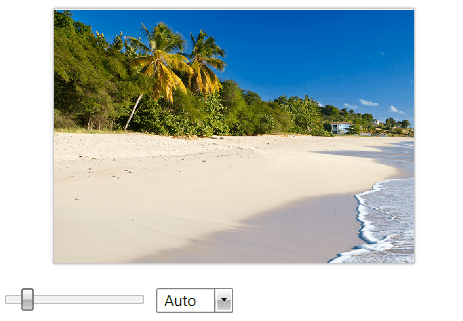
Using the Zoom Controller
The RadImageEditorUI control has a built-in zoom controller (a slider) element that allows you to zoom in and out. The slider is shown in Figure 1.
To use the control separately with RadImageEditor, you can define the ZoomController element, and set its ImageEditor control.
Example 5: Using ZoomController
<Grid>
    <Grid.RowDefinitions>
        <RowDefinition />
        <RowDefinition Height="Auto" />
    </Grid.RowDefinitions>
    <telerik:RadImageEditor x:Name="ImageEditor"/>
    <imageEditor:ZoomController ImageEditor="{Binding ElementName=ImageEditor}" Grid.Row="1" />
    <!-- imageEditor points to xmlns:imageEditor="clr-namespace:Telerik.Windows.Media.Imaging;assembly=Telerik.Windows.Controls.ImageEditor" -->
</Grid>
Figure 3: ZoomController