Updating an Entry
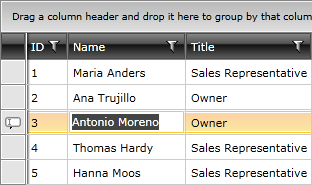
Using the RadGridView, you can edit the data displayed in it. The data is edited in rows, which means that when a row is in edit mode, you can edit all of the fields that it contains.
There are three ways for the row to enter edit mode. The first one is when the user presses F2 (or double clicks the cell), the second is when the BeginEdit() method of the RadGridView is called and the third is when the user starts typing over the cell. This behavior is controled by the EditTriggers enumeration either on gridview or column level.
this.radGridView.BeginEdit();
Me.radGridView.BeginEdit()
For example, you can use a button to call this method.
<StackPanel x:Name="LayoutRoot">
    <Button Content="Edit"
    Click="Button_Click" />
    <telerik:RadGridView AutoGenerateColumns="False">
        <!--...-->
    </telerik:RadGridView>
</StackPanel>
private void Button_Click(object sender, RoutedEventArgs e)
{
    this.radGridView.BeginEdit();
}
Private Sub Button_Click(ByVal sender As Object, ByVal e As RoutedEventArgs)
    Me.radGridView.BeginEdit()
End Sub

If the IsReadOnly property of the RadGridView is set to True you won't be able to bring the row into edit mode.
When entering edit mode the row to be edited represents the CurrentItem (the currently focused item) of the RadGridView. As it is a single object, at most one row can be edited at a time.
The next step in implementing the adding functionality is to attach event handlers to the BeginningEdit and the RowEditEnded events.
<telerik:RadGridView BeginningEdit="radGridView_BeginningEdit"
             RowEditEnded="radGridView_RowEditEnded">
    <!--...-->
</telerik:RadGridView>
The BeginningEdit event is raised before the row enters edit mode. In the event handler you can cancel the operation or modify the cell being edited via the Cancel and Cell properties of the GridViewBeginningEditRoutedEvenArgs.
private void radGridView_BeginningEdit(object sender, GridViewBeginningEditRoutedEventArgs e)
{
}
Private Sub radGridView_BeginningEdit(ByVal sender As Object, ByVal e As GridViewBeginningEditRoutedEventArgs)
End Sub
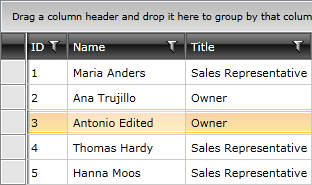
There are several ways to commit the edited data and all of them will raise the RowEditEnded event. The first one occurs when the user presses Enter, the second when the CommitEdit() method is called and the last one when another row is selected. The editing operation can also be cancelled by pressing Escape. The first time you press Escape only the cell cancels the edit. By pressing the Escape second time, the whole row leaves edit mode. Another way to make the row cancel the edit is by calling the CancelEdit() method. In this case the RowEditEnded event will be raised again.
Via the GridViewRowEditEndedEventArgs class you can access the EditAction (Commit or Cancel) and the GridViewEditOperationType (Insert or Edit) . The event arguments class also allows you to access the updated data via the NewData property. On the other hand the OldValues property contains the old data. To be sure that the appropriate data will be submitted (as this handler will be used by the add operations too), you have to assure that the action is Commit and the operation type is Edit.
private void radGridView_RowEditEnded(object sender, GridViewRowEditEndedEventArgs e)
{
    if (e.EditAction == GridViewEditAction.Cancel)
    {
        return;
    }
    if (e.EditOperationType == GridViewEditOperationType.Edit)
    {
        //Update the entry in the data base based on your logic.
    }
}
Private Sub radGridView_RowEditEnded(ByVal sender As Object, ByVal e As GridViewRowEditEndedEventArgs)
    If e.EditAction = GridViewEditAction.Cancel Then
        Exit Sub
    End If

    If e.EditOperationType = GridViewEditOperationType.Edit Then
        'Edit the entry in the data base based on your logic.
    End If
End Sub
You can also use the CellEditEnded event to handle the committing or the cancelling actions and the logic in the event handler will be executed every time a cell gets edited. In some cases this might be inconvenient because different calls to a service might be made for each cell.
When the updated item is committed, it will be automatically added to the RadGridView's Items collection, so you don't have to worry about anything on the client-side. If you have to save it to a data base use the event handler to call the appropriate method, as it is shown in the example above.
