Creating Silverlight Radial Gauge
One of the gauges you can create with the RadGauge control, is a radial gauge. It is represented by a circle container with a scale in it. Additionally, it can display various indicators that point to a certain value on the scale. This topic will walk you through the creation of a sample application that contains a radial RadGauge.
-
Assembly References
- Defining a RadialGauge with a Radial Scale
- Defining an Indicator
- Set Indicator's Position
Assembly References
In order to use the RadGauge control in your projects, you have to add references to the following assemblies:
- Telerik.Windows.Controls
- Telerik.Windows.Controls.DataVisualization
Defining a RadialGauge with a RadialScale
The radial gauge type is represented by the RadRadialGauge class. The RadRadialGauge control is used for wrapping radial scales. You can place one or more RadialScale objects inside of it. In order to define a scale inside the RadialGauge control you have to use the RadialScale control. The RadialGauge works as an ItemsControl, which takes RadialScale controls as items. This means that you can have more than one scale inside the radial gauge.
To use the RadGauge control and its components in XAML you have to declare the following namespace:
xmlns:telerik="http://schemas.telerik.com/2008/xaml/presentation"
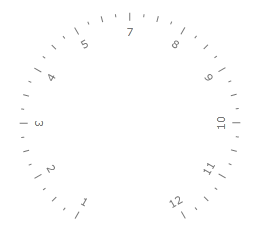
Example 1: Creating RadRadialGauge with a RadialScale
<telerik:RadRadialGauge x:Name="radialGauge"
                        Width="300"
                        Height="300">
    <telerik:RadialScale Min="1"
                         Max="12">
    </telerik:RadialScale>
</telerik:RadRadialGauge>
To learn more about the usage of the RadialScale control read the Radial Scale topic.
Image 1: Result from Example 1

The examples in this article are styled with the Windows8 theme.
Defining an Indicator
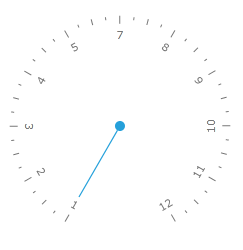
The RadialScale control allows you to display different types of indicators that point to a value on the scale. To specify an indicator, use the Indicators property, which is of type UIElementCollection. This means that the Indicators property can hold more than one indicator. Example 2 shows a RadialScale that uses a Needle indicator to mark the current value as well as Pinpoint to mark the center of the Gauge.
Example 2: Adding Indicators
 <telerik:RadRadialGauge x:Name="radialGauge"
                        Width="300"
                        Height="300">
    <telerik:RadialScale Min="1"
                         Max="12">
        <telerik:RadialScale.Indicators>
            <telerik:Needle />
            <telerik:Pinpoint/>
        </telerik:RadialScale.Indicators>
    </telerik:RadialScale>
</telerik:RadRadialGauge>
Image 2: Result from Example 2

Set Indicator's Position
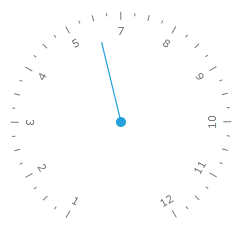
To make the indicator point to a certain value from the scale, you have to use the Value property of the indicator. Example 3 shows how you can work with this property:
Example 3: Setting indicator's position
<telerik:RadRadialGauge Name="radialGauge"
                    Width="300"
                    Height="300">
    <telerik:RadialScale Name="scale"
                    Min="1"
                    Max="11">
        <telerik:RadialScale.Indicators>
            <telerik:Needle Name="needle" Value="6" />
            <telerik:Pinpoint />
        </telerik:RadialScale.Indicators>
    </telerik:RadialScale>
</telerik:RadRadialGauge>
Image 3: Result from Example 3
