Image Export
This article describes the RadDiagram ExportToImage feature.
The RadDiagram framework provides a method and a command for exporting its current state to an image file. You can control the type and size of the created image along with the area of the diagram that should be exported.
ExportToImage() method
The RadDiagram.ExportToImage() method allows you to export the diagram to an image. It takes the following arguments:
-
Stream stream - this is a required attribute that represents the stream of the file where the diagram should be exported to.
__Telerik.Windows.Media.Imaging.BitmapEncoderhttp://www.telerik.com/help/silverlight/t_telerik_windows_media_imaging_bitmapencoder.html encoder - this attribute defines the image format. You can use any of the following encoders to create the file:
PngBitmapEncoder - this is the default encoder used by the ExportToImage() method.
Nullable
enclosingBounds - this attribute determines the portion of the diagram surface which should be exported Size returnImageSize - this attribute determines the size of the created image file
Brush backgroundBrush - this attribute determines the brush that should be applied as a background of the created image
Thickness margin - this attribute allows you to specify a Margin around the RadDiagram when exporting it to an image file.
Double dpi - this attribute allows you to specify the DPI that determines the quality of the exported image. This is an optional parameter and its default value is 96.
Below you can find a few examples demonstrating how to use the ExportToImage() method to customize the export. For the purpose of these examples we will use the following RadDiagram definition:
<telerik:RadDiagram x:Name="xDiagram">
    <telerik:RadDiagramShape x:Name="Shape1"
                                Content="Shape1"
                                Geometry="{telerik:FlowChartShape ShapeType=Database1Shape}"
                                Position="100,80" />
    <telerik:RadDiagramShape x:Name="Shape2"
                                Content="Shape2"
                                Geometry="{telerik:FlowChartShape ShapeType=Database2Shape}"
                                Position="200,180" />
    <telerik:RadDiagramConnection Source="{Binding ElementName=Shape1}" Target="{Binding ElementName=Shape2}" />
</telerik:RadDiagram>
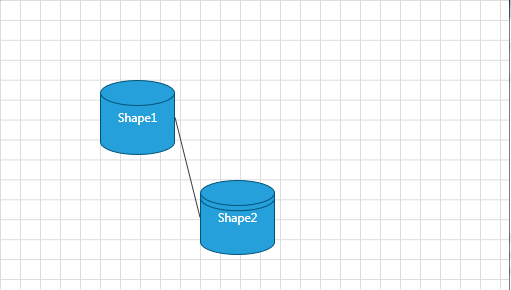
Please note that the examples in this tutorial are showcasing Telerik Windows8 theme. In the Setting a Theme article you can find more information on how to set an application-wide theme.
We will also create a RadButton control and we will handle its Click event handler to invoke the RadDiagram.ExportToImage() method.
<telerik:RadButton Content="Export to Image" Click="ExportToImage" />
-
Define only the stream of the file:
    private void ExportToImage(object sender, RoutedEventArgs e)
    {
        SaveFileDialog dialog = new SaveFileDialog() { DefaultFileName = "xDiagram.png"};
        bool? result = dialog.ShowDialog();
        if (result == true)
        {
            using (var stream = dialog.OpenFile())
            {
                xDiagram.ExportToImage(stream);
            }
        }
    }
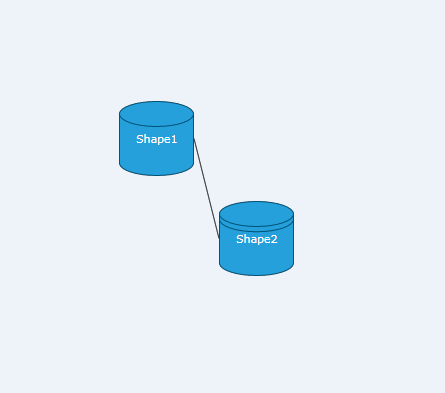
Private Sub ExportToImage(sender As Object, e As RoutedEventArgs) Dim dialog As New SaveFileDialog() With { .DefaultFileName = "xDiagram.png"} Dim result As System.Nullable(Of Boolean) = dialog.ShowDialog() If result = True Then Using stream = dialog.OpenFile() xDiagram.ExportToImage(stream) End Using End If End SubThis operation will result in the creating of a file named xDiagram.png and it will have the following content:
-
Define the portion of the diagram to be exported and the size of the image file:
    private void ExportToImage(object sender, RoutedEventArgs e)
    {
        SaveFileDialog dialog = new SaveFileDialog() { DefaultFileName = "xDiagram.png"};
        bool? result = dialog.ShowDialog();
        if (result == true)
        {
            using (var stream = dialog.OpenFile())
            {
                xDiagram.ExportToImage(stream,null,new Rect(10,10,150,150),new Size(200,600));
            }
        }
    }
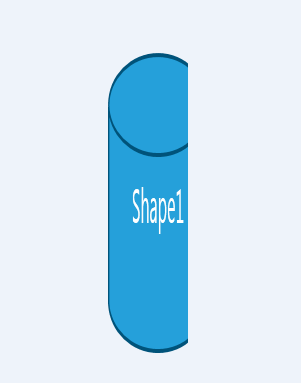
Private Sub ExportToImage(sender As Object, e As RoutedEventArgs) Dim dialog As New SaveFileDialog() With { .DefaultFileName = "xDiagram.png"} Dim result As System.Nullable(Of Boolean) = dialog.ShowDialog() If result = True Then Using stream = dialog.OpenFile() xDiagram.ExportToImage(stream, Nothing, New Rect(10, 10, 150, 150), New Size(200, 600)) End Using End If End SubThis operation will result in the creating of a file named xDiagram.png with a size of 200x200 and it will contain the portion of the RadDiagram defined by the rectangle (10, 10, 150, 150). This is why the image file will contain only a part of the diagram and it will stretch it to fit the required size:
-
Define only the stream and the portion of the diagram to be exported:
    private void ExportToImage(object sender, RoutedEventArgs e)
    {
        SaveFileDialog dialog = new SaveFileDialog() { DefaultFileName = "xDiagram.png"};
        bool? result = dialog.ShowDialog();
        if (result == true)
        {
            using (var stream = dialog.OpenFile())
            {
                xDiagram.ExportToImage(stream,null,new Rect(10,10,150,150));
            }
        }
    }
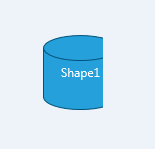
Private Sub ExportToImage(sender As Object, e As RoutedEventArgs) Dim dialog As New SaveFileDialog() With { .DefaultFileName = "xDiagram.png"} Dim result As System.Nullable(Of Boolean) = dialog.ShowDialog() If result = True Then Using stream = dialog.OpenFile() xDiagram.ExportToImage(stream, Nothing, New Rect(10, 10, 150, 150)) End Using End If End SubThis operation will result in the creating of a file named xDiagram.png that contains only the portion of the RadDiagram defined by the rectangle (10, 10, 150, 150):
-
Define the stream and the margin of the diagram to be exported:
    private void ExportToImage(object sender, RoutedEventArgs e)
    {
        SaveFileDialog dialog = new SaveFileDialog() { DefaultFileName = "xDiagram.png"};
        bool? result = dialog.ShowDialog();
        if (result == true)
        {
            using (var stream = dialog.OpenFile())
            {
               xDiagram.ExportToImage(stream, backgroundBrush: new SolidColorBrush(Colors.BlanchedAlmond));
            }
        }
    }
Private Sub ExportToImage(sender As Object, e As RoutedEventArgs) Dim dialog As New SaveFileDialog() With { .DefaultFileName = "xDiagram.png"} Dim result As System.Nullable(Of Boolean) = dialog.ShowDialog() If result = True Then Using stream = dialog.OpenFile() xDiagram.ExportToImage(stream, backgroundBrush := New SolidColorBrush(Colors.BlanchedAlmond)) End Using End If End SubThis operation will result in the creating of a file named xDiagram.png that contains the RadDiagram displayed on a BlanchedAlmond background:
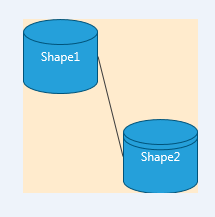
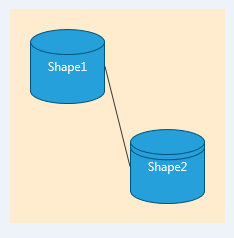
Now if we set the margin attribute of the method to 20
xDiagram.ExportToImage(stream, backgroundBrush: new SolidColorBrush(Colors.BlanchedAlmond), margin: new Thickness(20));
xDiagram.ExportToImage(stream, backgroundBrush := New SolidColorBrush(Colors.BlanchedAlmond), margin := New Thickness(20))
The xDiagram.png image will display the same diagram but its background area will be larger as the method added a Margin of 20px around the diagram:
Export() Method
RadDiagram also exposes an Export(string exportFormat) method that takes a string argument. The method can export the content of your diagram in an .png or .bmp image file. In order to specify the type of the output image file, you need to set the argument of the method to either "png" or "bmp":
<telerik:RadDiagram x:Name="xDiagram">
    <telerik:RadDiagramShape x:Name="Shape1"
                                Content="Shape1"
                                Geometry="{telerik:FlowChartShape ShapeType=Database1Shape}"
                                Position="100,80" />
    <telerik:RadDiagramShape x:Name="Shape2"
                                Content="Shape2"
                                Geometry="{telerik:FlowChartShape ShapeType=Database2Shape}"
                                Position="200,180" />
    <telerik:RadDiagramConnection Source="{Binding ElementName=Shape1}" Target="{Binding ElementName=Shape2}" />
</telerik:RadDiagram>
  //export to BMP
  xDiagram.Export("bmp");
  //export to PNG
  //xDiagram.Export("png");
  'export to BMP'
  xDiagram.Export("bmp")
  'export to PNG'
  'xDiagram.Export("png")'
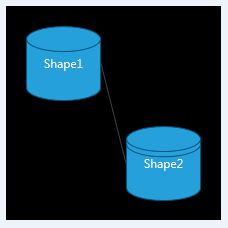
The result of the above implementation will be a .bmp file with the following content:
DiagramCommands.Export command
You can also use the DiagramCommands.Export command to export the diagram to an image file. It takes as a parameter the type of the image file. However, please keep in mind that the Export command supports only export to .bmp or .png image files. If you don't define a CommandParameter, the command will create a .png file:
<telerik:RadButton Command="telerik:DiagramCommands.Export" CommandTarget="{Binding ElementName=xDiagram}" CommandParameter="bmp" Content="Export" />
Using the above RadButton definition, we can export the RadDiagram to the following .bmp file:

You can also invoke the execution method of the command from code-behind:
Telerik.Windows.Controls.Diagrams.DiagramCommands.Export.Execute("bmp", null);
Telerik.Windows.Controls.Diagrams.DiagramCommands.Export.Execute("bmp", Nothing)